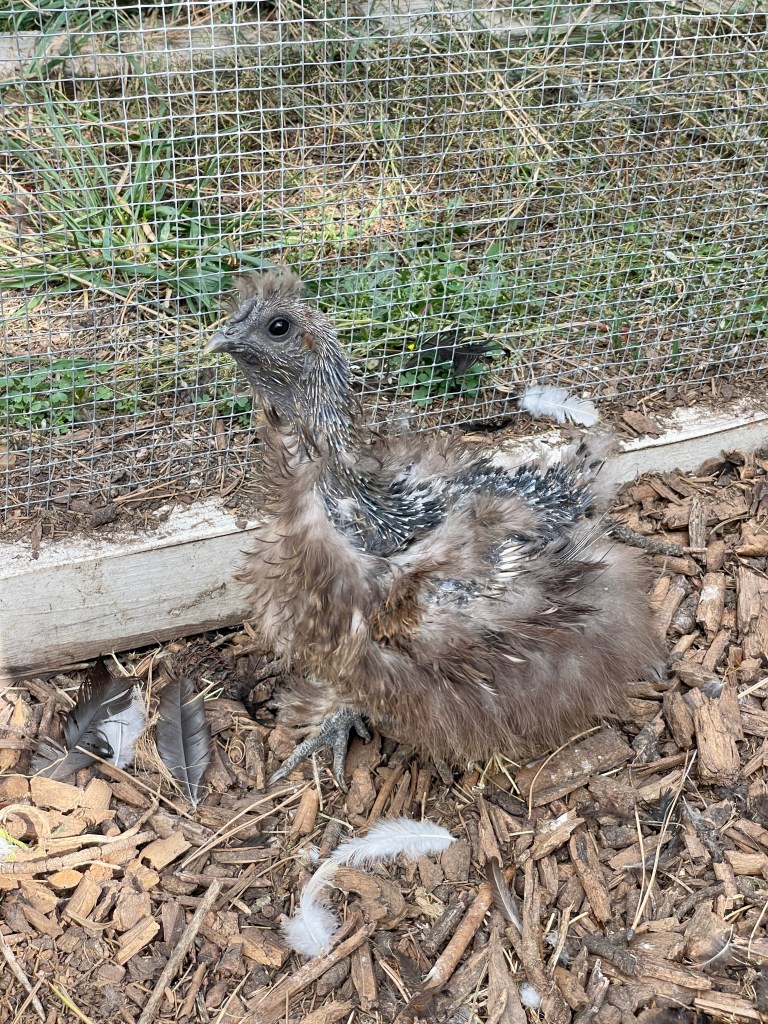
Imagine you’re strutting your stuff down the poultry runway, sporting your most fabulous feathers, and suddenly, they start falling out! This scenario isn’t just a chicken’s worst fashion nightmare; it’s a natural process known as molting. We’re going to dive into the world of chicken molting, discover why it happens, and learn how to help your feathered friends regain their beautiful plumage.
Feather Frustration: Why Do Chickens Molt?
Molting is like a seasonal makeover for chickens, and just like the leaves falling off trees in autumn, it’s all about rejuvenation. Here’s why those feathers need to hit the hay:
Wear and Tear: Chickens wear their feathers like a badge of honor. Over time, feathers become damaged and lose their luster. Molting allows them to shed the old, worn-out feathers and replace them with fresh, fabulous ones.
Seasonal Changes: Chickens molt in response to changes in daylight and temperature. The shorter days and cooler weather of fall trigger the molting process, helping chickens prepare for the winter ahead.
Energy Conservation: Growing new feathers is no small feat; it requires a lot of energy. By molting when food is plentiful in late summer and early fall, chickens can invest their energy in feather regrowth without compromising their overall health.
Feather Mites and Lice: Sometimes, molting can be a response to an infestation of feather mites or lice. Chickens shed their feathers to get rid of these pesky hitchhikers and grow new, parasite-free plumage.
How to Help Molting Chickens
Now that we know why chickens molt, let’s explore some ways to help them through this feathered frenzy:
Warm, Dry Shelter: Providing your chickens with a cozy, warm coop is essential during molt. Make sure they have a draft-free space to rest and stay warm and dry.
Pamper with Protein: Chickens need extra protein during molt to grow strong, healthy feathers. Treat them to some mealworms, black soldier fly larvae, or scrambled eggs. Another great option is to add black sunflower seeds to their feed as they are high in protein and vitamins.
Flock Support Group: Chickens are social creatures, and molting can be a tough time emotionally. Make sure they have plenty of companionship and keep an eye out for bullying in the coop.
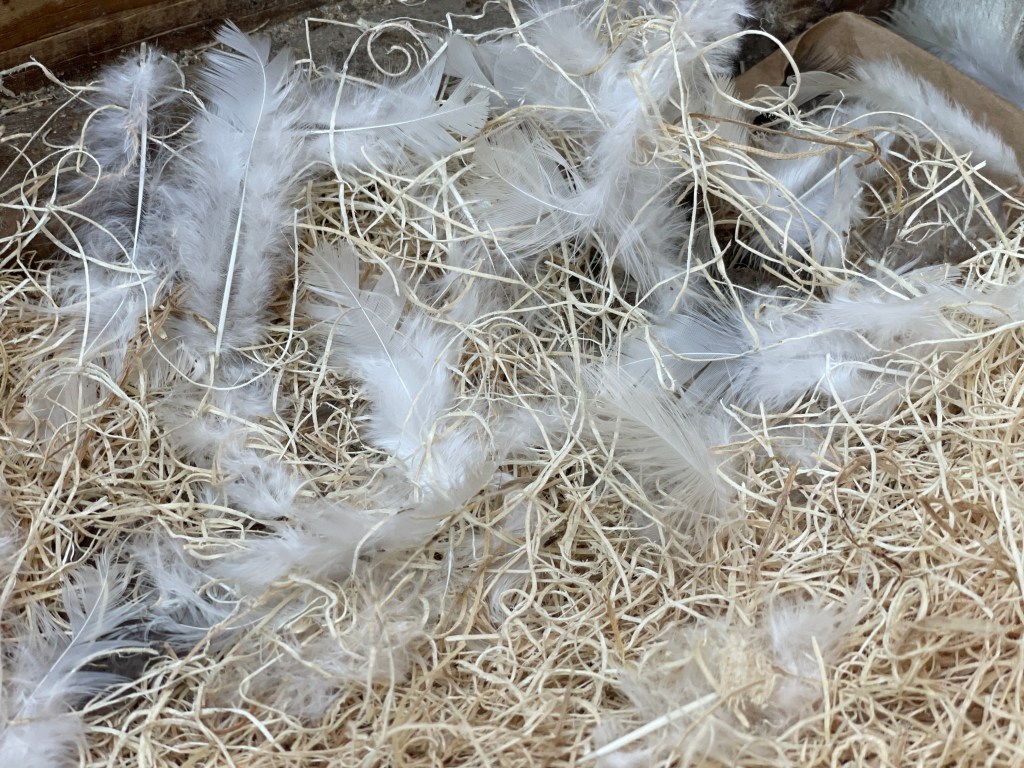
Fluff and Feather Bedding: Soft, cozy bedding in the coop helps reduce stress on the skin and keeps your molting chickens comfortable. Hemp or pine shaving bedding works well.
Feather-Boosting Supplements: Consider adding supplements like poultry vitamins or omega-3 fatty acids to their diet to support feather regrowth.
Avoid unnecessary irritation: Growing new feathers can be painful so try not to handle molting chickens too much and make sure their flockmates aren’t picking on them.
Molting may leave your chickens looking a bit disheveled, but it’s all part of their natural feathered journey. With a little TLC and a few fun strategies, you can help your molting chickens feel fabulous during this transitional period. Before you know it, they’ll be flaunting their beautiful new feathers with pride. So, embrace the molting season, and remember, all chickens need a little extra love from time to time!
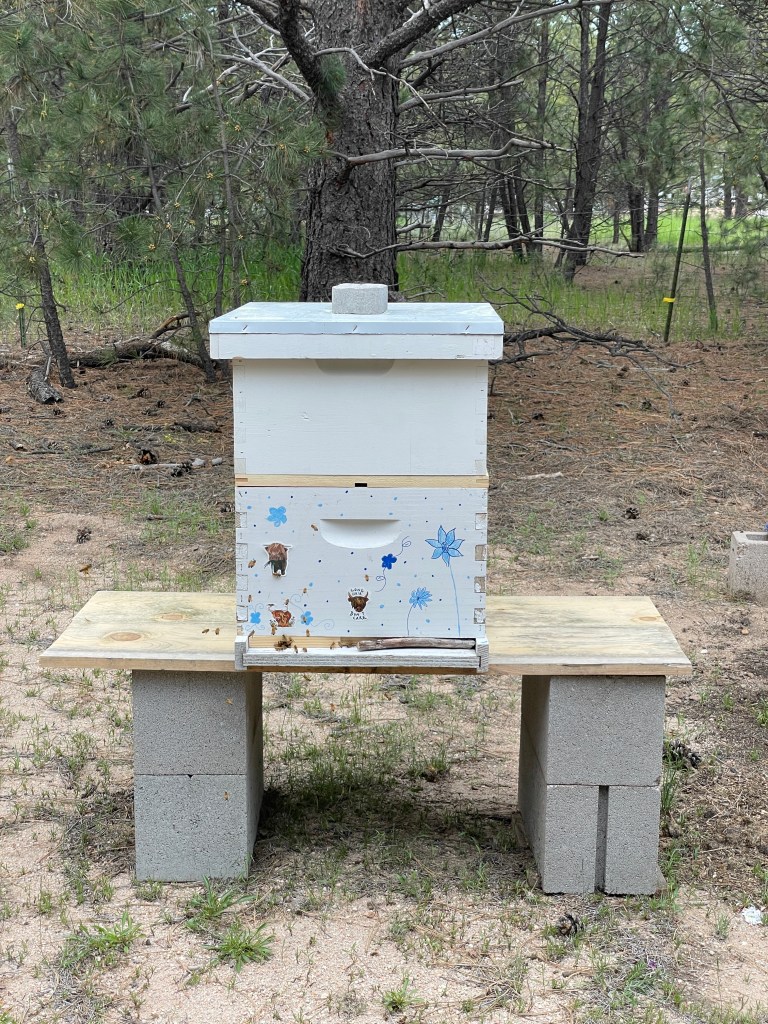
Imagine a world without honey drizzling over warm biscuits or buzzing gardens filled with colorful flowers and bountiful harvests. Now, envision a homestead teeming with industrious little workers – bees! While bees are often associated with the painful prospect of getting stung, having a colony of these fuzzy pollinators can be a sweet addition to your homestead. In this entertaining blog post, we’ll explore why having bees on your homestead is a brilliant idea that promises to sweeten your life and help save the world.
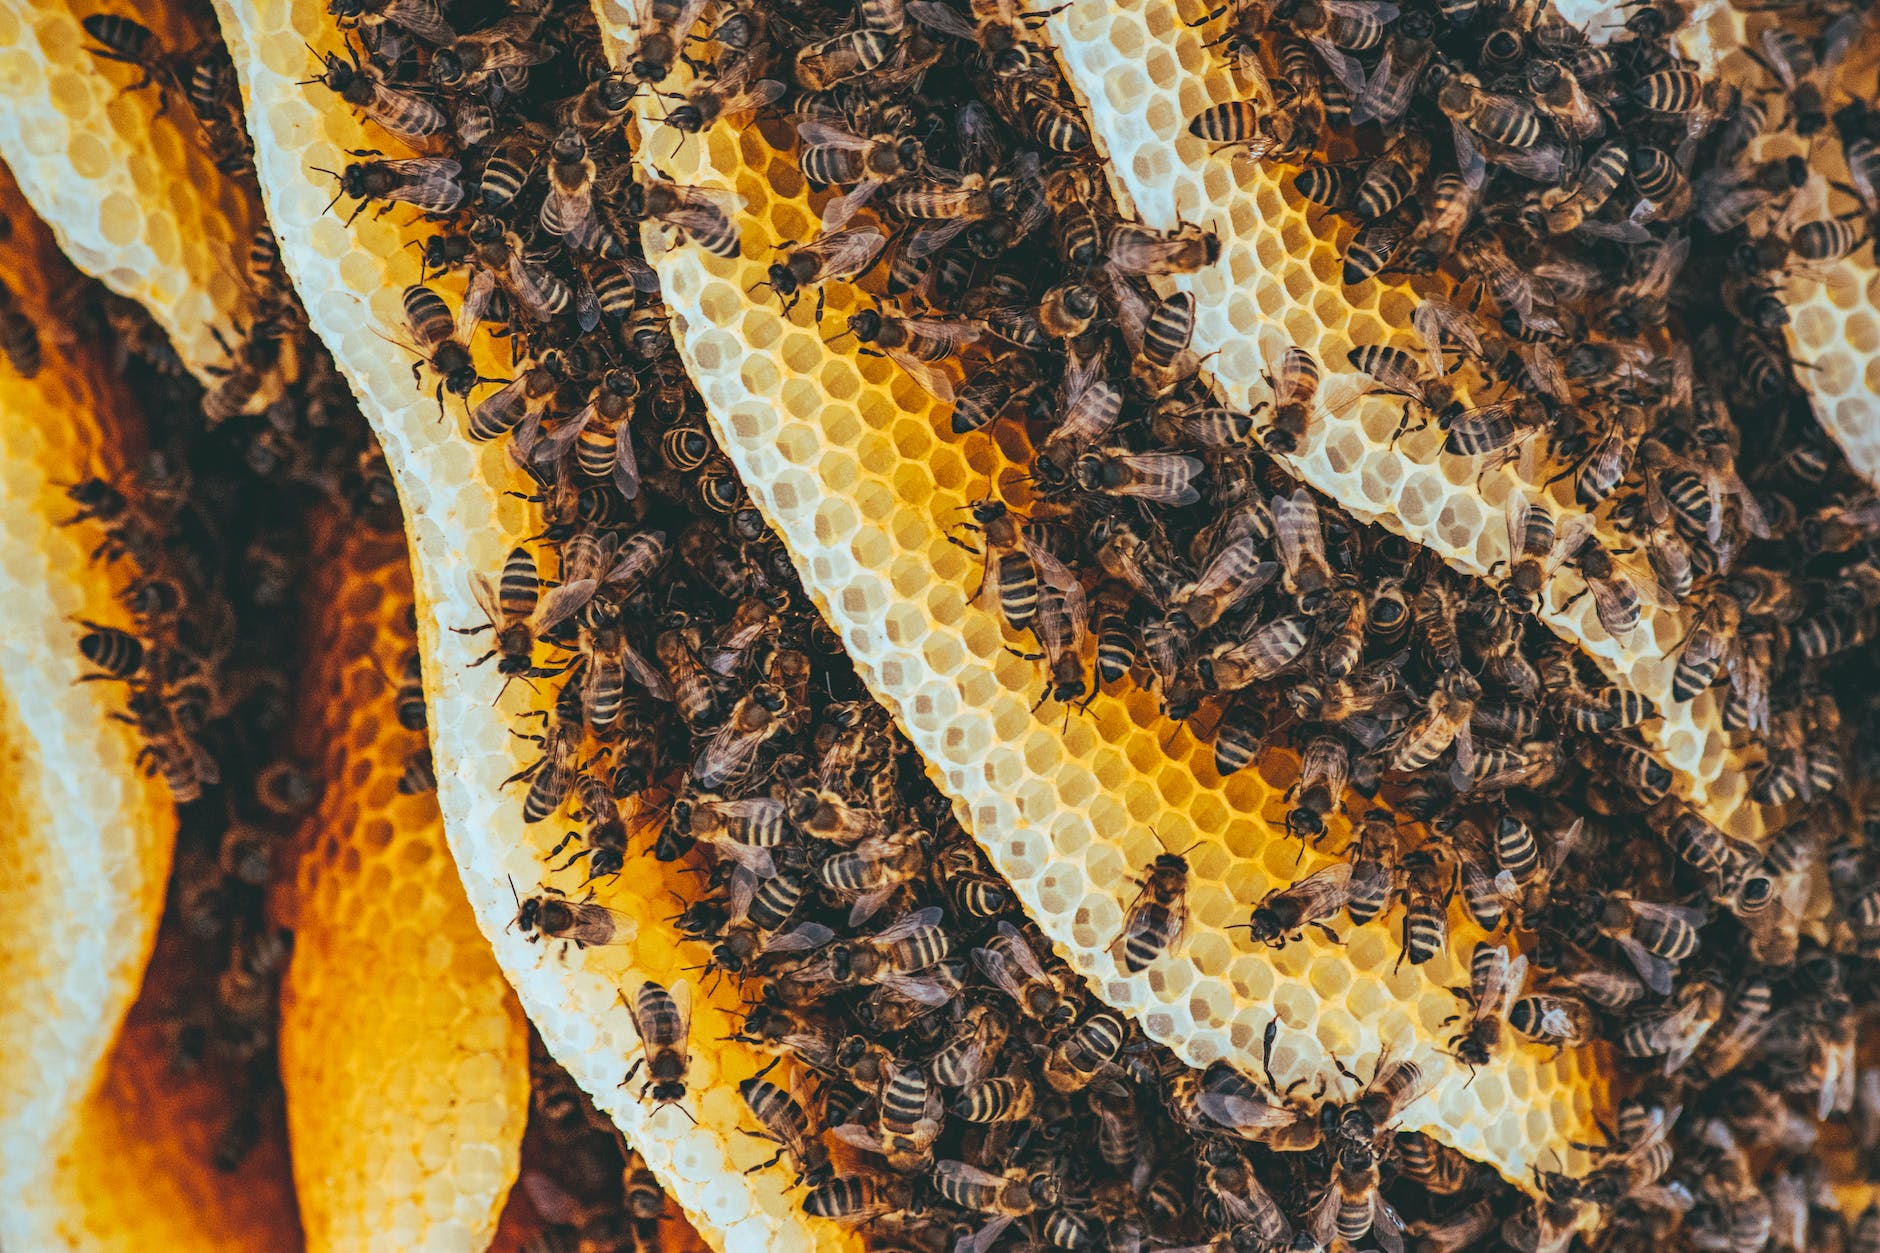
Honey: The Liquid Gold of Nature
Let’s start with the most obvious and delectable reason: honey! Bees are like nature’s tiny alchemists, transforming nectar into the golden nectar of the gods. Having your own beehive means a constant supply of this sweet elixir right at your doorstep. Use it to sweeten your tea, drizzle it over pancakes, or concoct your homemade honey mustard dressing.
Honey is not just a sweet treat; it also offers a range of potential health benefits when consumed in moderation. Here are some of the health benefits of raw honey:
Antioxidant Properties: Honey contains various antioxidants, such as flavonoids and phenolic compounds, which can help protect the body’s cells from oxidative stress and reduce the risk of chronic diseases.
Wound Healing: Honey has been used for centuries as a natural remedy for wound healing. Its antibacterial and anti-inflammatory properties can help soothe and heal minor burns, cuts, and wounds.
Cough and Throat Irritation Relief: Honey can be an effective remedy for soothing a sore throat and suppressing coughs. Its thick consistency coats the throat, reducing irritation, and its antimicrobial properties may help fight infections.
Improved Sleep: Consuming honey before bedtime may improve sleep quality. Honey helps increase insulin levels slightly, which promotes the release of tryptophan in the brain. Tryptophan is then converted into serotonin and melatonin, hormones that regulate sleep.
Digestive Health: Honey is known to have mild laxative effects and can help alleviate constipation when consumed in moderation. It may also aid in overall digestive health.
Allergy Symptom Relief: Some people believe that consuming locally sourced honey may help alleviate allergy symptoms. The idea is that exposure to trace amounts of pollen in honey can desensitize the body to pollen allergies. However, scientific evidence supporting this claim is limited.
Heart Health: Regular consumption of honey has been associated with potential improvements in heart health. It may help reduce risk factors for cardiovascular diseases, such as high blood pressure and high cholesterol levels.
Blood Sugar Regulation: While honey is a natural sweetener, it has a lower glycemic index compared to sugar. This means it may cause a slower and smaller rise in blood sugar levels when consumed in moderation. However, people with diabetes should still monitor their honey intake and consult a healthcare provider.
Antibacterial and Antifungal Properties: Honey’s natural composition, including low water content and acidity, can create an environment that inhibits the growth of bacteria and fungi. It has been used topically to treat minor skin infections.
Weight Management: Replacing sugar with honey in some recipes may help reduce overall calorie intake. However, it’s essential to use honey in moderation, as it still contains calories.
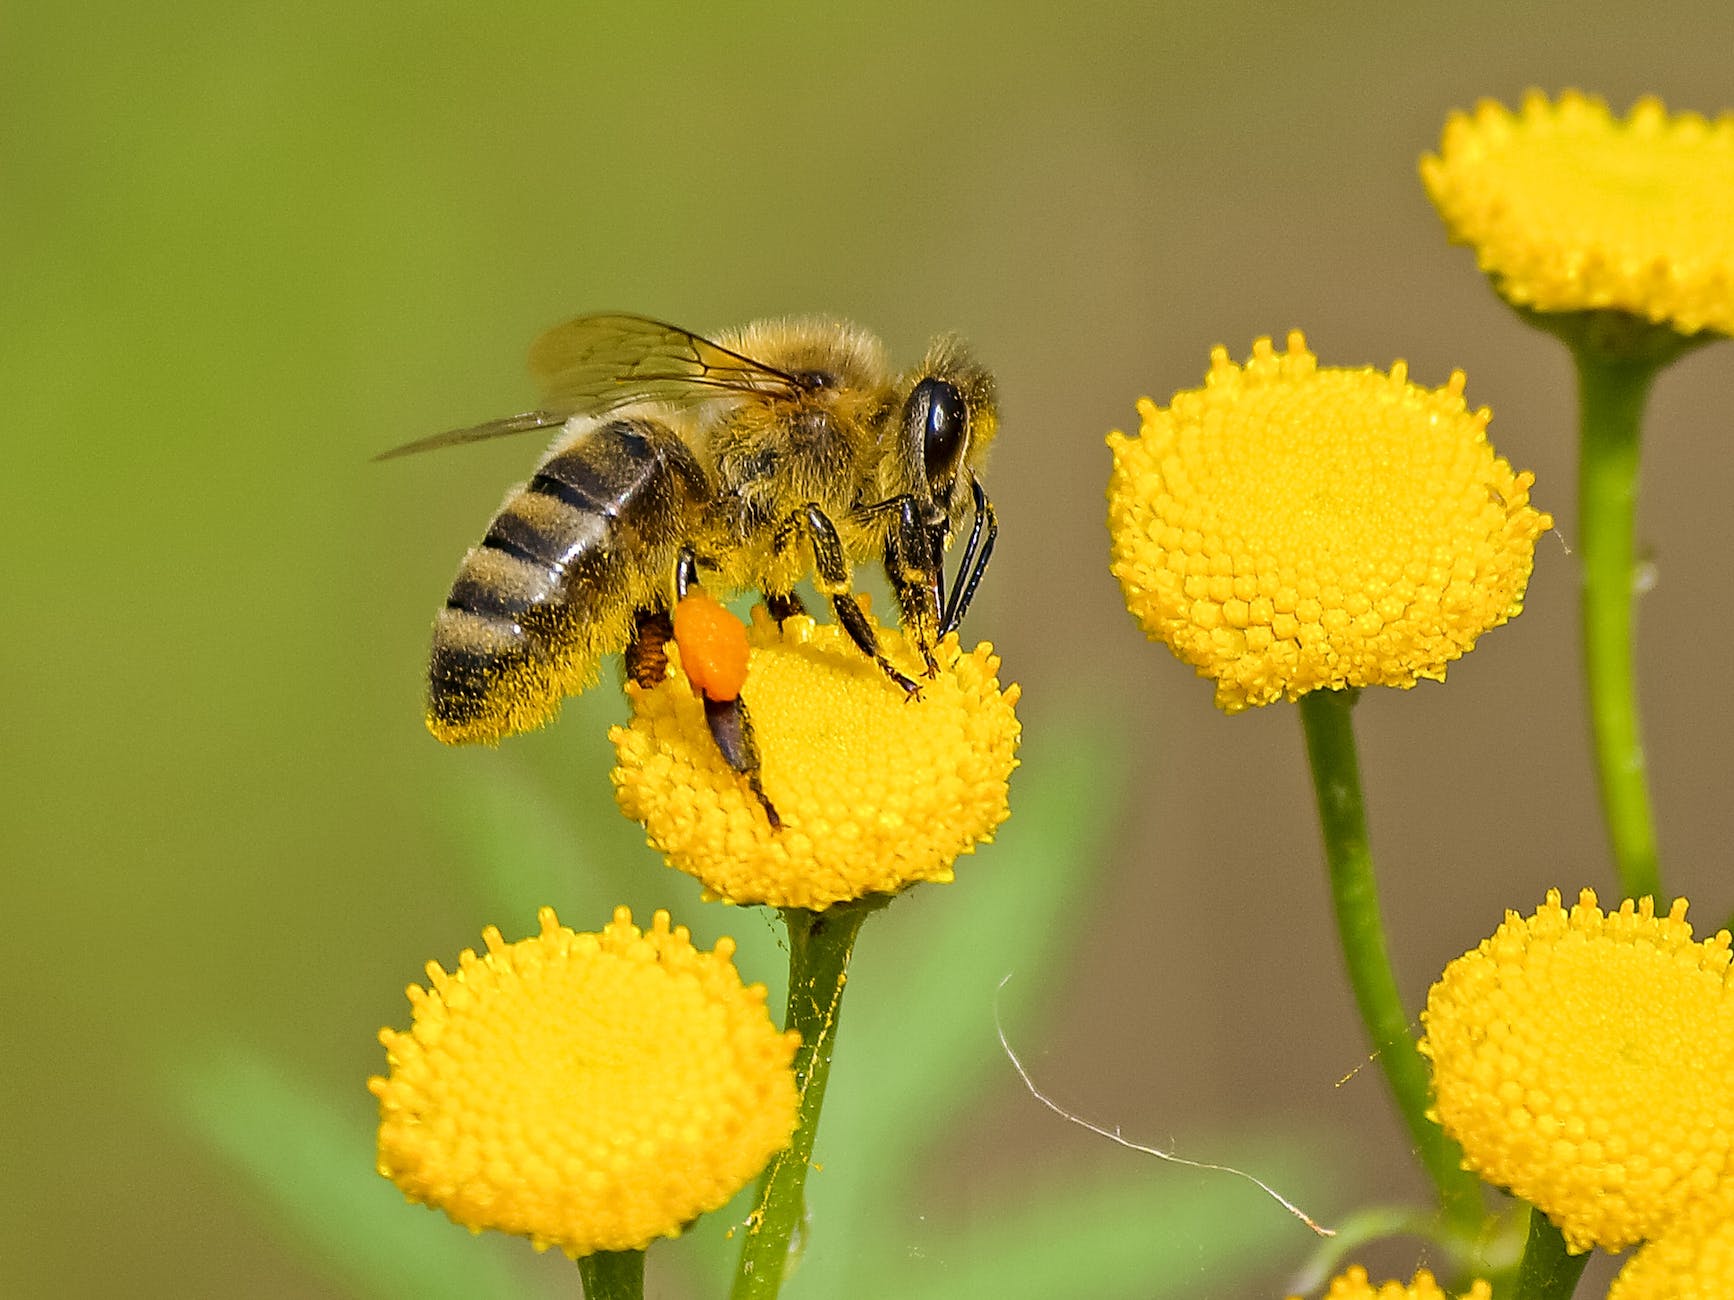
Pollination Powerhouse
Bees are nature’s most efficient pollinators. They flit from flower to flower, helping plants reproduce by carrying pollen from the male to the female parts. Having bees on your homestead means better pollination for your fruit trees, berry bushes, and garden veggies. Expect larger, juicier, and more abundant crops as a result. Bees turn your homestead into a buzzing pollination party!
By hosting a beehive, you’re contributing to the conservation of local flora and fauna. Bees play a crucial role in the ecosystem by pollinating not only crops but also wildflowers. When you keep bees, you’re doing your part to protect biodiversity and preserve the delicate balance of nature.
Educational Entertainment
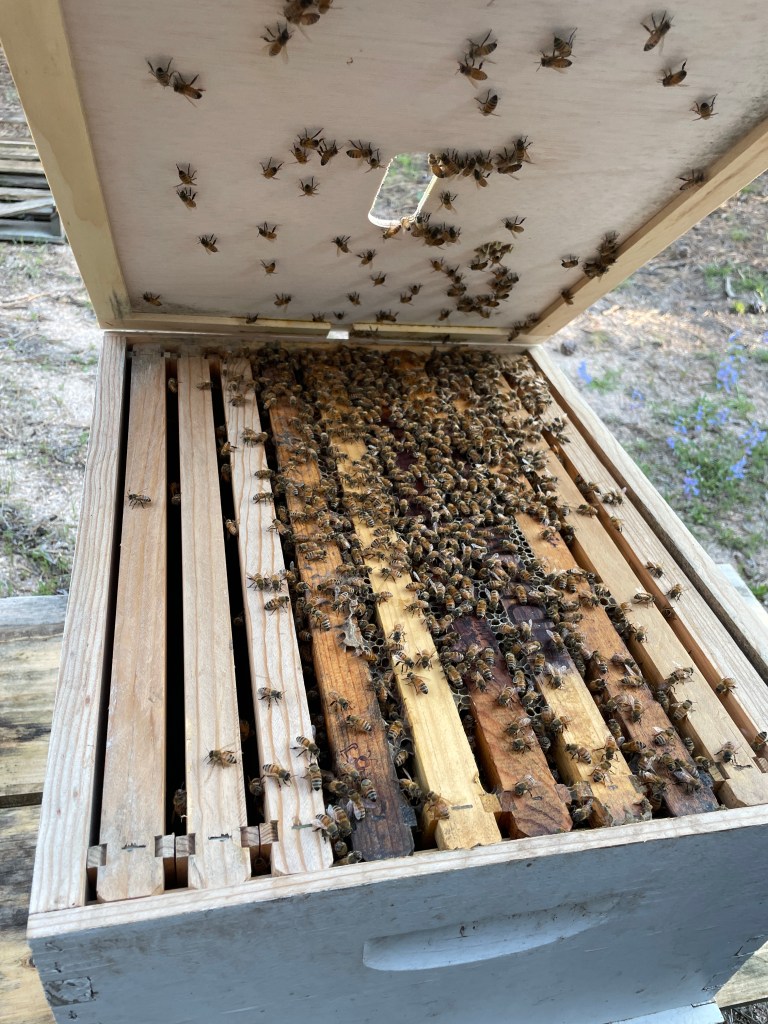
If you’ve ever wondered about the secret life of bees, having a hive on your homestead offers a front-row seat. Beekeeping is an educational and fascinating hobby that will keep you entertained for hours. From observing their intricate dances to learning about hive dynamics, bees are like tiny philosophers who have much to teach us.
Wax Wonders
Honey isn’t the only treasure bees bestow upon us. Beeswax is a versatile and valuable resource. You can use it to make candles, lip balms, soaps, and even furniture polish. Beeswax products also make thoughtful and eco-friendly gifts for friends and family.
Beeswax is a versatile natural substance with a wide range of uses due to its unique properties. Here are some common and creative applications for beeswax:
Candles: Beeswax candles are famous for their clean and natural burn. They emit a pleasant honey scent and are often preferred over paraffin candles, which can release harmful chemicals when burned.
Cosmetics and Skincare Products: Beeswax is a common ingredient in lip balms, lotions, creams, and salves. It helps lock in moisture and provides a protective barrier for the skin.
Soap Making: Beeswax can be added to homemade soap recipes to enhance hardness and provide a smooth texture.
Wood Polish: Mix beeswax with a carrier oil (such as olive oil) to create a natural wood polish. It adds a protective layer to wooden surfaces and enhances their shine.
Leather Conditioner: Beeswax can be used to condition and waterproof leather goods like boots, belts, and bags.
Thread Conditioning: Running a piece of beeswax over sewing thread can make it stronger, reduce friction, and prevent fraying during sewing.
Art and Craft Projects: Beeswax can be used in various art and craft projects, such as encaustic painting, sculpting, and making wax seals.
Food Preservation: Historically, beeswax was used to coat cheese to protect it from mold and dehydration. While less common today, it’s still used in some specialty cheeses.
Grafting and Budding: In horticulture, beeswax is used to seal grafts and buds on plants to promote successful propagation.
Homemade Deodorant: Beeswax is used in some DIY deodorant recipes for its consistency and skin-friendly properties.
Tack Cloth: Beeswax-soaked cloths are used in woodworking as tack cloths to remove sawdust and debris from surfaces before finishing.
Crayons: Beeswax crayons are a non-toxic alternative to traditional crayons, making them safe for children to use.
Fire Starters: Mix beeswax with sawdust or wood shavings to create fire starters for camping or heating.
Tool Lubrication: Apply a thin layer of beeswax to saw blades, hand tools, or even the soles of hand planes to reduce friction and improve performance.
Dreadlock Maintenance: Beeswax is sometimes used to maintain and shape dreadlocks by providing hold and structure.
Modeling and Sculpting: Beeswax’s pliability makes it a great material for modeling and sculpting, especially in educational settings.
Embalming and Taxidermy: Historically, beeswax was used in embalming and taxidermy to preserve and shape tissue and feathers.
Sealing and Waterproofing: Beeswax can be used to seal envelopes, containers, and seams to make them waterproof and airtight.
Remember that the quality of beeswax can vary, so using high-quality, pure beeswax is essential for some applications, such as cosmetics and skincare products. Additionally, when working with beeswax, consider proper safety precautions, as it can be flammable when heated, and melting it should be done with care.
Environmental Stewardship
Bees are facing multiple threats, including habitat loss and pesticide exposure. By keeping bees on your homestead, you’re contributing to their conservation. Creating a bee-friendly environment, free of harmful pesticides, is a small but impactful step toward preserving these essential pollinators.
Community Building
Beekeeping isn’t just about bees; it’s also about building a buzzing community. Joining local beekeeping clubs or sharing your honey and beeswax products with neighbors can foster camaraderie and a sense of shared responsibility for the environment.
Bees are like the unsung heroes of our ecosystem. They provide us with honey, improve our harvests, and support biodiversity, all while working tirelessly without asking for much in return. So, why not consider welcoming a beehive to your homestead? It’s a decision that promises to sweeten your life, provide hours of entertainment, and contribute to the well-being of our planet. Beekeeping isn’t just a hobby; it’s a way to become a guardian of these remarkable creatures and a steward of the environment. So, put on your beekeeper’s suit and embark on a sweet journey of discovery with these marvelous little insects!
If you’re a proud chicken keeper, you already know that these feathered friends are the gift that keeps on giving – fresh, delicious eggs! However, keeping your cluckers happy and well-fed doesn’t have to break the bank. In this budget-friendly guide, we’ll show you how to feed your chickens without feathering out your wallet.
1. The Grain Train: Mixing Your Own Chicken Feed
One of the most cost-effective ways to feed your chickens is by creating your own feed mix. You can buy bulk grains like corn, wheat, and oats, which are typically less expensive than pre-made feeds. Mix these grains in ratios suitable for your chickens’ age and purpose (layers, broilers, etc.). Sometimes you can find local business that mix their own for a much better price than buying at a traditional feed store.
2. Garden Goodies: Let Your Chickens Do the Work
Chickens love to forage, and allowing them access to your garden or a designated area can significantly reduce your feed expenses. They’ll feast on weeds, insects, and even kitchen scraps like vegetable peels, fruit cores, and leftover bread.
3. Dumpster Diving for Chickens (Legally, of Course!)
Okay, maybe not diving, but dumpster diving for your chickens can be a fantastic way to score free or nearly free food for your flock. Visit your local bakery or grocery store to inquire about getting their food scraps, like stale bread or produce that’s past its prime. Your chickens will be thrilled with the variety!
One of our favorite things to do is get spent grain from local breweries. This can supplement the feed of our chickens and goats.
4. Egg-cellent Supplements: Nutritional Bonuses
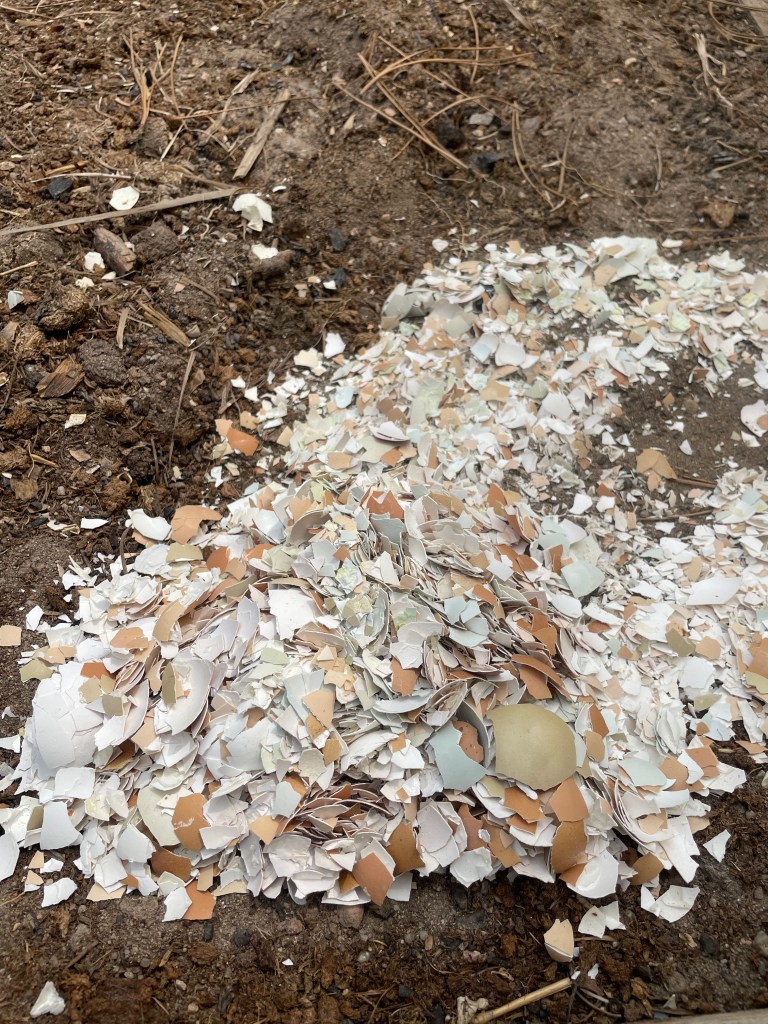
Instead of purchasing expensive commercial supplements, look for budget-friendly alternatives. Crushed eggshells, for example, can provide calcium, while mixing in yogurt or cottage cheese offers an extra protein boost. Plus, it’s a fun treat for your feathered friends!
5. Shop Smart: Find Deals and Discounts
Keep an eye out for sales and discounts at your local feed store or online. Buying in bulk can also save you money in the long run. Just ensure you have proper storage to keep your feed fresh and pest-free.
6. Flock Gardening: Grow Your Own Chicken Food
Consider planting a chicken-friendly garden. Grow crops like sunflowers, clover, or alfalfa that chickens love to munch on. Not only will this save you money, but it’ll also provide a natural source of nutrition for your flock.
7. DIY Chicken Treats: Homemade Goodies
Get creative with DIY chicken treats. Make your own suet blocks by mixing birdseed, cornmeal, and melted suet or lard. Freeze it in a mold, and voila – a budget-friendly chicken snack that’ll keep them clucking happily.
8. Share the Load: Collaborate with Fellow Chicken Keepers
Join a local poultry enthusiasts’ group or connect with friends and neighbors who also raise chickens. You can share resources, bulk purchases, or even take turns watching each other’s flocks when someone goes on vacation.
9. Chickens on a Diet: Optimize Their Food Consumption
Don’t overfeed your chickens. Monitor their consumption, and only provide what they can finish in a day to minimize waste. Investing in a good-quality feeder that prevents spillage can save you money in the long run.
10. Barter with Your Bounty: Trade Eggs or Chickens
If you have more eggs or chickens than you can handle, consider bartering with neighbors, friends, or local farmers. Trade for fresh produce, homemade goods, or even services to keep your chicken budget in check.
Feeding your chickens on a budget doesn’t mean sacrificing their health or happiness. With a little creativity, resourcefulness, and a dash of chicken charm, you can provide your feathered companions with a nutritious diet without emptying your wallet. So, get clucking and start saving – your chickens and your bank account will thank you!
As winter blankets the landscape with snow and chilly temperatures, your feathered friends – the chickens – require a little extra care to ensure their well-being. Just like any other season, maintaining the health and comfort of your flock during winter is vital. In this blog post, we’ll explore essential tips and practices to keep your chickens healthy, happy, and thriving through the colder months.
1. Provide Adequate Shelter:
A warm and dry coop is essential for your chickens’ winter comfort:
Insulation: Ensure your coop is well-insulated to prevent drafts and keep the interior temperature more stable. Preventing drafts is one of the most important things you can do to keep your chickens warm in the winter.
Ventilation: While insulation is important, proper ventilation is equally crucial to prevent moisture buildup and ammonia odors. Ventilation should be towards the top of the coop to keep air flow without drafts or allowing moisture to enter the coop.
2. Deep Bedding:
Bedding helps insulate the coop and provides a cozy environment:
Deep Layers: Use straw, wood shavings, or other bedding materials to create a thick layer on the coop floor.
Regular Cleaning: While deep bedding provides warmth, it’s important to keep it clean and dry to avoid mold and odors.
3. Provide Ample Food and Water:
Winter requires extra energy to stay warm, so ensure your chickens have access to plenty of food and fresh water:
High-Quality Feed: Feed your chickens a balanced diet rich in protein to help them maintain their body heat.
Heated Water: Invest in a heated waterer to prevent water from freezing and provide hydration.
4. Keep Active:
Encourage your chickens to move around and stay active even during cold weather:
Clear Pathways: Clear snow and ice from outdoor areas where they roam to prevent frostbite and encourage movement.
Dust Baths: Provide a dry area for dust baths to help keep feathers clean and free from pests.
5. Provide Extra Heat Sparingly:
Chickens are naturally equipped to handle the cold, but in extreme cold conditions, you can consider supplemental heat:
Safe Heaters: If you decide to use a heater, opt for safe heating options designed for coops and ensure proper ventilation. I highly discourage the use of heat lamps because of the risk of fire.
Avoid Overheating: Chickens can be sensitive to sudden temperature changes, so avoid drastic shifts in temperature.
Wide Roosting Bars: Provide wide roosting bars to allow chickens to tuck their feet under their bodies and keep them warm. We use 2x4s as roosting bars to help keep their feet warm.
7. Check Health Regularly:
Regular health checks are important during winter:
Observe Behavior: Watch for signs of illness, such as lethargy, decreased appetite, or difficulty breathing.
Separate Sick Birds: If you suspect a chicken is sick, isolate it from the rest of the flock to prevent the spread of illness.
Winter care for chickens is all about creating a comfortable environment that addresses their specific needs during cold weather. By providing adequate shelter, food, water, and attention to their health, you can ensure that your feathered companions stay healthy, warm, and content throughout the winter months. With a little extra effort and care, you’ll have a flock that continues to thrive and produce even in the chilliest of seasons.
Ah, fall—the season of cozy sweaters, pumpkin spice lattes, and, for all you green thumbs out there, the promise of a bountiful garden next year. While the trees shed their leaves, we gardeners are busy collecting seeds for the future. Join me on this journey as we dive into the exciting world of harvesting seeds in the fall, a practice that connects us to nature’s rhythm and guarantees a vibrant garden in the seasons to come.
The Art of Seed Harvesting:
Step 1: Timing is Everything
Fall is the perfect time to start harvesting seeds. As the days grow shorter and cooler, plants begin to focus their energy on producing seeds. The key is to keep an eye out for those seed pods and heads that are dry and brown. This indicates that they are ready for harvest.
Step 2: Gather Your Tools
Before you embark on your seed-harvesting adventure, gather a few essential tools:
Small bags or envelopes: For storing and labeling your seeds. I always use paper envelopes to avoid any moisture buildup.
Scissors or pruners: To snip seed heads or pods.
A marker: To label your seed packets.
A notebook: To jot down important details about your seeds.
Choosing the Right Seeds:
Not all seeds are created equal, and some are easier to harvest than others. Here are a few favorites that are perfect for beginners:
Sunflowers: Their large, distinctive heads are easy to spot and collect.
Marigolds: These vibrant flowers produce seeds that resemble tiny arrowheads.
Nasturtiums: Their seed pods are easy to gather and add a peppery punch to salads. These are some of my favorite flowers in the garden!
Basil: Wait for basil to bolt and produce seeds for next year’s pesto.
Dill: these seeds smell amazing and are easy to harvest ones the dill is done producing and dry
Cilantro: cilantro seeds are also super easy to harvest once the plant is dry
Cross-pollination and What You Need To Know:
Gardening isn’t just about planting seeds and watching them grow; it’s also about understanding the intricate dance of nature that happens right before our eyes. One of the most captivating aspects of gardening is cross-pollination, a natural process where plants exchange genetic material.
What is Cross-Pollination?
Cross-pollination occurs when pollen from one plant is transferred to the stigma of another plant, typically of the same species but a different variety. This process is essential for genetic diversity, leading to healthier and more adaptable plant populations. While some plants are self-pollinators, meaning they can fertilize themselves, many rely on pollinators like bees, butterflies, and even the wind to carry pollen from one flower to another.
Why Cross-Pollination Matters:
Biodiversity: Cross-pollination increases genetic diversity, making plants more resilient to pests, diseases, and environmental changes.
Hybridization: Cross-pollination can result in hybrid plants with unique characteristics, such as different colors, sizes, or flavors.
Adaptation: Plants that cross-pollinate have a better chance of adapting to changing environmental conditions, ensuring their survival over time.
Common Cross-Pollinators in the Garden:
Tomatoes: While many tomato varieties are self-pollinating, they can also cross-pollinate if grown in proximity. This can lead to exciting new tomato hybrids.
Squash: Different varieties of summer and winter squash can cross-pollinate, resulting in intriguing squashes with unexpected shapes and colors.
Zucchini and Cucumbers: These garden staples can cross-pollinate since they belong to the same family. You might end up with a cucumber that tastes slightly like zucchini or vice versa.
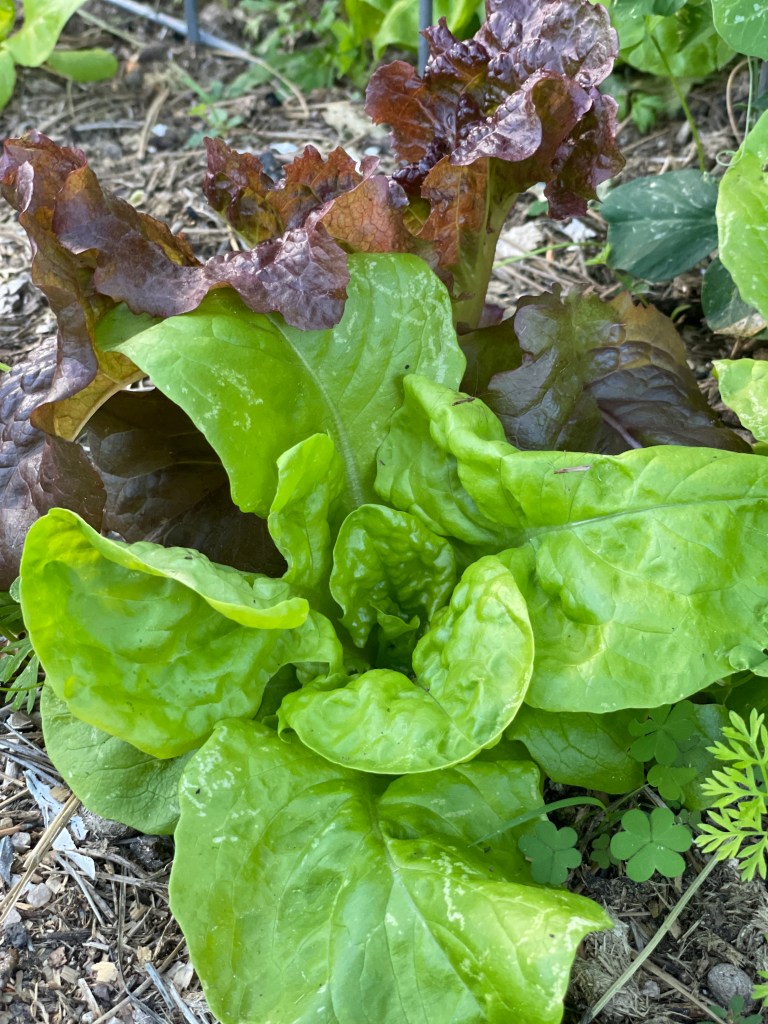
Lettuce: Lettuce plants can cross-pollinate, leading to variations in leaf color, texture, and shape.
Preventing Unwanted Cross-Pollination:
While cross-pollination can lead to exciting surprises, it may not always be desirable. If you want to maintain the purity of a particular plant variety, follow these tips:
Isolation: Plant different varieties of the same species as far apart as possible to reduce the chances of cross-pollination.
Hand Pollination: For precise control, use a small paintbrush to transfer pollen from one flower to another. This is particularly useful for plants like squash.
Timing: Plant varieties with different flowering times to avoid overlapping pollination periods.
Cross-pollination can definitely impact your next season’s crop, so for many (like myself) that plant a lot of different vegetables in close proximity – I buy new seeds each season that run this risk so I know I am going to get exactly what I want. But, it can be fun to experiement sometimes, too!
The Harvesting Process:
Once you’ve identified your target seeds, it’s time to start the harvesting process. Follow these general steps:
Cut the Seed Heads or Pods: Use your scissors or pruners to carefully snip the seed heads or pods from the plant. Make sure to do this on a dry, sunny day when the plants are free of moisture.
Drying: Place the seed heads or pods in a warm, dry location for about a week to ensure they’re completely dry. This prevents mold and rot during storage.
Extraction: Once your seeds are dry, gently remove them from their seed heads or pods. Be patient; this can be a bit time-consuming but is incredibly rewarding.
Labeling: Don’t forget to label your seed packets with the plant’s name, the date of harvest, and any other relevant information, such as flower color or special care instructions.
Here are a few seed saving items I use and love:
A binder – I use this to hold and organize my seeds
Postcard Sleeves – these fit your seed packets (your own or purchased) perfectly
Seeds! – You’ll need plenty of seeds for your garden, especially those you aren’t able to harvest yourself or are trying out for the first time.
The Joy of Seed Saving:
Harvesting seeds in the fall isn’t just about saving money on next year’s garden; it’s a way to connect with the natural world and develop a deeper appreciation for your plants. Plus, there’s something truly magical about planting seeds you’ve collected yourself. It’s like tucking a piece of the past season into the ground, nurturing it, and watching it bloom anew.
As we bid farewell to another summer, remember that fall is not just about saying goodbye—it’s also about preparing for the future. Harvesting seeds in the fall is a delightful and rewarding practice that allows you to play a role in the circle of life in your garden. So, grab your pruners, embrace the crisp autumn air, and get ready to sow the seeds of future beauty and bounty in your garden. Happy harvesting!
Hello, fellow green thumbs and dirt enthusiasts! Today, we’re diving headfirst into the wonderfully weird world of permaculture. But hold onto your garden hats, because this ain’t your grandma’s gardening club. Permaculture is like gardening, but with a side of cosmic wisdom and a sprinkle of eco-friendly magic.
What the Heck is Permaculture?
Permaculture isn’t just a gardening method; it’s a lifestyle, a philosophy, and a quirky dance with Mother Nature herself. It’s like telling the planet, “Hey, let’s get cozy and grow some stuff together, but also, let’s keep it weird.”
Permaculture is all about observing how nature does its thing and then copying it. Picture this: You’re in your garden, and you spot a squirrel. Instead of chasing it away with a broom (admit it, we’ve all done it), you start taking notes. “Squirrel,” you write. “Good at planting acorns. Hmm.”
The Three Permaculture Ethics
Permaculture has three ethics that are as noble as they are amusing:
Earth Care: This one’s a no-brainer. Take care of the planet like it’s your favorite pet hamster. Stroke its furry soil and make sure it gets enough sun (but not too much, we’re talking sunscreen for the Earth here).
People Care: People are like plants. They need love, attention, and a decent amount of hydration. In permaculture, we build communities that thrive like a garden full of happy tomatoes.
Fair Share: Don’t hog all the ripe apples! Share your bounty with your neighbors, or else your karma might end up as worm food.
Designing with Nature
Permaculture design is where the fun really kicks in. Instead of straight rows of vegetables, permaculturists design their gardens like a forest. It’s like creating a salad bowl where the lettuce, tomatoes, and cucumbers have a jam session together, swapping nutrients and stories about their latest compost pile gossip.
And here’s the kicker: permaculture doesn’t just grow food; it grows friendships. In a permaculture garden, you’re more likely to hear plants gossiping about their best fertilizers than see them squabbling over sunlight.
Chickens and Ducks as Garden Gurus
In the permaculture world, chickens and ducks aren’t just poultry; they’re the garden’s secret agents. They scratch, they peck, they patrol for pests, and they provide you with breakfast. It’s like having your own feathered garden ninjas. Here’s a little advice – don’t let your chickens free range your garden competely. They will eat almost everything – including the stuff you don’t want them to. Chicken manure is a fantastic fertilizer because it’s high in nitrogen. Here’s the catch – it’s STRONG so it needs to be composted first as to not burn your plants. We’ll go into composting details in later posts. Chickens also love to eat your weeds which is a great way to keep them happy and lower that food bill.
Plus, they have a hilarious sense of humor. Ever tried explaining to a chicken that it’s time to take a break from laying eggs? Good luck with that! They’re dedicated, even if it means producing enough eggs to fill a swimming pool. Unless of course you are in need of a bunch of eggs, in which case they will decide to take a break or molt.
Meditate with Mulch
In permaculture, mulch isn’t just a gardening tool; it’s a way of life. When you’re not spreading mulch, you’re probably meditating on it. Picture it: You, cross-legged in your garden, surrounded by a zen garden of mulch. Namaste, my friends. We use a locally made mulch from Black Forest Slash. This is a win-win. It’s local branches and slash that are then turned into a fantastic mulch that not only helps conserve water but adds nutrients back into the soil. Mulch will also act as a natural weed barrier.
Permaculture is like gardening’s whimsical, eco-conscious cousin who always brings homemade kombucha to family reunions. It’s about working with nature, not against it, and doing so with a touch of humor and a dash of cosmic insight. A great place to start with permaculture is researching Back to Eden Gardening.
What’s Back to Eden Gardening, Anyway?
Imagine your garden as a laid-back forest shindig where your plants are the groovy party animals. Back to Eden gardening is all about mimicking the natural world, where the soil is rich, moist, and teeming with life. It’s like Mother Nature herself threw a disco for your plants and invited them to dance in style.
Step 1: Mulch Like There’s No Tomorrow
You know that saying, “Mulch is the answer; what was the question?” Well, that’s basically the mantra of Back to Eden gardening. Mulch is like the velvet dance floor for your plant party.
Grab some wood chips, straw, or leaves, and pile ’em up like you’re making a mulch mountain. Spread it around your plants like you’re throwing confetti at a garden parade. The mulch keeps the soil moist, prevents weeds from crashing the party, and lets your plants shimmy their roots down to the rhythm of the Earth.
Step 2: Forget About Tilling (It’s So Last Season)
Tilling is like the garden equivalent of the Macarena – fun in the ’90s, but it’s time to move on. In Back to Eden gardening, you don’t disturb the soil like it owes you money. Just lay that mulch down and let the soil microbes, earthworms, and other underground party animals do their thing.
Remember, your garden is an underground nightclub, and the soil organisms are the DJs spinning the tunes (compost beats, anyone?). Tilling disrupts their groove, and we don’t want any upset earthworms on our dance floor.
Step 3: No Need to Fertilize (Nature’s Buffet Is Open)
Back to Eden gardening believes in letting your plants graze at the buffet of nature. The mulch breaks down over time, releasing nutrients and goodies for your plants to gobble up. It’s like the ultimate all-you-can-eat garden brunch!
Say goodbye to chemical fertilizers – they’re the uninvited guests at this organic garden soirée. Your plants will thank you with vibrant health and the best salsa moves this side of the garden fence.
Ben turning our compost pile
Step 4: Water Like You’re Serenading Your Plants
Watering your Back to Eden garden is like serenading your plants with a love song. You give them a slow, deep drink, and they respond with lush growth and radiant vibes.
The mulch helps retain moisture, so you don’t have to play garden DJ with your hose all day. Water when your plants are looking a bit parched, and watch them sway to the rhythm of hydration.
Step 5: Sit Back and Watch the Garden Disco Unfold
Now that you’ve set the stage for your garden’s dance-off, it’s time to be the VIP guest and enjoy the show. Kick back with a glass of iced tea and let your plants do their thing.
Watch as your garden transforms into a lush, vibrant discotheque of greenery. You’ll have tomatoes twerking, carrots cha-cha-ing, and peppers doing the salsa – it’s a garden party like no other!
So there you have it, folks – Back to Eden gardening, where mulch is king, tilling is taboo, and your plants are the life of the underground dance party. Get out there and let your garden boogie like it’s 1979!
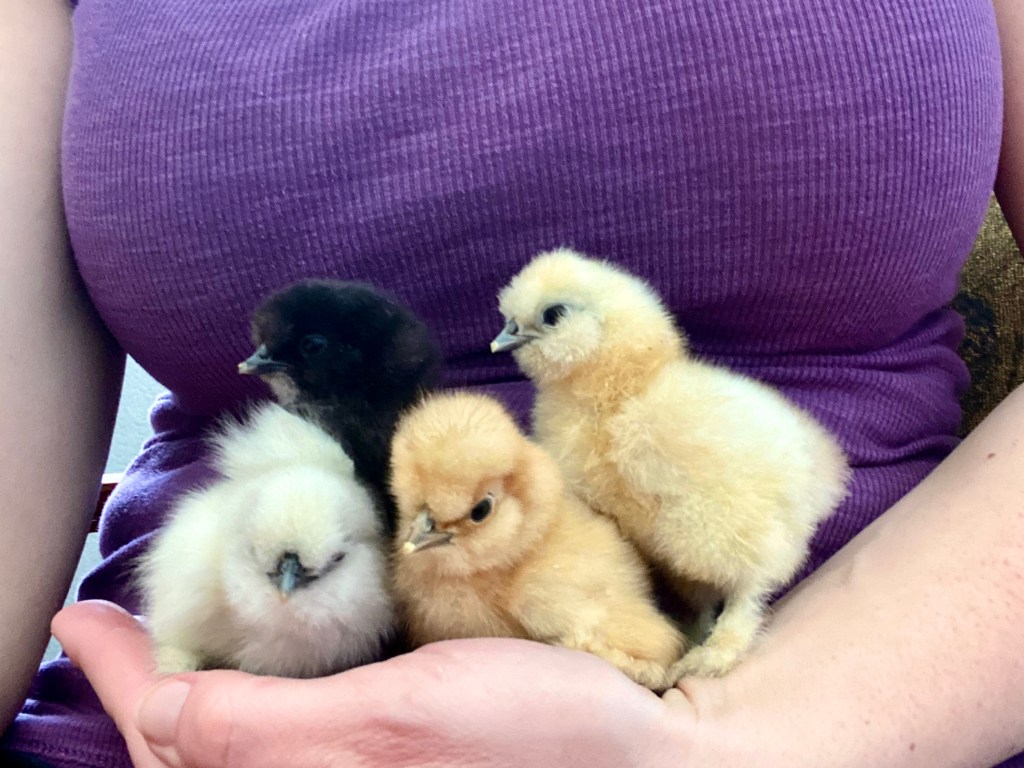
Greetings, fellow poultry enthusiasts, or should I say, “egg-ceptional” humans? Don’t unfollow me please. Today, we’re going to dive headfirst into the hilarious world of raising chickens. If you’ve ever considered turning your backyard into a feathered fiesta, or if you’re already knee-deep in feathers and coop cleaning, you’ll relate to the egg-sasperating adventures I’m about to share.
1. Chicken Math: The New ‘Common Core’
You thought math was tough in school? Try calculating the number of chickens you need. First, it’s just a “baker’s dozen,” and before you know it, you’re considering a second coop to accommodate your newfound feathered friends. But don’t worry, chicken math is a lot more forgiving and way more fun than algebra! I can tell you this firsthand since I homeschool some of my children. My husband agreed to three chickens. Within 6 weeks I had 12 chickens. I now have 45 chickens. Because chicken math.
My first “three” chickens.
2. The Great Escape Artists
Chickens are notorious escape artists, and they approach it with the cunning of a secret agent. I’ve seen hens execute daring daylight breakouts like they’re auditioning for a spy movie. Be prepared for regular renditions of “The Great Chicken Escape,” complete with feathered fugitives, a high-speed chase, and your neighbors giving you strange looks. One night one of our kids came knocking on our door to tell us she heard a chicken outside her window. I think, “impossible that chicken coop is Fort Knox”. Low and behold there’s a chicken in our driveway bocking away. To this day we have no idea how she escaped or why at 1am she decided to sing the egg song outside the window. By the way – there were no eggs laid that night nor any other chickens out.
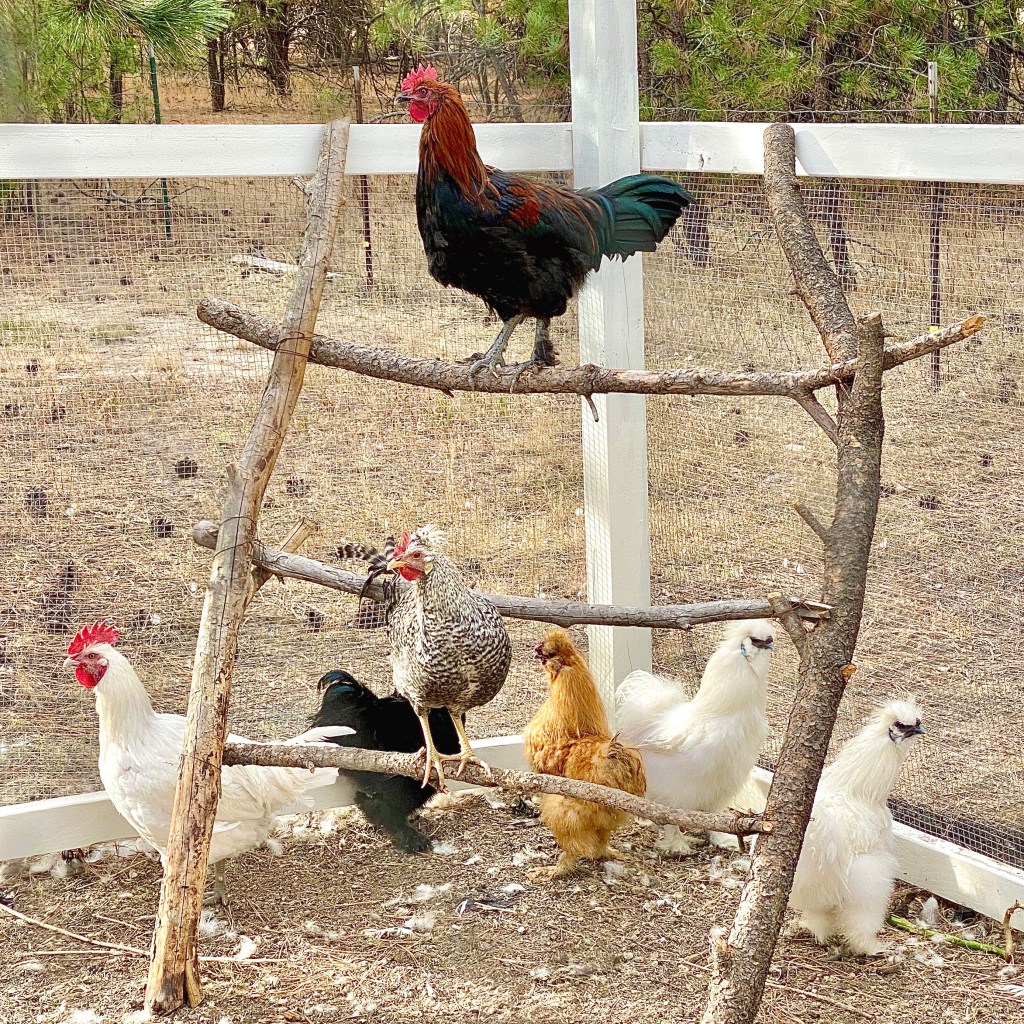
3. Chicken Fashion: A Thing We Never Knew We Needed
When it comes to fashion, chickens are way ahead of the curve. They’ve got natural tuxedos (black and white feathers), punk-rock mohawks (Silkies), and feathered pantaloons (Polish chickens). Forget Paris Fashion Week; your coop is where it’s at!
4. Coop Cleaning: A Never-Ending Task
Raising chickens means facing the never-ending struggle of coop cleaning. It’s like trying to tidy up after a toddler’s birthday party every single day. Just when you think you’ve got it spotless, your feathered friends decide to redecorate with fresh bedding. Expect to become an expert in chicken poop disposal – a skill no one ever adds to their resume.
5. Chicken TV: The Ultimate Reality Show
Who needs Netflix when you have Chicken TV? Spend hours watching your feathered friends peck at bugs, have intense conversations with the neighbor’s cat, and perform spontaneous dust baths that make you question your own personal hygiene choices.
6. Chicken Therapy
Forget expensive therapists; chickens are the ultimate emotional support animals. They listen to your woes without judgment, provide a daily dose of adorable antics, and even lay eggs to cheer you up. Just try to stay grumpy when you’re holding a warm, freshly laid egg. It’s impossible.
7. The Egg Hunt: Easter Every Day
Every morning is like an Easter egg hunt when you’re raising chickens. But instead of colorful plastic eggs filled with candy, you’re hunting for freshly laid eggs hidden in the most unexpected places. It’s a daily adventure that keeps you on your toes.
8. Chicken Shenanigans
Chickens have a knack for getting into the most ridiculous situations. Whether they’re perched on top of the swing set, pretending to be raptors from Jurassic Park, or attempting to master yoga poses that would put a contortionist to shame, their antics will leave you laughing or crying or both.
Raising chickens is a cluck-tastic adventure filled with laughter, love, and a whole lot of feathers. It’s like living in your very own poultry-themed sitcom, complete with quirky characters and unforgettable moments. So, if you’re considering adding some feathered friends to your life, go ahead and take the plunge into the hilarious world of chicken-raising. Just be prepared for a few egg-sasperating adventures along the way!
The concept of self-sufficiency, with its promise of independence and sustainability, can be appealing, but it often seems daunting. The truth is, self-sufficiency doesn’t require a radical change overnight. It’s a journey, and you can start small. In this blog post, we’ll explore easy and practical ways to begin your journey towards self-sufficiency, empowering you to take control of your life, resources, and future.
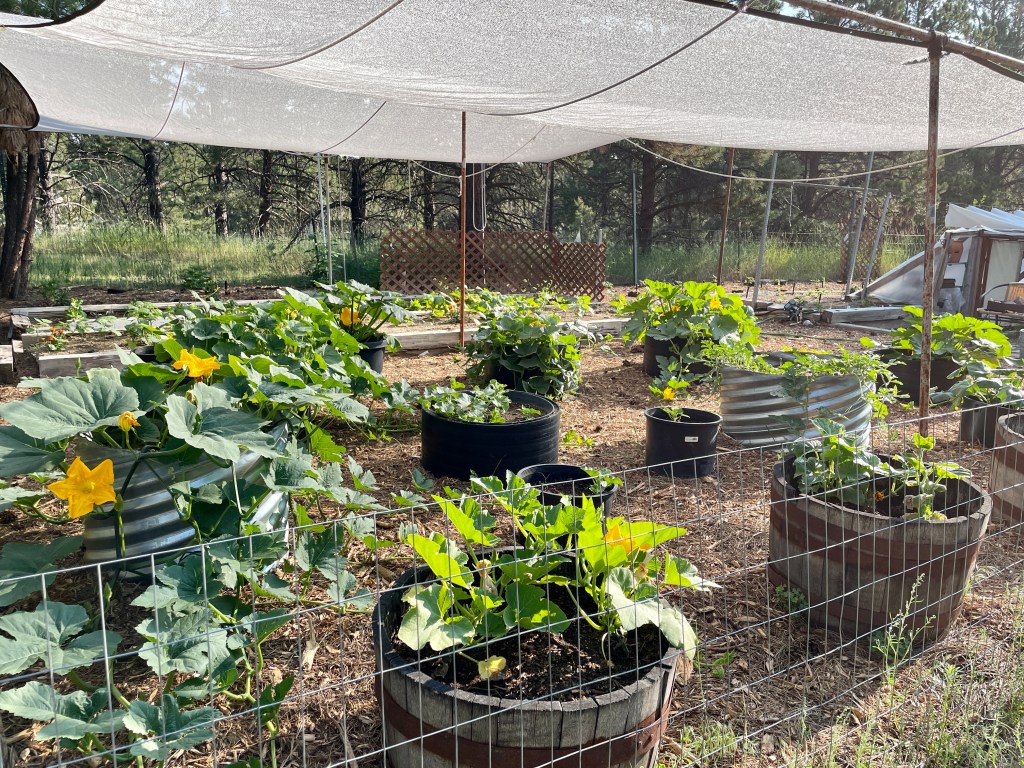
1. Start a Vegetable Garden
Growing your own vegetables is one of the most accessible ways to become self-sufficient. Even a small garden plot or a collection of pots on your balcony can provide a significant portion of your produce. Start with easy-to-grow vegetables like tomatoes, peppers, and herbs.
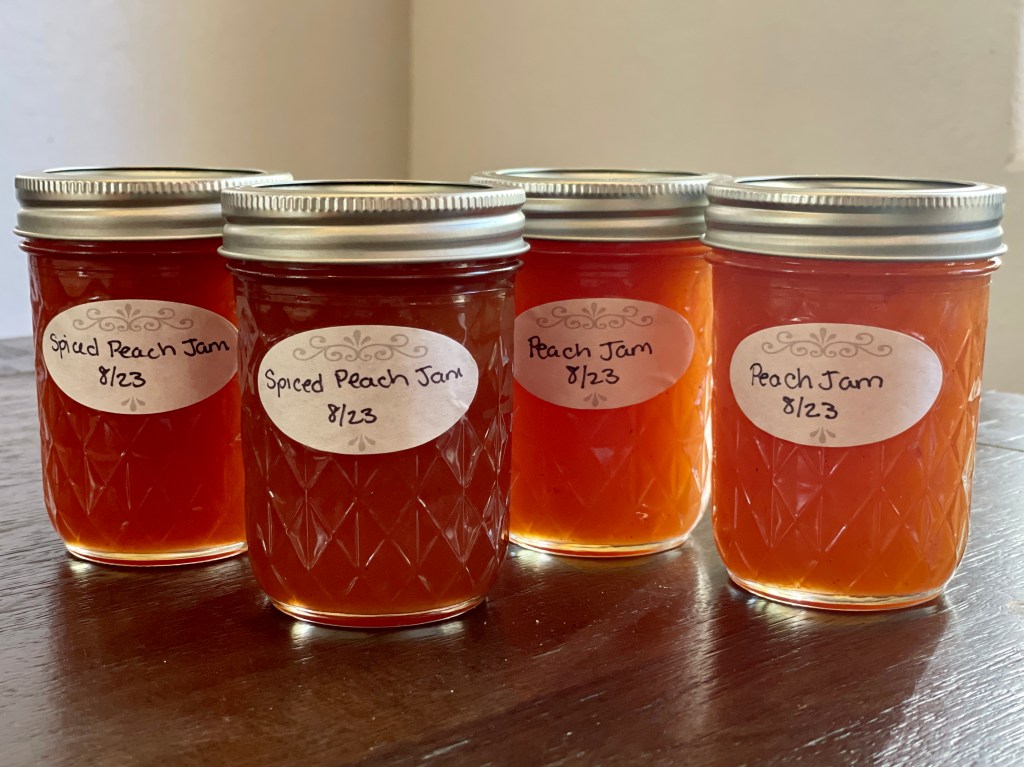
2. Learn Basic Food Preservation
Preserve your garden’s bounty and reduce food waste by learning simple food preservation techniques like canning, freezing, and drying. These methods can help you enjoy your homegrown produce year-round.
3. Raise Backyard Chickens
If local regulations permit, consider keeping a small flock of chickens. They provide fresh eggs daily, eat kitchen scraps, and their manure can enrich your garden soil. Chickens are relatively low-maintenance and a great introduction to animal husbandry.
4. Reduce Energy Consumption
Take small steps to reduce your energy dependence. Install LED bulbs, use a programmable thermostat, and unplug devices when not in use. Over time, these changes can lower your energy bills and reduce your carbon footprint.
5. Compost Your Kitchen Scraps
Composting kitchen waste not only reduces landfill waste but also produces nutrient-rich compost for your garden. A simple compost bin or pile can turn your kitchen scraps into black gold for your plants.
6. Reduce, Reuse, Recycle
Practice the three Rs diligently. Reduce your consumption of single-use items, reuse what you can, and recycle responsibly. This not only conserves resources but also saves money.
7. Harness Renewable Energy
Consider installing solar panels or a small wind turbine if feasible. Renewable energy sources can provide power to your home and even feed excess energy back into the grid, potentially earning you credits.
8. Learn Basic DIY Skills
Being self-sufficient often means fixing things yourself. Learn basic DIY skills such as plumbing, carpentry, and electrical work. There are countless online resources and tutorials available.
9. Build a Rainwater Collection System
Set up a rainwater harvesting system to collect and store rainwater for gardening and other non-potable uses. It’s an eco-friendly way to reduce your water bills.
10. Cook and Bake from Scratch
Reduce reliance on processed foods by cooking and baking from scratch. Make your own bread, pasta, and snacks. It’s healthier and often more economical.
11. Cultivate Relationships in Your Community
Forge connections with your neighbors and community members. Collaborate on projects, share resources, and support one another. A strong local network can be invaluable in times of need.
12. Practice Mindful Consumption
Think critically about your purchases. Buy quality items that last longer, and avoid impulse buying. A mindful approach to consumption saves money and reduces waste.
Remember, self-sufficiency is a journey, not a destination. Start with one or two of these easy steps that resonate with you, and gradually incorporate more as you become comfortable. The key is to take consistent, intentional actions that align with your values and goals. Over time, you’ll find that self-sufficiency becomes not only achievable but also deeply rewarding, enriching your life in ways you might not have imagined.
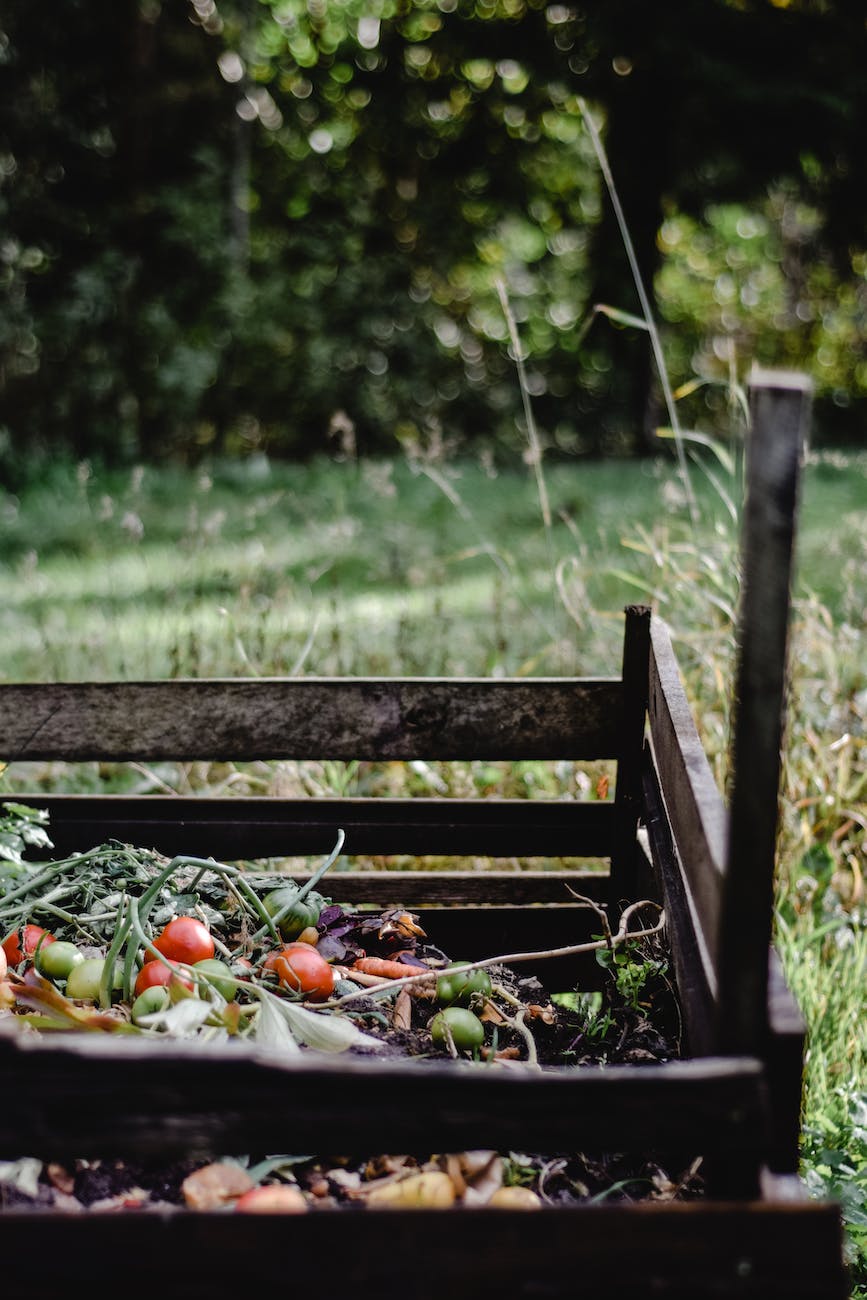
If you’re looking to turn your garbage into gardeners gold and do it in a hurry, then you should try a compost tumbler. If you have a compost bin then you know how great it is to add compost to your flower beds and vegetable garden. But making compost takes time and its usually in short supply. A compost tumbler is a great time saver when making compost.
Some gardeners believe that compost is better than fertilizer because it doesnt just feed your plants, it also improves your soil. Improving your soil keeps your plants healthier so they grow stronger and more capable of fighting off diseases or beating droughts. Compost is decomposed organic matter and is high in nutrients that plants love. Bacteria and other micro organisms help break down that decomposing organic matter and their short life cycles become part of the process itself. When they reproduce their offspring continue the process while the parents bodies break down and add to the organic matter. Its natures way of recycling.
Creating compost will usually take a couple of months. If you get the ratio of browns to greens right, turn the pile to keep it aerated and dont let it dry out youll be rewarded with fresh earthy compost. The more you tend your compost pile, the quicker your garden waste will become compost. Neglect the pile and it will still become compost but itll take a lot longer. For an example of this examine the rich soil in a forest. As leaves and tree litter fall to the ground, there isnt anyone there making sure its the same wetness as a wrung out sponge. But by the time the next season rolls around, a lot of those leaves have begun decomposing and in the process, theyre feeding the trees and the cycle continues without any help from man.
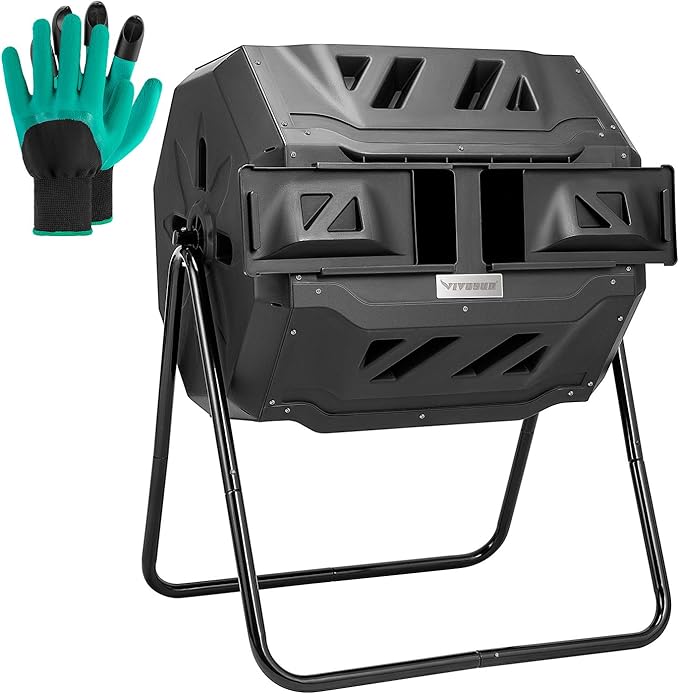
The gardening season can be very short depending on where you live. In the Northeast we have about 4 months of time to grow the flowers, fruits and vegetables that we love. So unless you have a huge bin of compost ready to go on the first day of spring youll need some more during the growing season. A compost tumbler is perfect for making compost fast. Now you probably wont make enough compost to fill new beds but the amount you can make is perfect to give your plants and nice top dressing.
Or if you are a composter with a pest problem, the compost tumbler will keep the critters out of your pile. The most popular tumblers are sealed up and only have holes for air. If rodents or snakes have been problems for you in the past then the compost tumbler is the solution that youve been looking for.
Theres a few things youll need to do a little differently if youre used to bin composting. First off, youll need to add all the raw materials at once. Dont continue adding or else your compost will never be done. Add what you want and then start turning. Try to turn it everyday. If not everyday then at least a few times a week. The first few batches will take the longest unless you already have some compost that you can toss into the tumbler. Or you can use a compost activator. Thats all activators really are anyway. Just someones elses compost to help get your pile started. The bacteria and micro organisms have to get in there somehow.
Be sure not to over water when using a compost tumbler. Moisture doesnt escape as easily inside the tumbler as with a regular compost bin. And most likely your ingredients such as grass clippings or coffee grinds were already moist to begin with.
After about 3 weeks the compost should start to look like compost. It should be an even color and you shouldnt be able to tell what you put in the tumbler. If your waste is still recognizable then let it decompose a while longer. And dont forget to smell your compost. It should have a nice earthy smell to it.
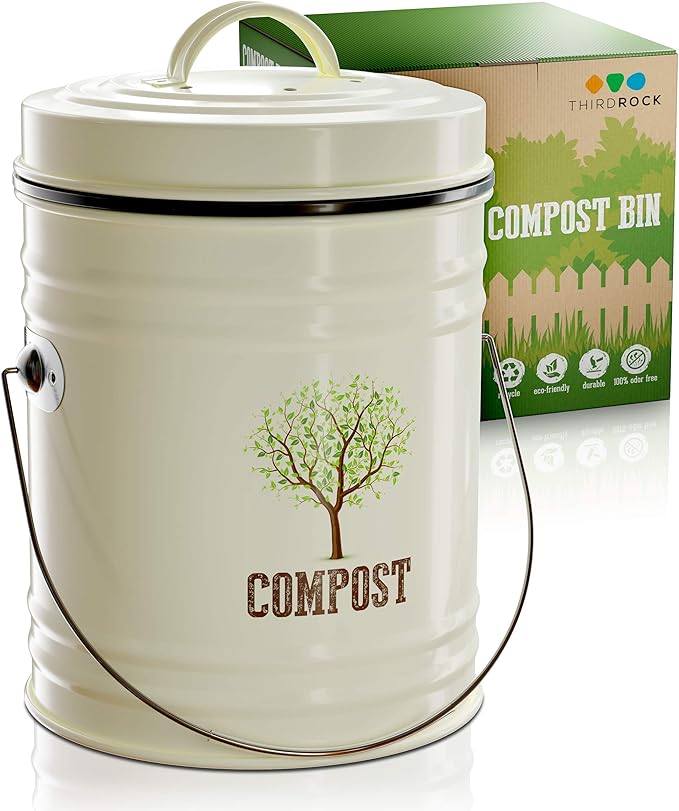
If youre looking for a neat & compact composting solution that works quickly and wont receive a lot of attention from your neighbors, then look into a compost tumbler. You’ll be tumbling your way to a great garden this season.
PRO TIP: I have a small compost bin inside the house to put vegetable cuttings and scraps in. Once it’s full, I add it to the tumbler outside. It’s a great way to reduce waste and maximize your compost!
Raising chickens should not be a fuss. There are actually several reasons why people want to cultivate chickens in their backyard. Some of these are written below.
Reason # 1 Chickens love leftovers.
A chickens appetite is incredible. They can eat almost everything, even their own kind! You can now say bye-bye to those unwanted leftovers being left rotten in your fridge. You feel less guilty of throwing them out into the garbage can. Plus, you can save on chicken feed. But be very careful with what you give for it may be their last supper. Tone down on the onions and garlic.
Reason #2 Eggs!
Who doesnt love eggs? Have them boiled, scrambled, sunny side up, etc. Admit it, pets that live comfortably inside your houses dont give anything more than barks, meows, purrs, and sometimes, chirp. Fishes, in general, can be eaten, but who would want to eat Goldie? None of these domesticated animals produce something edible. Well, chickens, on the other hand, have lots of benefits. One of the many benefits chickens give is their egg.
Who doesnt love eggs? Have them boiled, scrambled, sunny side up, etc. Admit it, pets that live comfortably inside your houses dont give anything more than barks, meows, purrs, and sometimes, chirp. Fishes, in general, can be eaten, but who would want to eat Goldie? None of these domesticated animals produce something edible. Well, chickens, on the other hand, have lots of benefits. One of the many benefits chickens give is their egg.
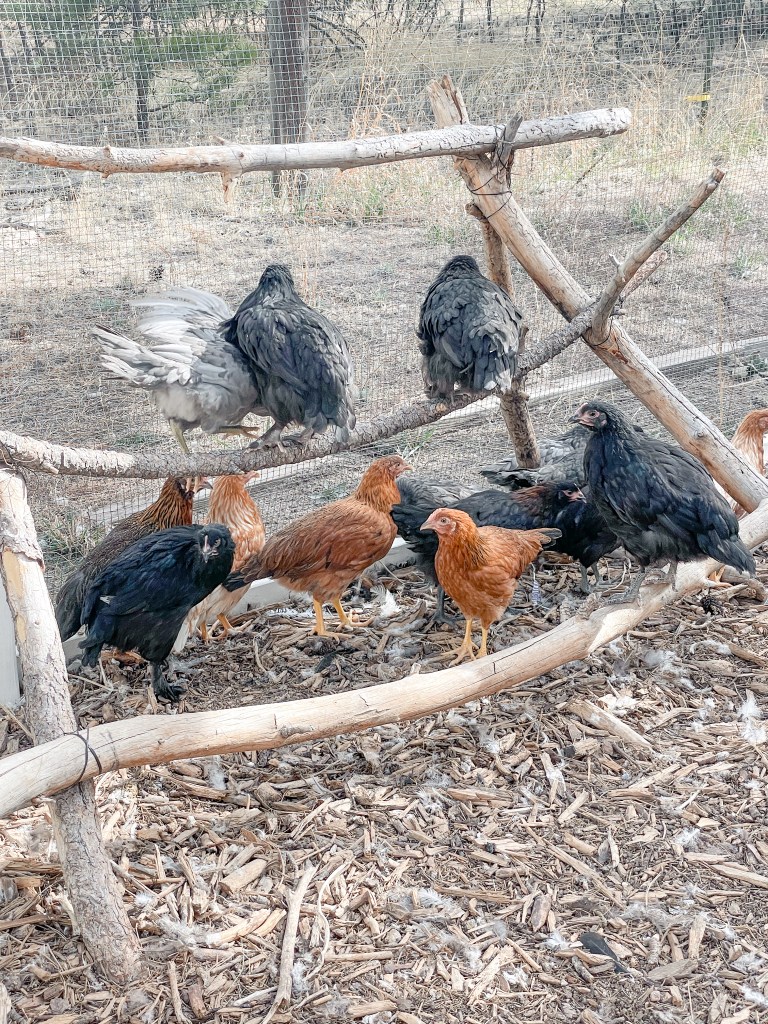
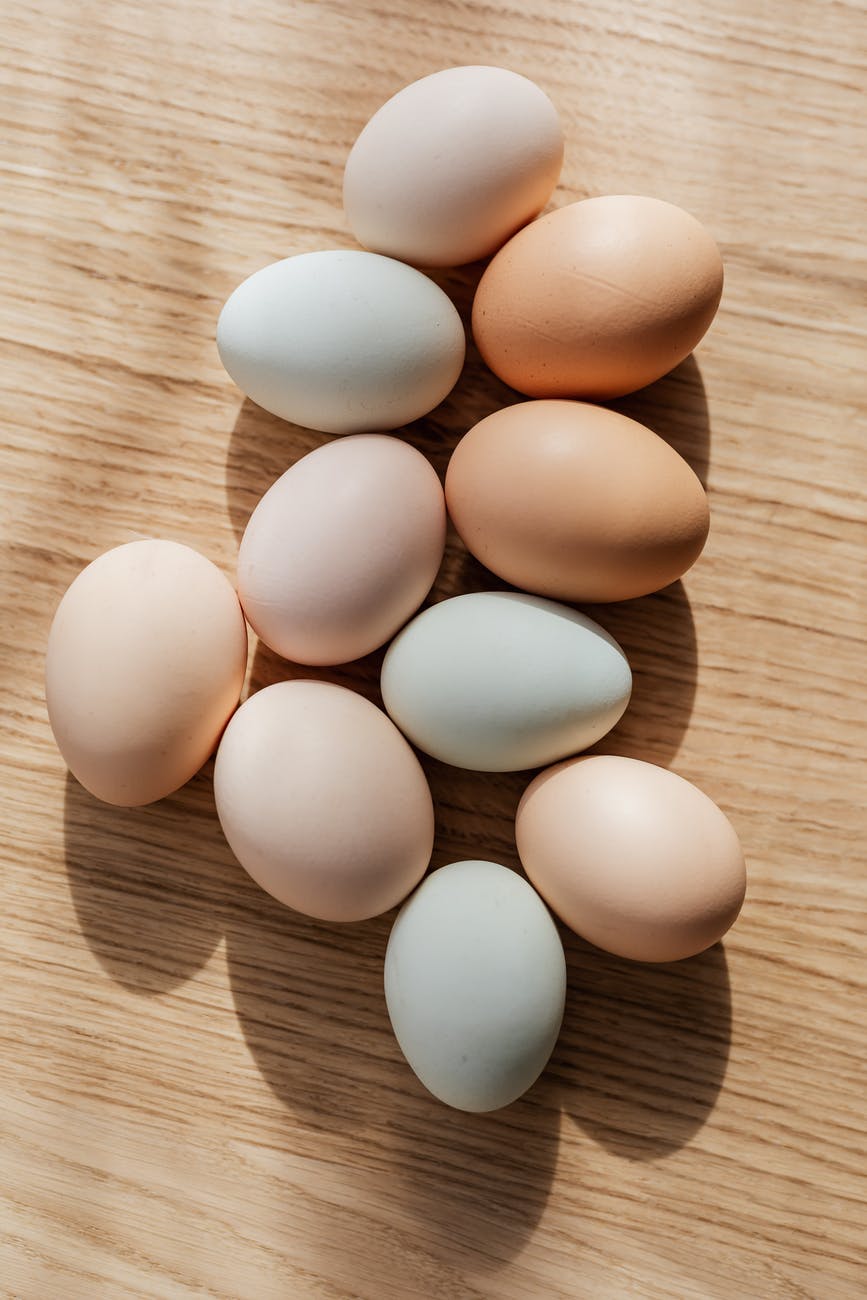
You can eat fresh eggs right from the source. Eggs taken from chickens minutes or hours ago are more tasty and nutritious than those purchased in the grocery store. Youll notice the texture and color is way different than that of the fresh ones. We have a variety of different breeds of chickens that all lay different colors which makes it more fun for the kids (and us!).
Reason #3 Source of natural fertilizers
Your lawn or backyard couldve never looked better. Chickens love to freely walk around. Chickens also love to peck on anything they see that can be considered as food. And what is food to them? Possibly anything thats organic. If you let your chickens roam around your space, youll find out how reliable they can be. They eat pests living in your backyard grubs, beetles, insects, earwigs, and anything that comes close.
After the digestion has set its due, they will transform what theyve eaten into poop. But this is not just any kind of poop but a treasure called natural fertilizer. And you know what natural fertilizers do right? They keep the soil healthy for plants to grow. Cool.
Reason #4 Low Maintenance Pets
Unlike dogs that need combing and brushing everyday to keep their fur alive and shiny, chickens doesnt need such soulful treatment. All you have to do is provide them their daily needs like food and water. You also have to clean their pad at least twice a month and change the beddings too. In return, you can gather all the eggs. Aside from just gathering, you can also start a small business of your own by supplying poultry stores with fresh eggs or chicken meat.
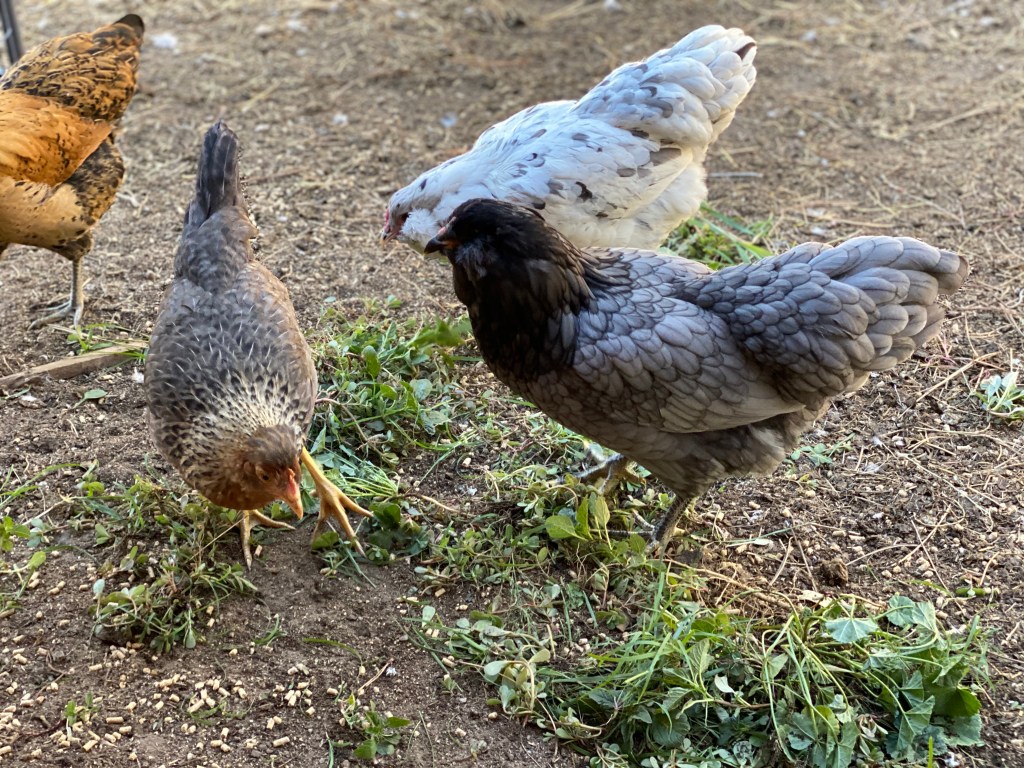
Reason #5 Grass and weed clippers
Got that right. Now you can save on mowing your own lawn by getting yourself chickens! For chickens, grasses, weeds, and leaves are treats. Its like a lifetime dessert offering. Its like having a cow in your own backyard. They will dig through whatever it is without even complaining about the hard work. Chickens will clip it then clean it all at the same time.
With these reasons, why bother getting yourself a dog or a cat? No offense but they cant even water the plants nor lay eggs for breakfast. All they do is prove to their masters that they are either ones best friends. In cases of chickens, you can have a best friend, a lawn mower, a supplier of organic fertilizer and an egg producer all in one.
So how do you get started?
Certain equipments must already be present upon the arrival of the chickens in your own backyard. You have to be geared up before presenting your not so baby chicks outside the world. The transition period can be quite stressful therefore being prepared can help you rid of half of the stress.
You have to purchase a lot of items for your chicks to stay comfortable from where they would lay. You need to pamper them so that when selling or butchering day comes, there are no regrets.
1. Food
Without this, who will live? The food you will give will entirely depend on the kind of chicken that you have. But to sum it up, just give something that is complete. It must contain the right food substance that your chickens will need like carbohydrates, fats, proteins, and minerals and if the budget can still take it, buy them vitamins. There are two kinds of feeds: conventional and organic. Either of the two can be purchased online or at an agricultural poultry store. We choose Scratch and Peck foods for our chickens.
If the time has come for your chickens to lay eggs or is about 20 weeks old, purchase a layer feed. But if they are younger than 20 weeks, starter or grower feed is highly recommended.
2. Waterer and Feeder
Purchase a waterer and feeder that are suspended from the ground if possible. They should hang at least a couple inches off it. A very good advantage when purchasing such items is that they will prevent your chickens from jumping on top of it and smudging off their feet filled with feces inside the container. An automatic refill feature is also included which is very reliable during times when you have to go somewhere and will take you a couple of days before you come back. Worry-free.
Our favorite water is one with little refillable cups. Our chickens love to use this, almost year round. During the really cold months, we use a heated waterer. Remember that food and water should be left outside of the coop to avoid unwanted visitors (rodents) and frostbite during the winter. The increased humidity in the coop is the top culprit of frostbite for chickens.
3. Bed
Yes, no matter how absurd it seems, you have to provide them with the proper bedding to keep them warm, comfortable, healthy and happy. But this doesnt mean that you have to buy them sheets from Best Buy. Beddings can be in the form of a pile of clean haystack, old or used newspapers, or if you wanted it to be extra special, there are beddings that can be bought online or in a poultry store.
Beddings are best inside the coop where it can provide chickens a soft surface to roam around with. Beddings are also beneficial for your flock because it absorbs the odor and droppings. You dont want a foul-smelling coop, right? Another advantage of the bedding is that is saves the eggs from cracking making it an area where eggs are safe to land.
Our favorite is hemp bedding. There are so many reasons we love it!
GIVE YOUR PETS THE POSHEST PAD – Premium Hemp Fiber is the highest quality bedding you can provide for your pets. Super warm, cozy and comfortable, Hemp Bedding is loved by a wide variety of animals big and small.
SUPERIOR QUALITIES – Hemp bedding is highly absorbent meaning less mess and less odor. A high thermal rating means your animals will stay warmer in winter and cooler in summer. Low dust means cleaner, fresher air to breathe.
LONGER LIFE = LESS EXPENSE – Hemp bedding lasts much longer than traditional paper and wood bedding materials making it the economical choice. When it does finally expire, hemp bedding makes great compost!
GREAT FOR PETS AND THE PLANET – Hemp grows super fast, needs very little water or fertilizer and no pesticides making it the eco-friendly and sustainable choice. Naturally Processed and free of chemicals and dyes.
There are a lot of bedding varieties. But whatever the bedding that youve chosen, always make it a point that it is at least two inches thick and is truly absorbent.
4. Dust Baths
If you see your chickens digging a shallow hole and creating a mess with dirt, they are dust bathing! Chickens enjoy bathing in dust. But did you know that when chickens take dust baths, they are actually protecting themselves from parasites and those creatures that find it interesting to live inside their legs and feathers. Therefore, it is necessary to have dust baths.
If you have a dry area in your chicken run that has patches of fresh ground, its the perfect spot to do their thing. But if your pen consists of entirely cement, worry not, because there are artificial dust baths (like this one) available in agricultural stores.