Just a family learning to be mroe self-sufficient and helping others do the same
Author: Jessie Williams
Welcome, I am so happy to have you! My goal is to help you learn how to embrace abundance in life and health. My blog will have tons of information on homesteading, gardening, healthy recipes, toxin-free living and so much more.
The concept of self-sufficiency, with its promise of independence and sustainability, can be appealing, but it often seems daunting. The truth is, self-sufficiency doesn’t require a radical change overnight. It’s a journey, and you can start small. In this blog post, we’ll explore easy and practical ways to begin your journey towards self-sufficiency, empowering you to take control of your life, resources, and future.
1. Start a Vegetable Garden
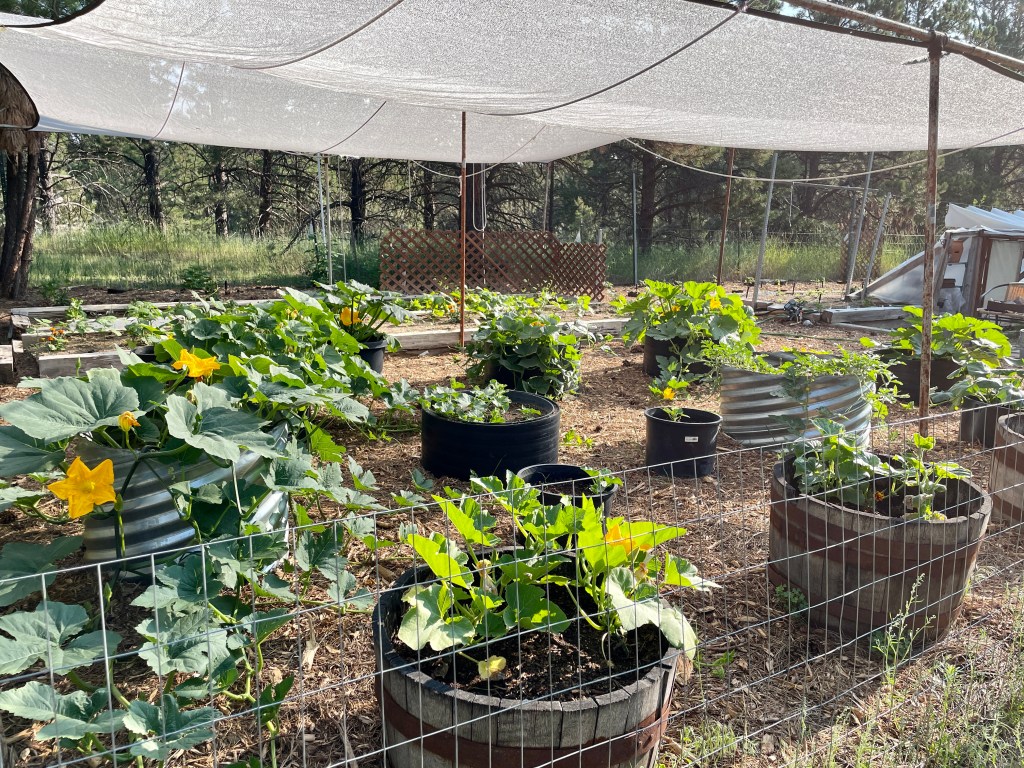
Growing your own vegetables is one of the most accessible ways to become self-sufficient. Even a small garden plot or a collection of pots on your balcony can provide a significant portion of your produce. Start with easy-to-grow vegetables like tomatoes, peppers, and herbs.
2. Learn Basic Food Preservation
Preserve your garden’s bounty and reduce food waste by learning simple food preservation techniques like canning, freezing, and drying. These methods can help you enjoy your homegrown produce year-round.
3. Raise Backyard Chickens
If local regulations permit, consider keeping a small flock of chickens. They provide fresh eggs daily, eat kitchen scraps, and their manure can enrich your garden soil. Chickens are relatively low-maintenance and a great introduction to animal husbandry.
4. Reduce Energy Consumption
Take small steps to reduce your energy dependence. Install LED bulbs, use a programmable thermostat, and unplug devices when not in use. Over time, these changes can lower your energy bills and reduce your carbon footprint.
5. Compost Your Kitchen Scraps
Composting kitchen waste not only reduces landfill waste but also produces nutrient-rich compost for your garden. A simple compost bin or pile can turn your kitchen scraps into black gold for your plants.
6. Reduce, Reuse, Recycle
Practice the three Rs diligently. Reduce your consumption of single-use items, reuse what you can, and recycle responsibly. This not only conserves resources but also saves money.
7. Harness Renewable Energy
Consider installing solar panels or a small wind turbine if feasible. Renewable energy sources can provide power to your home and even feed excess energy back into the grid, potentially earning you credits.
8. Learn Basic DIY Skills
Being self-sufficient often means fixing things yourself. Learn basic DIY skills such as plumbing, carpentry, and electrical work. There are countless online resources and tutorials available.
9. Build a Rainwater Collection System
Set up a rainwater harvesting system to collect and store rainwater for gardening and other non-potable uses. It’s an eco-friendly way to reduce your water bills.
10. Cook and Bake from Scratch
Reduce reliance on processed foods by cooking and baking from scratch. Make your own bread, pasta, and snacks. It’s healthier and often more economical.
11. Cultivate Relationships in Your Community
Forge connections with your neighbors and community members. Collaborate on projects, share resources, and support one another. A strong local network can be invaluable in times of need.
12. Practice Mindful Consumption
Think critically about your purchases. Buy quality items that last longer, and avoid impulse buying. A mindful approach to consumption saves money and reduces waste.
Remember, self-sufficiency is a journey, not a destination. Start with one or two of these easy steps that resonate with you, and gradually incorporate more as you become comfortable. The key is to take consistent, intentional actions that align with your values and goals. Over time, you’ll find that self-sufficiency becomes not only achievable but also deeply rewarding, enriching your life in ways you might not have imagined.
In the realm of herbs, there’s one often overlooked gem that deserves the spotlight: borage. With its striking blue flowers, cucumber-like flavor, and an array of health benefits, borage is a remarkable addition to both your garden and your culinary repertoire. Join us as we dive into the world of borage, uncovering its unique attributes and the hidden treasures it brings to your table and wellness routine.
Borage (Borago officinalis) is an herbaceous plant that boasts vibrant blue star-shaped flowers. These blossoms are not only visually stunning but are also edible, making them a delightful addition to salads, desserts, and beverages.
Borage leaves and flowers are renowned for their mild, cucumber-like flavor. The delicate taste makes borage a versatile ingredient in the kitchen. From adding blooms to cocktails for a splash of color to tossing young leaves into salads, this herb invites creativity in the culinary realm.
Nourishment for Health:
Beyond its culinary charm, borage offers a host of health benefits:
Rich in Nutrients: Borage leaves are a source of important nutrients such as vitamins A and C, calcium, potassium, and more.
Anti-Inflammatory Power: Borage contains gamma-linolenic acid (GLA), an omega-6 fatty acid known for its anti-inflammatory properties.
Skin Health: Borage oil, extracted from the plant’s seeds, is used in skincare products for its potential to nourish and hydrate the skin.
Supports Heart Health: The GLA content in borage oil may contribute to cardiovascular health by helping to regulate inflammation and cholesterol levels.
Elevating Your Garden:
Borage isn’t just a feast for the palate; it’s also a boon to your garden ecosystem:
Pollinator Attraction: Borage flowers are a magnet for pollinators, particularly bees. Planting borage can support local pollinator populations and enhance overall garden health.
Natural Pest Control: Borage has a reputation for deterring certain pests, making it a beneficial companion plant in vegetable gardens.
Growing Borage:
Borage is relatively easy to grow, making it a great choice for both novice and experienced gardeners:
Sunlight: Borage thrives in full sun but can tolerate partial shade.
Soil: Well-draining soil is essential for borage. It prefers moderately fertile soil with a slightly acidic to neutral pH.
Planting: Directly sow borage seeds in the spring or fall. Space plants about 18 to 24 inches apart.
Watering: Borage appreciates regular watering but is relatively drought-tolerant once established.
Harvesting and Using Borage:
Harvest borage leaves and flowers when they’re young and vibrant. The flowers are particularly delicate, so handle them gently. Use them as garnishes, in salads, or to infuse beverages with their subtle flavor.
Precautions:
While borage offers numerous benefits, its GLA content can interact with certain medications and may not be suitable for everyone. Consult a healthcare professional before incorporating borage supplements or oil into your routine.
Borage, with its enchanting blooms and multifaceted contributions to health and cuisine, is a treasure trove waiting to be explored. From brightening your garden with pollinator activity to enriching your dishes with a hint of freshness, borage offers a myriad of ways to infuse your life with its unique charm. So, whether you’re sipping on a borage-infused drink or admiring its azure blooms in your garden, let this unheralded beauty inspire you to explore its many wonders.
In an era where self-sufficiency and sustainability are increasingly valued, one of the most rewarding endeavors you can embark upon is growing your own food. Cultivating a diverse garden of edible plants not only empowers you to be more self-reliant but also provides you with fresh, nutritious produce right at your doorstep. In this blog post, we’ll explore some of the best plants to grow to achieve self-sufficiency in your home garden.
1. Potatoes: The Staple Crop
Potatoes are a versatile and high-yield crop that can provide sustenance throughout the year. They store well, are rich in carbohydrates, and can be used in various dishes. Varieties like russet, Yukon Gold, and red potatoes offer a range of flavors and textures.
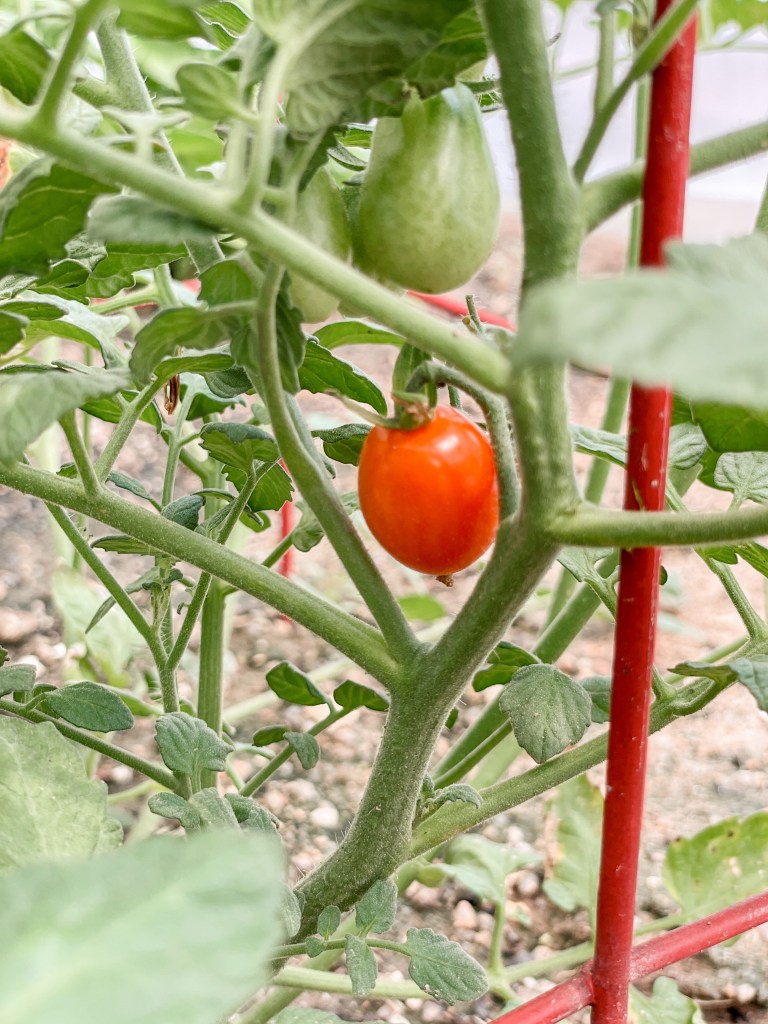
2. Tomatoes: The Garden Superstar
Tomatoes are a garden favorite due to their prolific production and countless culinary uses. Grow a mix of heirloom and hybrid varieties for salads, sauces, and canning. Indeterminate types will keep producing throughout the season.
3. Beans: A Protein-Packed Option
Beans, such as bush beans, pole beans, and soybeans, are excellent for self-sufficiency. They provide protein, fiber, and essential nutrients. Dry beans can be stored for an extended period, making them a valuable addition to your pantry.
4. Greens: Leafy Nutrition
Leafy greens like spinach, kale, Swiss chard, and lettuce are nutrient powerhouses that are easy to grow. They can be harvested continuously, ensuring a steady supply of fresh greens for salads and cooking.
5. Squash: Abundant Harvests
Squash, including zucchini, butternut, and acorn varieties, can produce prolifically. They’re not only delicious but also store well. Consider growing vining types on trellises to save space.
6. Carrots: Underground Bounty
Carrots are a reliable root crop that can be left in the ground until needed. They provide essential vitamins and add sweetness to soups, stews, and salads. Try different colors for variety.
7. Herbs: Flavor and Medicine
Growing herbs like basil, rosemary, thyme, and mint can enhance the flavors of your dishes and even serve as natural remedies. Dry or preserve excess herbs for year-round use.
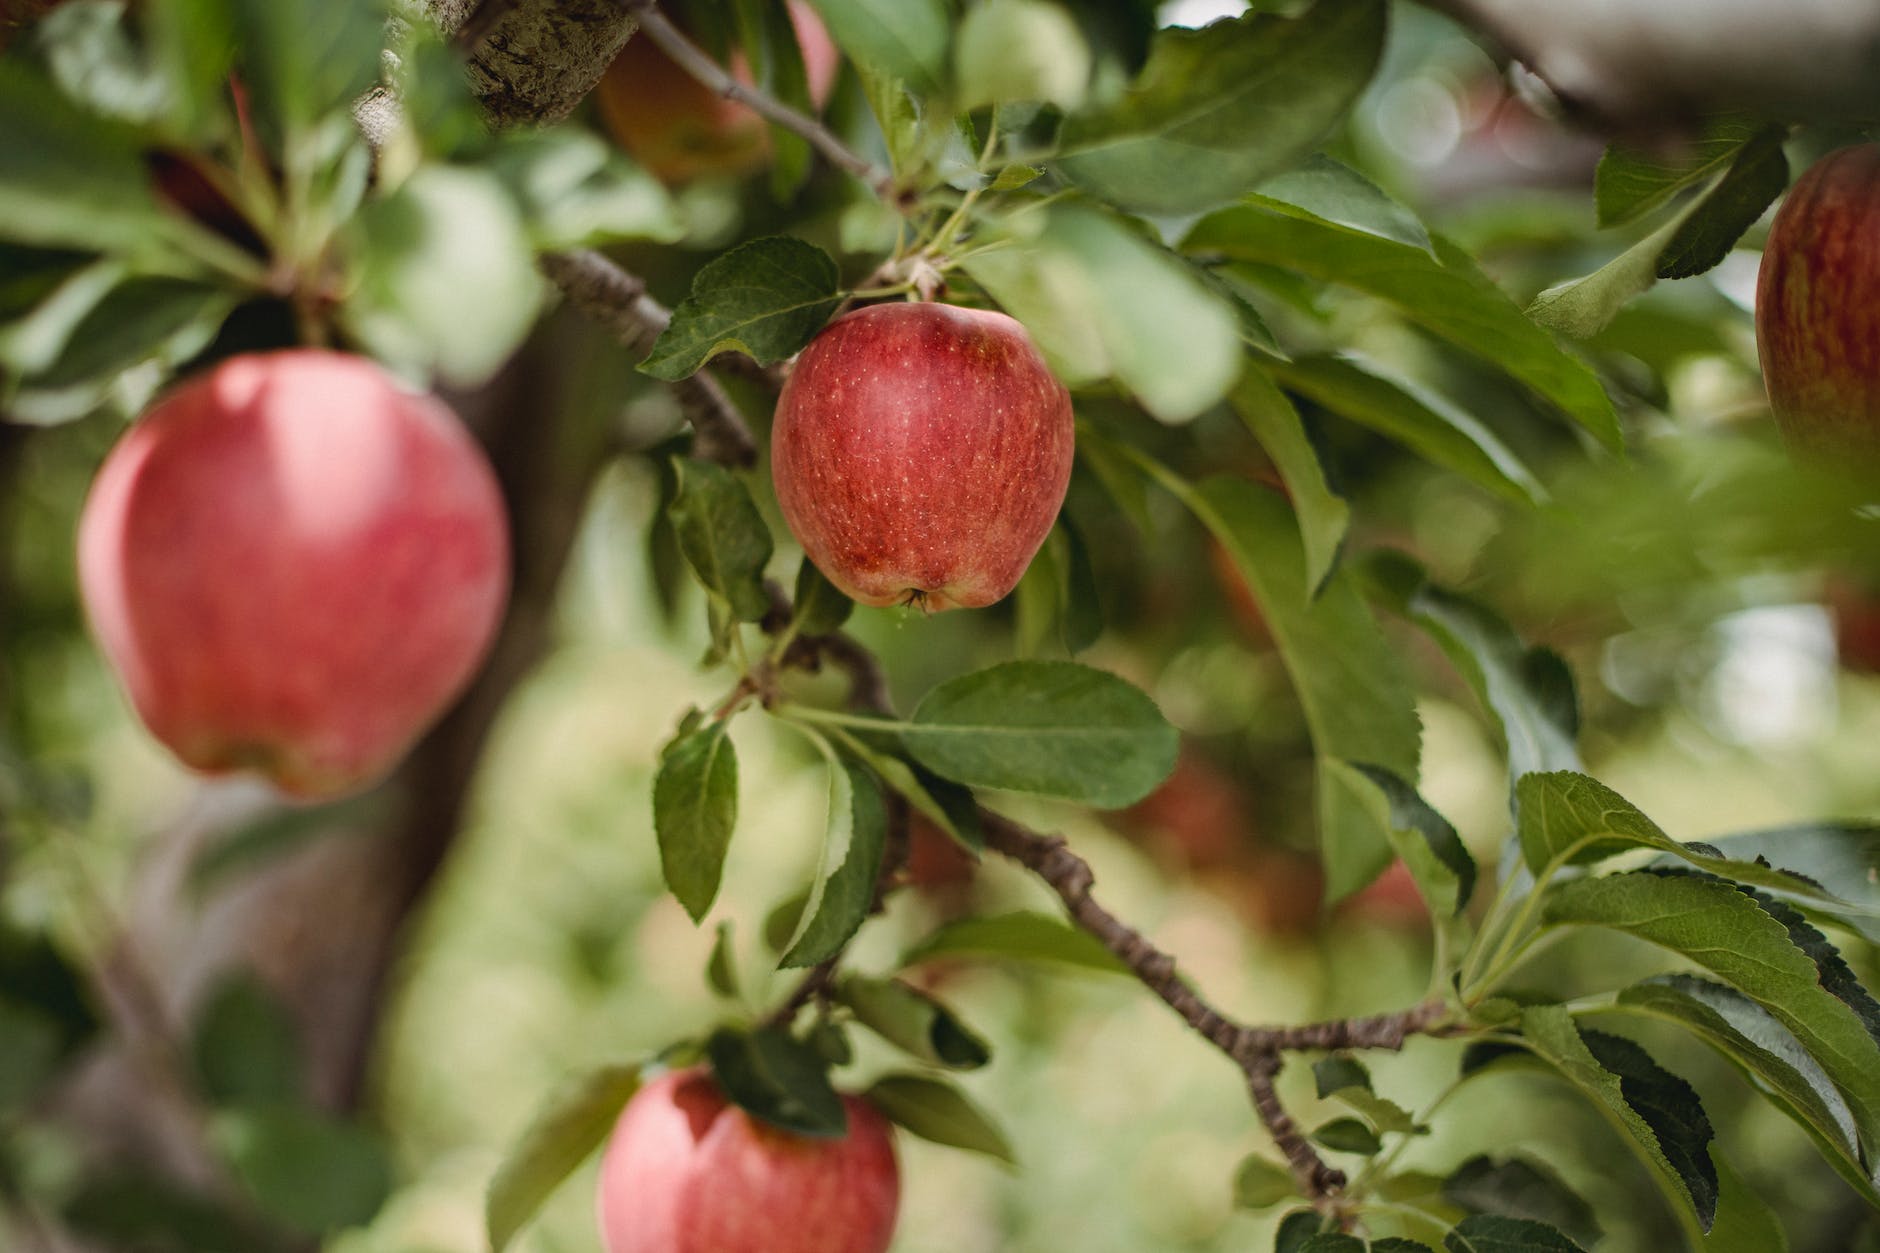
8. Fruit Trees: Abundance of Fresh Fruit
Fruit trees, such as apple, pear, and cherry, provide an abundance of fresh fruit with proper care. They can be preserved as jams, canned, or dried for long-term storage.
9. Berries: Fresh and Preserved
Raspberries, blueberries, and strawberries are nutrient-rich and easy to grow. Enjoy them fresh or preserve them as jams, jellies, or frozen berries for year-round use.
10. Onions and Garlic: Flavor Staples
Onions and garlic are essential flavorings in countless recipes. They can be stored for months, making them a valuable addition to your self-sufficiency garden.
11. Cabbage: Fermentation Hero
Cabbage is not only nutritious but also a star in homemade sauerkraut and kimchi. Fermented foods can provide valuable probiotics for gut health.
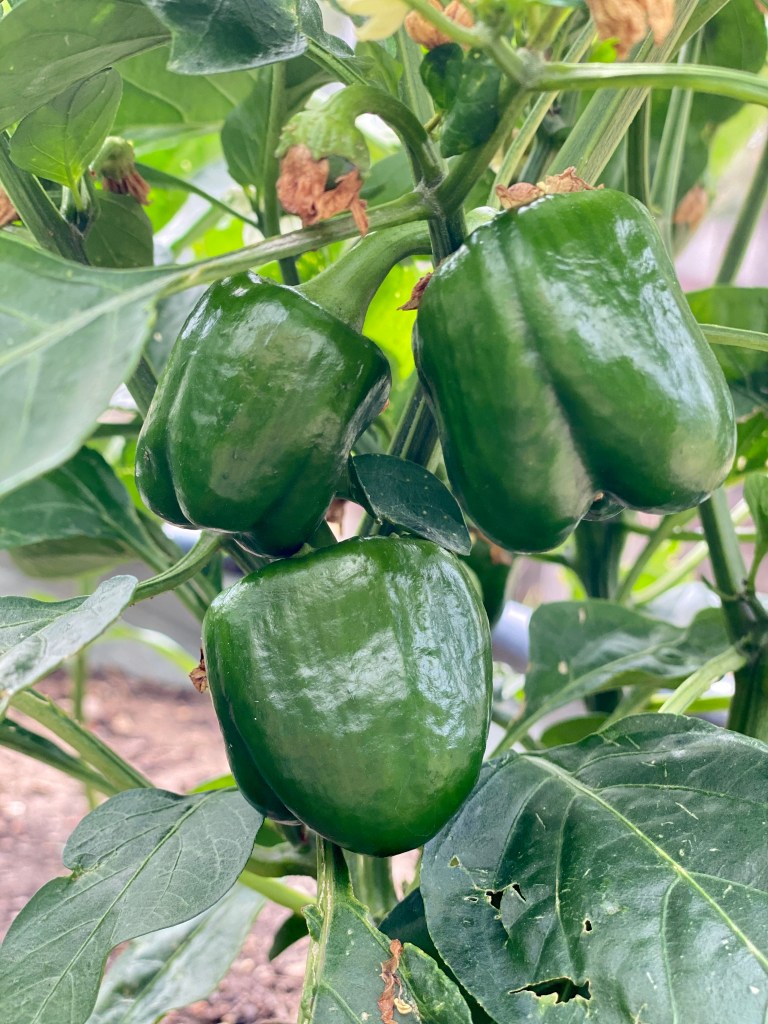
12. Peppers: Spice Up Your Dishes
Bell peppers, chili peppers, and sweet peppers add flavor and spice to your meals. Preserve excess peppers by freezing, canning, or drying.
Cultivating a garden with these essential plants is a significant step toward self-sufficiency. Not only will you reduce your reliance on commercial food sources, but you’ll also enjoy the satisfaction of nurturing your own sustenance. Remember that successful gardening requires planning, dedication, and a bit of trial and error. Whether you have a small urban plot or a sprawling rural garden, growing your own food is a fulfilling journey that contributes to your well-being and sustainability. So, roll up your sleeves, get your hands in the soil, and start your journey toward greater self-sufficiency through gardening.
A strong and resilient immune system is essential for maintaining good health and defending your body against illnesses. While there are various ways to support your immune system, turning to nature’s pharmacy can offer a powerful solution. In this blog post, we’ll explore the world of healing herbs and how they can play a vital role in boosting your immune system naturally.
1. Echinacea: The Immune Enhancer
Echinacea is a well-known herb revered for its immune-boosting properties. Rich in antioxidants, it supports the production of white blood cells and enhances the body’s defense against infections. Echinacea can be consumed as tea, tincture, or supplement.
2. Elderberry: Nature’s Cold Fighter
Elderberry is a potent antiviral herb that has been used for centuries to combat colds and flu. Its rich content of flavonoids and vitamins helps bolster the immune response and reduce the duration of illness. Elderberry syrup or tea can be a comforting addition to your routine.
3. Astragalus: The Immune Tonic
Astragalus is an adaptogenic herb that strengthens the body’s resistance to stress and infections. It enhances immune cell activity and stimulates the production of white blood cells. Incorporating astragalus into soups, stews, or as a tea can provide ongoing immune support.
4. Ginger: Warmth and Defense
Ginger’s warming nature makes it a go-to herb for promoting circulation and supporting immunity. Its anti-inflammatory compounds help reduce inflammation and strengthen the immune response. Enjoy ginger in teas, soups, and meals for a flavorful boost.
5. Turmeric: Golden Immunity
Turmeric’s active compound, curcumin, boasts powerful anti-inflammatory and antioxidant properties. It supports immune function by reducing inflammation and aiding in detoxification. A cup of golden milk or turmeric tea can be a soothing way to incorporate this herb into your routine.
6. Garlic: Nature’s Antibiotic
Garlic is a potent immune booster with natural antibacterial and antiviral properties. Allicin, a compound found in garlic, has been shown to stimulate immune cells and enhance their activity. Include fresh garlic in your meals or consider garlic supplements.
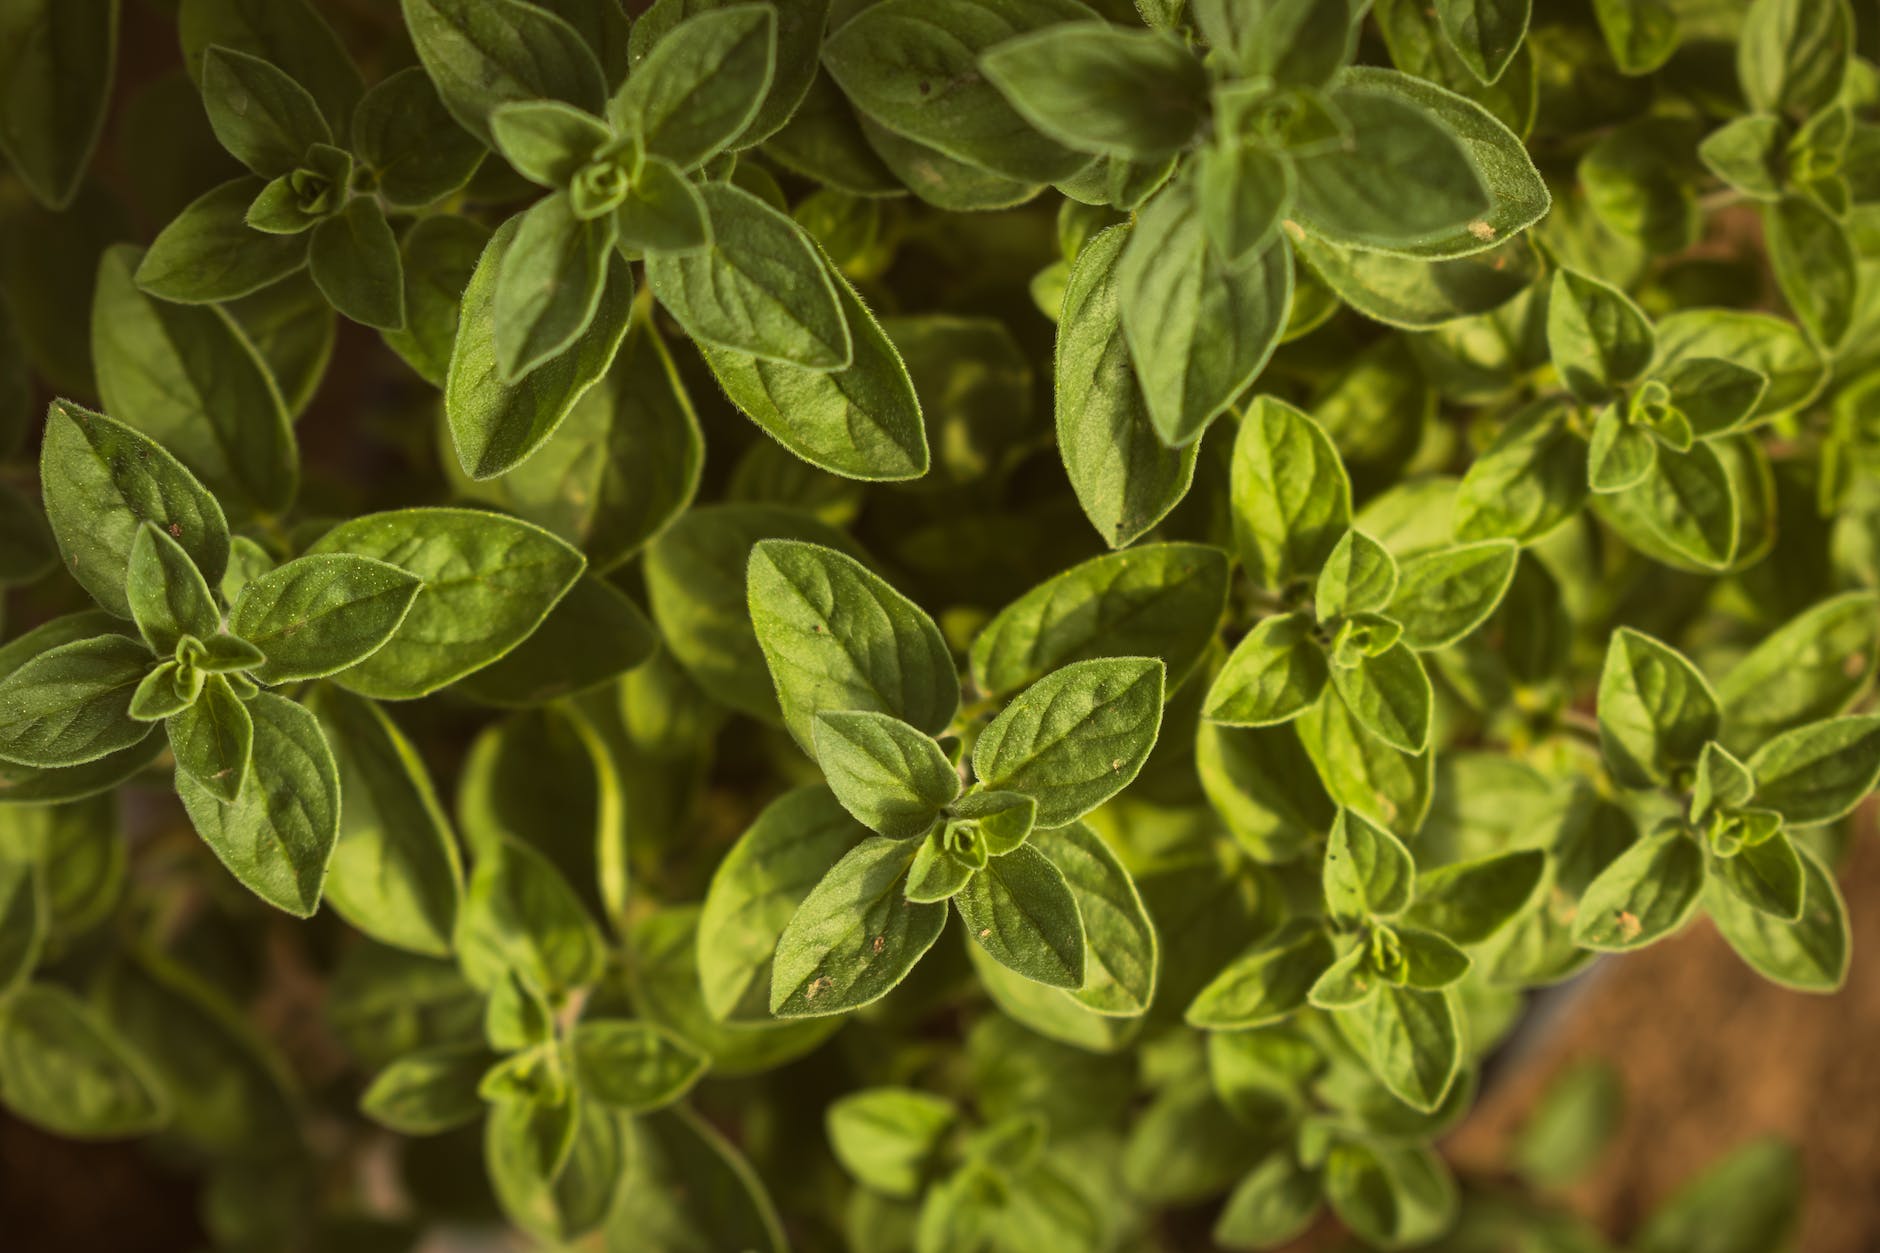
7. Oregano: Antimicrobial Powerhouse
Oregano is known for its antimicrobial properties, thanks to its high concentration of compounds like carvacrol. It can help combat infections and bolster the immune system. Oregano oil is a concentrated form that can be added to your health regimen.
8. Reishi Mushroom: Immune Modulator
Reishi is an adaptogenic mushroom that supports immune function by modulating the immune response. It enhances the body’s ability to adapt to stressors and maintain equilibrium. Reishi can be consumed as a supplement or in powdered form added to beverages.
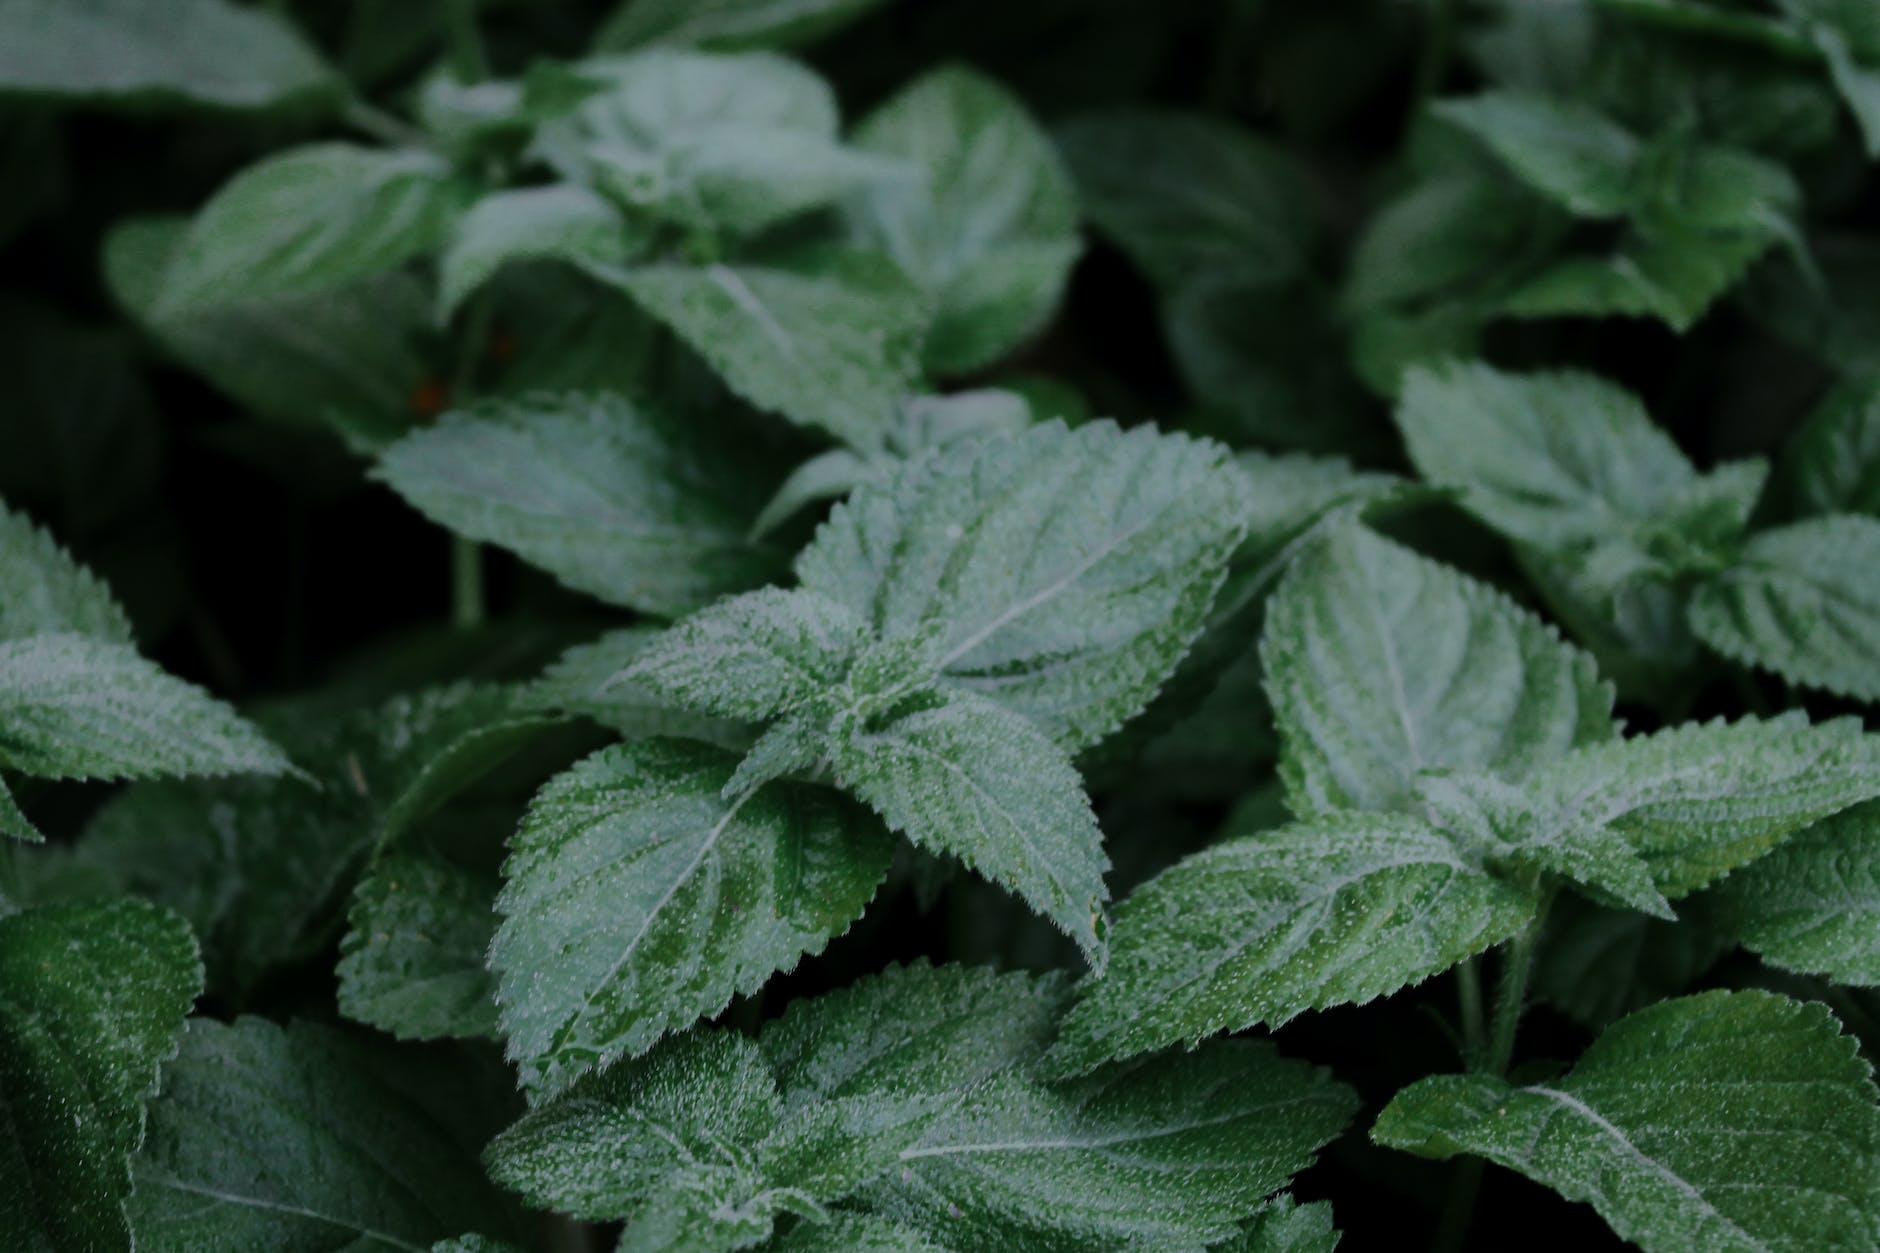
9. Lemon Balm: Stress Relief and Wellness
Lemon balm is a calming herb that helps reduce stress and promote relaxation. Chronic stress can weaken the immune system, so incorporating lemon balm into your routine can indirectly support immunity.
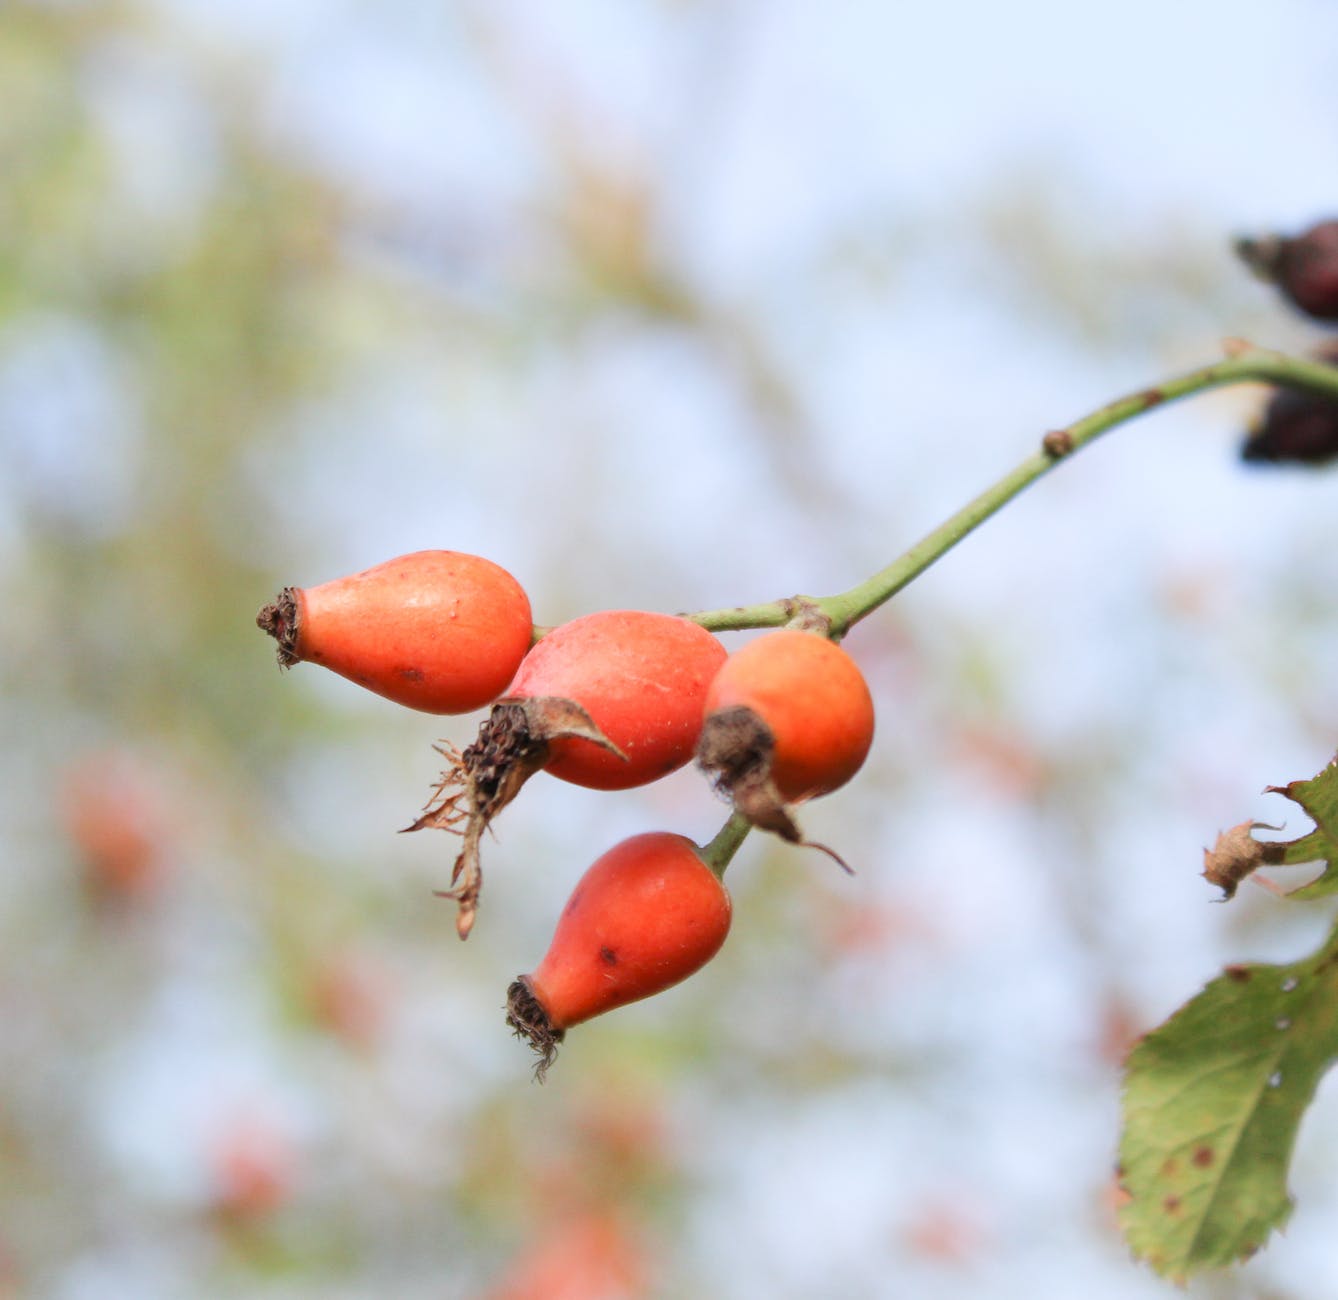
10. Rosehip: Vitamin C Boost
Rosehip is rich in vitamin C, a powerful antioxidant that supports immune health. Adding rosehip tea to your daily regimen can provide a natural vitamin C boost to help your body ward off infections.
Nature has provided us with a treasure trove of healing herbs that can fortify our immune systems and promote overall wellness. By incorporating these herbs into your daily routine, you can empower your body’s natural defense mechanisms and enjoy the benefits of a stronger immune response. As always, consult with a healthcare professional before introducing new herbs or supplements, especially if you have preexisting medical conditions or are taking medications. Embrace the power of nature’s remedies and nurture your well-being with these immune-boosting herbs.
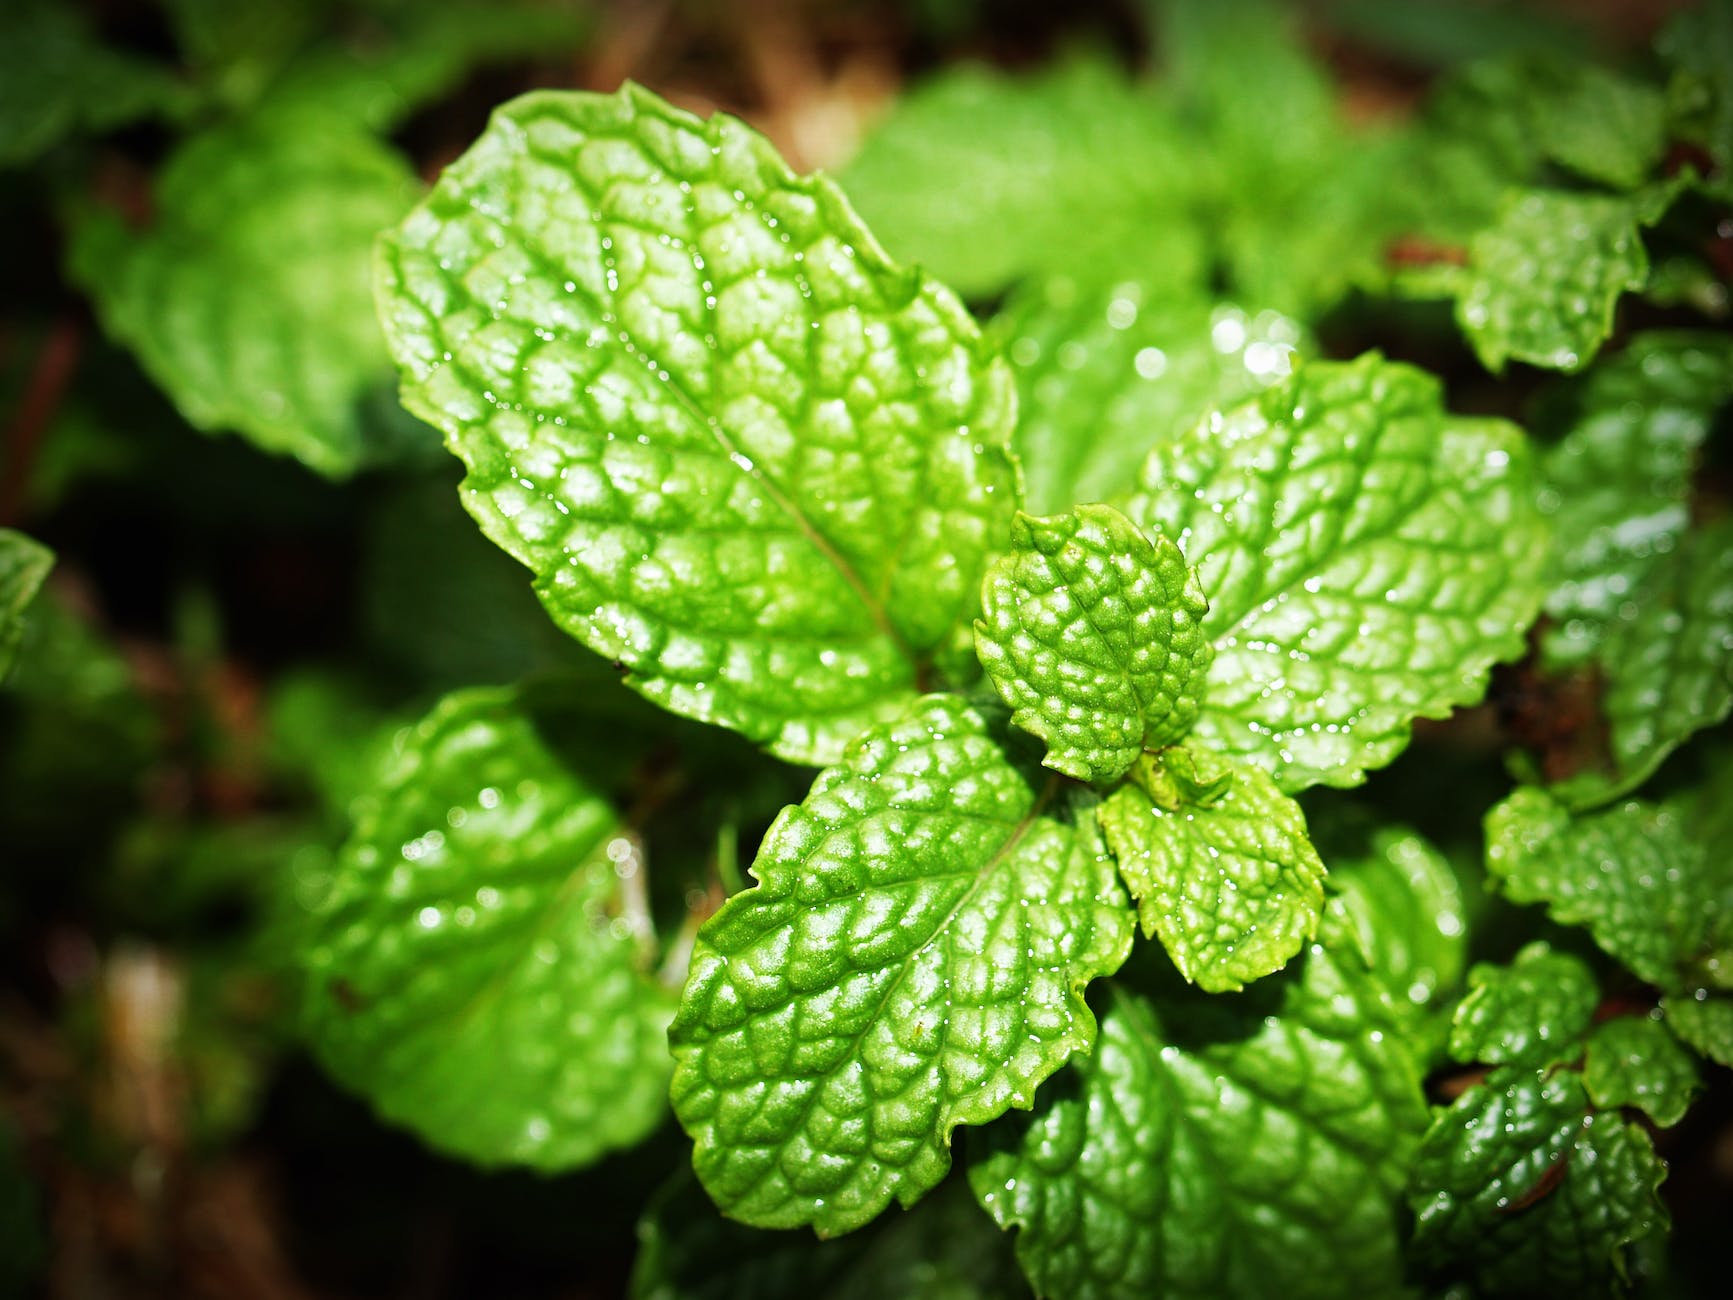
Mint, with its invigorating aroma and refreshing flavor, is a versatile herb that has been celebrated for its multitude of benefits for centuries. From soothing stomach troubles to spicing up culinary creations, mint’s role in promoting both health and taste is truly remarkable. In this blog post, we’ll delve into the enchanting world of mint and uncover the diverse benefits it brings to our lives.
1. Aids Digestion and Relieves Indigestion:
Mint has been traditionally used to alleviate digestive discomfort. Its natural compounds, including menthol, can relax muscles in the gastrointestinal tract, making it an excellent choice for soothing indigestion, bloating, and gas. Sipping on a cup of mint tea after a meal can provide much-needed relief.
2. Sensational Stress Relief:
Inhaling the soothing aroma of mint can have a calming effect on the mind and body. The scent of mint essential oil has been linked to reducing stress and anxiety, making it a popular choice for aromatherapy and relaxation rituals.
3. Respiratory Refreshment:
Mint’s menthol content can help open up airways and ease breathing. This is why mint is often found in cough drops, throat lozenges, and inhalers. Adding a few drops of mint oil to hot water for steam inhalation can provide quick relief from congestion.
4. Cooling and Refreshing:
Mint’s natural cooling properties make it a popular ingredient in summer beverages and dishes. Mint-infused water, lemonades, and iced teas can help beat the heat and refresh your senses.
5. Skin Soothing Superstar:
Mint’s anti-inflammatory and antimicrobial properties make it beneficial for skin health. It can help soothe skin irritations, reduce redness, and even provide relief from itching caused by insect bites.
6. Enhances Focus and Cognitive Function:
The invigorating scent of mint has been shown to stimulate cognitive function and improve focus. Diffusing mint oil or using mint-infused products in your workspace can boost alertness and mental clarity.
7. Oral Health Ally:
Mint’s antibacterial properties can help combat bacteria in the mouth, making it a natural breath freshener. Chewing on mint leaves or using mint-infused mouthwash can contribute to improved oral hygiene.
8. Nausea Relief:
Mint has a long history of use for alleviating nausea. Whether due to motion sickness, morning sickness during pregnancy, or other causes, the aroma of mint and its ability to calm the stomach can provide relief.
9. Culinary Magic:
Beyond its health benefits, mint’s culinary uses are endless. It adds a burst of flavor to both sweet and savory dishes. From salads and sauces to desserts and beverages, mint’s vibrant taste can elevate a wide range of recipes.
10. Antioxidant Power:
Mint is rich in antioxidants, including vitamin A and various phytonutrients. These antioxidants help combat oxidative stress and may contribute to overall well-being.
As we’ve explored, mint is much more than just a fragrant herb. Its array of benefits, from digestive support to mental clarity, make it a valuable addition to both our wellness routines and culinary endeavors. Whether you’re savoring a cup of mint tea, indulging in a mint-infused dessert, or using mint oil for relaxation, this versatile herb has something delightful and beneficial for everyone. So, go ahead and embrace the marvelous world of mint to enhance your health and your palate.
Growing Mint
Growing mint can be a rewarding and relatively easy endeavor. Mint is a hardy herb that thrives in various growing conditions, making it suitable for both garden beds and containers. Here’s a step-by-step guide on how to grow mint:
1. Choose a Growing Location: Mint prefers partial to full sunlight. It can tolerate some shade, but it will grow more vigorously with more sun. Select a location with well-draining soil to prevent waterlogging, as mint does not thrive in overly wet conditions.
2. Decide on Container vs. Garden Bed: Mint has a tendency to spread rapidly, so many gardeners prefer to grow it in containers to contain its growth. If planting in a garden bed, consider using barriers like plastic edging or planting mint in a container buried in the ground to prevent it from spreading too much.
3. Prepare the Soil: If planting in a garden bed, prepare the soil by loosening it and incorporating compost for improved drainage and fertility. If growing in a container, use a well-draining potting mix.
4. Choose Mint Varieties: There are several mint varieties available, each with its own unique flavor profile. Common varieties include spearmint, peppermint, chocolate mint, and pineapple mint. Choose the variety that suits your taste preferences and intended uses.
5. Planting Mint: If planting from seeds, sow them in shallow rows and lightly cover with soil. If using established mint plants, you can either propagate from cuttings or purchase young plants from a nursery. Plant mint cuttings or young plants at the same depth they were growing in their original container.
6. Spacing: If planting in a garden bed, space mint plants about 18 to 24 inches apart to allow for their spreading growth habit. In containers, one plant per 12-inch diameter pot is generally sufficient.
7. Watering: Keep the soil consistently moist, but not soggy. Mint prefers slightly damp soil. Water at the base of the plant to avoid wetting the leaves, which can make the plant susceptible to diseases.
8. Fertilization: Mint is a relatively low-maintenance herb and doesn’t require heavy fertilization. You can apply a balanced, slow-release fertilizer in the spring to provide nutrients for the growing season.
9. Pruning: Regular pruning is essential to keep mint from becoming too invasive. Pinch back the tips of the stems to encourage bushier growth and prevent the plant from becoming leggy.
10. Harvesting Mint: You can start harvesting mint leaves once the plant is established and has enough foliage. Harvest by snipping the leaves just above a set of leaves to encourage new growth. Regular harvesting will also help control the plant’s growth.
To dry mint, spread them out in a single layer in a cool, dry place away from direct sunlight. Once they’re completely dry, store them in an airtight container in a cool, dark location. Dried mint can be used for teas, infused oils, and more. I use these mesh drying racks in a cool, dark room (we have a basement pantry that works great for this). Allow them to dry completely.
The other, much quicker way to dry herbs is with a dehydrator. It’s best to dry herbs on a very low temperature setting to retain its beneficial and medicinal compounds. We set our dehydrator to 110°F or below (or use the lowest setting available) for 12-24 hours.
11. Preventing Overgrowth: Mint has a tendency to spread rapidly through underground runners (rhizomes). To prevent overgrowth, regularly trim the edges of the plant and remove any runners that extend beyond the desired planting area.
12. Winter Care: In colder climates, mint may die back in the winter. Mulching around the base of the plant can help protect the roots from freezing temperatures.
By following these steps, you can enjoy a bountiful harvest of fresh and flavorful mint leaves for culinary uses, teas, and more. Just be mindful of its spreading tendencies and take steps to keep it in check if needed.
When autumn arrives, the scent of ripe apples and the crunch of fallen leaves fill the air. It’s the perfect time to transform this seasonal favorite into a wholesome and delectable treat. In this blog post, we’re diving into the world of homemade apple chips – a simple, nutritious, and utterly satisfying snack that captures the essence of fall in every bite.
Apple chips are an excellent alternative to traditional store-bought snacks. Packed with fiber, vitamins, and natural sweetness, they offer a guilt-free indulgence for both kids and adults. These crispy delights are easy to make, and their satisfying crunch makes them a perfect on-the-go snack.
Ingredients:
4-5 medium-sized apples (choose firm and flavorful varieties)
1 tablespoon lemon juice (to prevent browning)
Optional: cinnamon or other spices for flavor (pumpkin pie spice works well!)
Instructions:
1. Prep the Apples:
Wash and dry the apples thoroughly. Leave the skin on for added nutrients and color.
Using a sharp knife or a mandoline slicer, thinly slice the apples into uniform rounds. Aim for slices about 1/8-inch thick.
2. Prevent Browning:
To prevent the apple slices from browning, place them in a large bowl of water mixed with lemon juice. Gently toss to coat.
3. Choose Your Flavor:
If desired, add a sprinkle of cinnamon or other spices to the water to infuse the apple slices with extra flavor. Cinnamon adds a warm and cozy touch that complements the natural sweetness of the apples.
4. Dry the Slices:
Drain the apple slices and pat them dry with paper towels. Lay them in a single layer on a clean, dry surface, such as a baking sheet.
5. Oven Method:
Preheat your oven to 200°F (93°C).
Place the apple slices on a baking sheet lined with parchment paper. Make sure the slices do not overlap.
Bake the apple slices in the preheated oven for about 1.5 to 2 hours, or until they are crisp and no longer soft in the center.
Keep an eye on them towards the end to avoid overcooking.
6. Dehydrator Method:
If you have a food dehydrator, arrange the apple slices on the dehydrator trays, ensuring they don’t touch.
Follow the manufacturer’s instructions for dehydrating apples, typically around 125-135°F (51-57°C), for about 6-8 hours or until they’re crisp.
7. Cool and Enjoy:
Once the apple chips are done, remove them from the oven or dehydrator and let them cool on a wire rack. They will continue to crisp up as they cool.
8. Store Your Apple Chips:
To keep your apple chips crisp, store them in an airtight container or a resealable bag. If any moisture gets in, they may lose their crunch.
Feel free to experiment with different apple varieties, spice blends, or even a drizzle of honey before drying for added sweetness.
Homemade apple chips are a simple and delightful way to enjoy the flavors of fall in a nutritious snack. With just a few steps, you can transform fresh apples into crispy, satisfying treats that are perfect for satisfying cravings or packing in lunchboxes. By making your own apple chips, you’re not only indulging in a delicious snack but also celebrating the season’s bounty in a wholesome and enjoyable way. So, grab your apples, slice away, and savor the crisp delights of homemade apple chips!
When it comes to raising backyard chickens, their health and happiness are top priorities. Did you know that certain herbs can play a significant role in enhancing your chickens’ overall well-being? From promoting good digestion to deterring pests, incorporating these natural wonders into your coop and yard can lead to healthier, happier hens. In this blog post, we’re delving into the world of herbs and sharing the best ones to consider for your feathered friends.
1. Oregano: Boosting Immunity and Digestion
Oregano is a powerhouse herb known for its antimicrobial properties. When offered to chickens, it can help support their immune systems and aid in digestion. You can offer fresh oregano leaves, or even dry and crush them to mix with their feed.
2. Lavender: Calming and Pest-Repelling
Lavender’s soothing aroma isn’t just for humans. Chickens can benefit from its calming effects, helping to reduce stress and promote relaxation. Additionally, lavender’s fragrance acts as a natural pest repellent, keeping bothersome insects at bay.
3. Mint: Cooling and Digestive
Mint offers more than just a refreshing scent – it can help cool your chickens in hot weather. Furthermore, mint aids in digestion and can contribute to overall gut health. Offer fresh mint leaves in their coop or as a treat.
4. Thyme: Respiratory and Antibacterial
Thyme is a natural respiratory aid and can help chickens with any respiratory issues they may face. Its antibacterial properties can also contribute to a cleaner and healthier environment in the coop.
5. Rosemary: Stimulating and Repelling
Rosemary’s invigorating aroma can stimulate your chickens’ senses, encouraging activity and exploration. Additionally, rosemary can deter pests and parasites, making it a valuable addition to your coop and yard.
6. Sage: Egg-Laying and Antioxidant
Sage is believed to have properties that support healthy egg-laying. Its antioxidant properties can also contribute to your chickens’ overall well-being. Offer sage in moderation as a treat or add it to their nesting boxes.
7. Parsley: Nutrient-Rich and Fresh Breath
Parsley is rich in vitamins and minerals that can supplement your chickens’ diet. Plus, its chlorophyll content can help freshen their breath. Chop up fresh parsley and offer it as a nutrient-packed treat.
8. Marigold: Vibrant Yolks and Pest Control
Marigold petals can enhance the color of your chickens’ egg yolks, giving them a deep, rich hue. Additionally, marigolds can repel certain pests and add a pop of color to your chicken area.
How to Offer Herbs:
Fresh Leaves: Offer herbs directly to your chickens as part of their daily foraging.
Hanging Bundles: Hang bundles of herbs in the coop for chickens to peck at.
Coop Bedding/nesting box: Scatter dried herbs in the coop bedding to enhance the scent and repel pests.
Embracing the power of herbs in your backyard chicken keeping routine can bring about a range of benefits – from improved digestion and respiratory health to pest control and stress reduction. By introducing these natural remedies, you’re not only enhancing the quality of your chickens’ lives but also fostering a holistic approach to their well-being. As you incorporate these herbs into your coop and yard, you’ll witness firsthand the positive impact they can have on your happy hens.
Prep Your Pine Cones The only downside to collecting pine cones from outside is they’re likely to have dirt, sap, or even small bugs on them. But don’t let that deter you. It’s easy to clean them. Simply give the pine cones a good rinse in the sink. You can use an all natural dish soap, castille soap or just water. The scent from the store bought dish soap will linger (and possibly interfere with the oils) so I don’t recommend using anything other than an all natural soap.
Then, place the pine cones on a foil-lined cookie sheet. Bake them at a low heat (roughly 200 degrees Fahrenheit) for about an hour. Baking works to preserve the pine cones, opens them up and gets rid of any creepy crawlers. Keep an eye on them throughout the entire baking process to be sure they do not burn. While it is unlikely that they will burn, it is important to take them out immediately if it looks like they are. Finally, remove them from the oven, and wait for them to cool before proceeding to the next step.
Apply essential oil(s) to scent your pine cones, choose any essential oils that you like. You can apply just one type of oil, or you can mix and match. For instance, cinnamon and vanilla blend together to form a pleasant, warming aroma. Place the pine cones in a gallon-size zip-top bag, and pour at least 10 drops of essential oil right inside. You can always add more drops if you feel the scent isn’t strong enough. Seal and shake the bag to spread the essential oil on the pine cones, and then leave them in the bag for a week. Finally, remove them from the bag, and make sure they’re dry before using them to decorate. You also can use a spray bottle for a quicker and more uniform application of the essential oil. Fill the bottle with a few ounces of water and about 10 drops of essential oil to start. (You always can add more.) Then, spray the pine cones, and place them inside the gallon-size zip-top bag. With this method, they only need to remain in the bag for about a day because they’ve taken a more direct hit of essential oil thanks to the spray bottle. Finally, remove the pine cones from the bag, and let them dry completely before placing around your home.
Repeat as Needed Once the pine cones are out on display for a few weeks, they’ll start to lose their fragrance. You can continue to add essential oil as needed to refresh the scent. You don’t have to use the same scents that you previously used on the pine cones, as long as the previous scents aren’t detectable to the point that they clash with the new scents.
As the air turns crisp and leaves begin to don their autumnal hues, it’s the perfect time to indulge in the comforting flavors of fall. What better way to embrace the season than with a steaming bowl of creamy, velvety pumpkin soup? In this blog post, we’re sharing our favorite pumpkin soup recipe that captures the essence of fall in every spoonful. Get ready to savor the warmth and richness of this seasonal delight.
Start by slicing the pumpkin in half and removing the seeds and stringy pulp.
Cut the pumpkin into smaller pieces for easier roasting.
Place the pumpkin pieces on a baking sheet, drizzle with olive oil, and roast in a preheated oven at 400°F (200°C) for about 45-60 minutes or until the pumpkin is tender.
2. Make the Pumpkin Puree:
Once the pumpkin is roasted and cooled, scoop out the flesh and blend it until smooth. You should have about 4-5 cups of pumpkin puree.
3. Sauté the Aromatics:
In a large pot, heat olive oil or butter over medium heat.
Add the diced onion and sauté until translucent.
Stir in the minced garlic and cook for another minute until fragrant.
4. Add the Pumpkin and Spices:
Add the pumpkin puree to the pot and stir to combine with the onion and garlic.
Sprinkle in the ground cinnamon and nutmeg, and season with salt and pepper.
5. Simmer and Blend:
Pour in the vegetable or chicken broth and stir to incorporate.
Allow the mixture to come to a gentle simmer, then use an immersion blender to puree the soup until smooth. If you don’t have an immersion blender, carefully transfer the mixture to a regular blender in batches and blend until smooth.
6. Add Creaminess:
Reduce the heat to low and stir in the coconut milk or heavy cream.
Let the soup simmer for an additional 5-10 minutes to allow the flavors to meld.
7. Taste and Adjust:
Taste the soup and adjust the seasonings, adding more salt, pepper, or spices if needed.
8. Serve and Garnish:
Ladle the pumpkin soup into bowls and garnish with your choice of toppings.
Toasted pumpkin seeds, a dollop of sour cream, croutons, or a sprinkle of chopped parsley all make excellent options.
9. Enjoy and Embrace Fall:
Grab a spoon, cozy up with your bowl of pumpkin soup, and relish the warmth and comfort of autumn flavors.
When the weather turns chilly and the leaves begin to fall, there’s nothing quite as inviting as a bowl of homemade pumpkin soup. With its creamy texture, aromatic spices, and rich pumpkin flavor, this recipe captures the essence of fall in every spoonful. Whether enjoyed as a comforting meal on its own or as a delightful appetizer, this ultimate pumpkin soup is a culinary celebration of the season’s bounty. So, gather your ingredients, stir up some coziness, and let the flavors of fall envelop you in warmth and contentment.
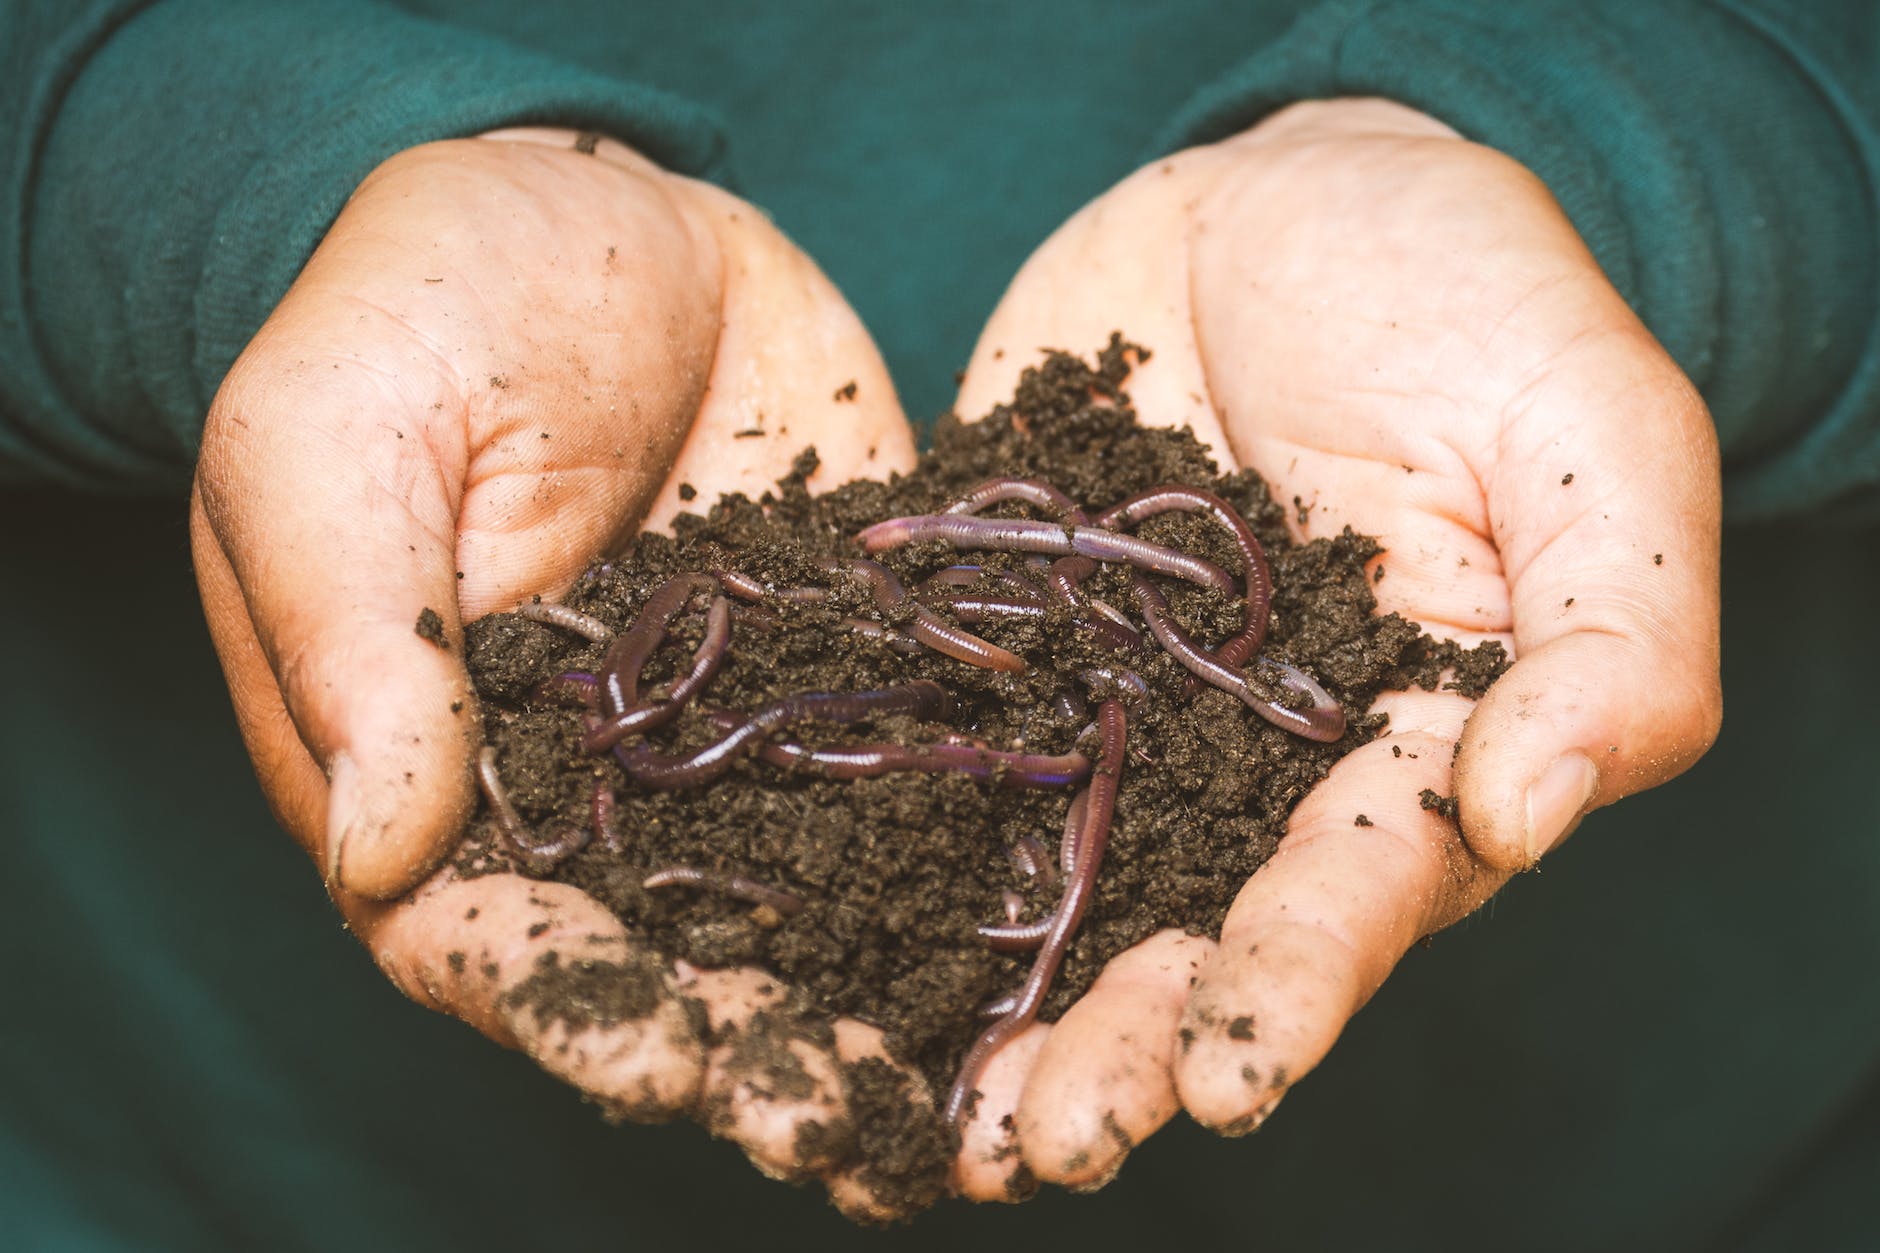
Imagine having a thriving ecosystem right in your garden that works tirelessly to improve soil quality, boost plant growth, and contribute to a more sustainable environment. Welcome to the world of worm farming! In this blog post, we’ll delve into the incredible advantages of setting up a worm farm and how these wriggly wonders can become your garden’s best allies.
1. Nature’s Nutrient Cyclers:
Worms, particularly red wigglers and Eisenia fetida, are experts at breaking down organic matter:
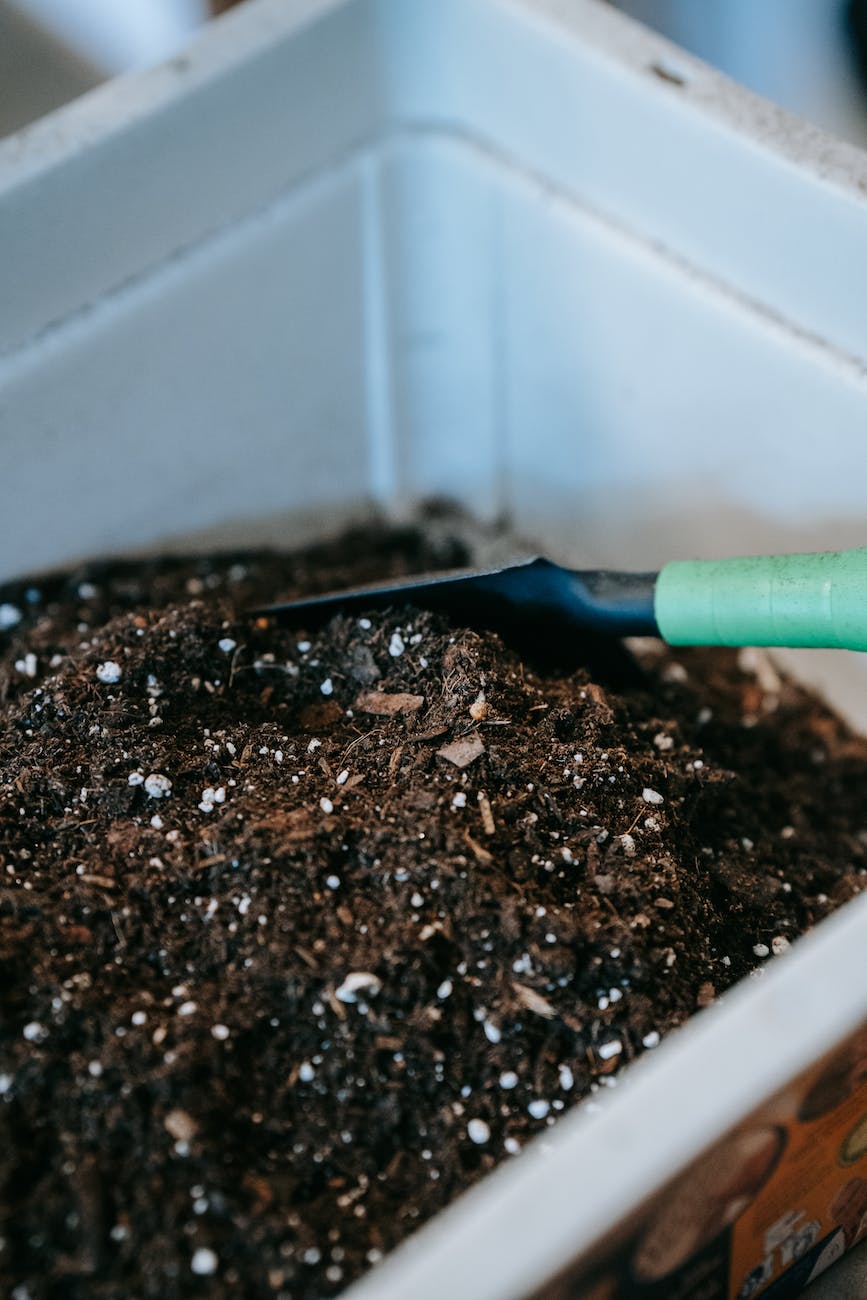
Vermicompost: The castings produced by worms, also known as vermicompost, are a nutrient-rich soil amendment that enhances plant health and growth.
Microbial Activity: As worms consume organic matter, their digestive process enriches the soil with beneficial microorganisms that promote nutrient availability.
2. Improved Soil Structure:
The activity of worms works wonders beneath the surface:
Aeration: Worm tunnels create natural air passages in the soil, enhancing oxygen circulation for healthier root systems.
Water Retention: Well-structured soil with worm channels retains water more effectively, reducing the risk of drought stress.
3. Enhanced Nutrient Availability:
Worm castings are a treasure trove of essential nutrients:
Slow Release: Nutrients in vermicompost are released slowly over time, providing a consistent supply to plants.
Mineral Enrichment: Worms break down minerals in organic matter, making them more accessible to plants.
4. Reduced Environmental Impact:
Worm farming contributes to sustainable gardening practices:
Waste Reduction: Worms consume kitchen scraps, reducing the amount of organic waste sent to landfills.
Less Synthetic Fertilizers: Vermicompost reduces the need for synthetic fertilizers, minimizing their environmental impact.
5. Enhanced Plant Growth and Yield:
Plants thrive in nutrient-rich soil:
Stronger Roots: The improved soil structure and nutrient availability lead to robust root systems.
Bountiful Harvests: Plants grown in worm-enriched soil often yield larger, healthier produce.
6. Easy and Low-Maintenance:
Worm farming is user-friendly:
Compact: A worm farm requires minimal space and can even be set up indoors.
Low Odor: When managed properly, worm farms produce little to no offensive odor.
Minimal Effort: Regular feeding and occasional maintenance are all that’s needed to keep the worms happy and productive.
Nature’s Cycles: Witnessing the process of organic matter breakdown and nutrient cycling fosters a deeper understanding of nature’s systems.
Educational Tool: Worm farming is a fantastic educational tool for children, teaching them about sustainability and the interconnectedness of ecosystems.
8. Versatility of Worm Castings:
Vermicompost has multiple applications:
Potting Mix: Incorporate worm castings into potting soil for healthier container plants.
Compost Tea: Brew vermicompost tea as a natural, nutrient-rich liquid fertilizer.
A worm farm is a small but powerful addition to your gardening toolkit. As nature’s soil scientists, worms tirelessly work to enrich your soil, enhance plant growth, and contribute to a greener planet. By embracing worm farming, you’re not only reaping the benefits of healthier gardens but also participating in a sustainable and eco-friendly practice that supports a thriving garden ecosystem. So, let your garden flourish with the assistance of these humble heroes – the worms!
Setting up a worm farm
Setting up a worm farm is a rewarding and environmentally friendly way to recycle kitchen scraps and create nutrient-rich vermicompost for your garden. Here’s a step-by-step guide to help you get started:
Step 1: Choose the Right Worms
The best worms for vermicomposting are red wigglers (Eisenia fetida) or red worms. These worms are voracious eaters and thrive in the conditions of a worm farm. Here is a great place to get composting worms.
Step 2: Select a Container
You can use various containers for your worm farm, such as plastic bins, wooden crates, or specialized worm bins available in gardening stores. Make sure the container has a tight-fitting lid to keep pests out. We use this one and it works great!
Step 3: Prepare Bedding
Create a comfortable bedding for the worms using shredded newspaper, cardboard, coconut coir, or a mix of these materials. Dampen the bedding until it feels like a damp sponge.
Step 4: Add Worms and Food
Place the worms on top of the bedding. Start by adding a small amount of kitchen scraps like fruit and vegetable peels, coffee grounds, and eggshells. Avoid adding dairy, meat, oily foods, and citrus.
Step 5: Maintain the Worm Farm
Here’s how to keep your worm farm healthy:
Feeding: As the worms settle in, gradually increase the amount of food scraps. Bury the food under the bedding to prevent fruit flies and odors.
Moisture: Keep the bedding moist, but not waterlogged. Sprinkle water when needed.
Temperature: Worms thrive in temperatures between 55-77°F (13-25°C). Avoid extreme heat and cold.
Ventilation: Drill small holes in the lid or sides of the container to ensure proper airflow.
Harvesting: After a few months, the bedding will turn into nutrient-rich castings. To harvest, move the bedding to one side of the container and add fresh bedding and food to the other. The worms will migrate to the new bedding, allowing you to collect the vermicompost.
Step 6: Use the Vermicompost
Once you’ve harvested the vermicompost, you can use it to enrich your garden soil or potting mix. Mix it into the soil to improve its structure and provide essential nutrients to your plants.
Tips for Success:
Start Small: Begin with a small worm farm and gradually expand as you become more familiar with the process.
Balanced Diet: Provide a mix of green and brown materials (food scraps and bedding) for a balanced diet for the worms.
Avoid Overfeeding: Don’t overfeed the worms; they will eat at their own pace.
No Chemicals: Avoid using chemicals or pesticides in your worm farm, as they can harm the worms.
Regular Check-ups: Check on your worms regularly to ensure they’re healthy and the conditions are optimal.
Creating a worm farm is a fun and educational way to reduce waste and improve your garden’s soil health. With a little care and attention, you’ll have a thriving ecosystem of worms working tirelessly to create nutrient-rich compost for your plants.