Gardening, Recipes, Vegetables

Zucchini Extravaganza: A Garden’s Green Goldmine of Recipes!


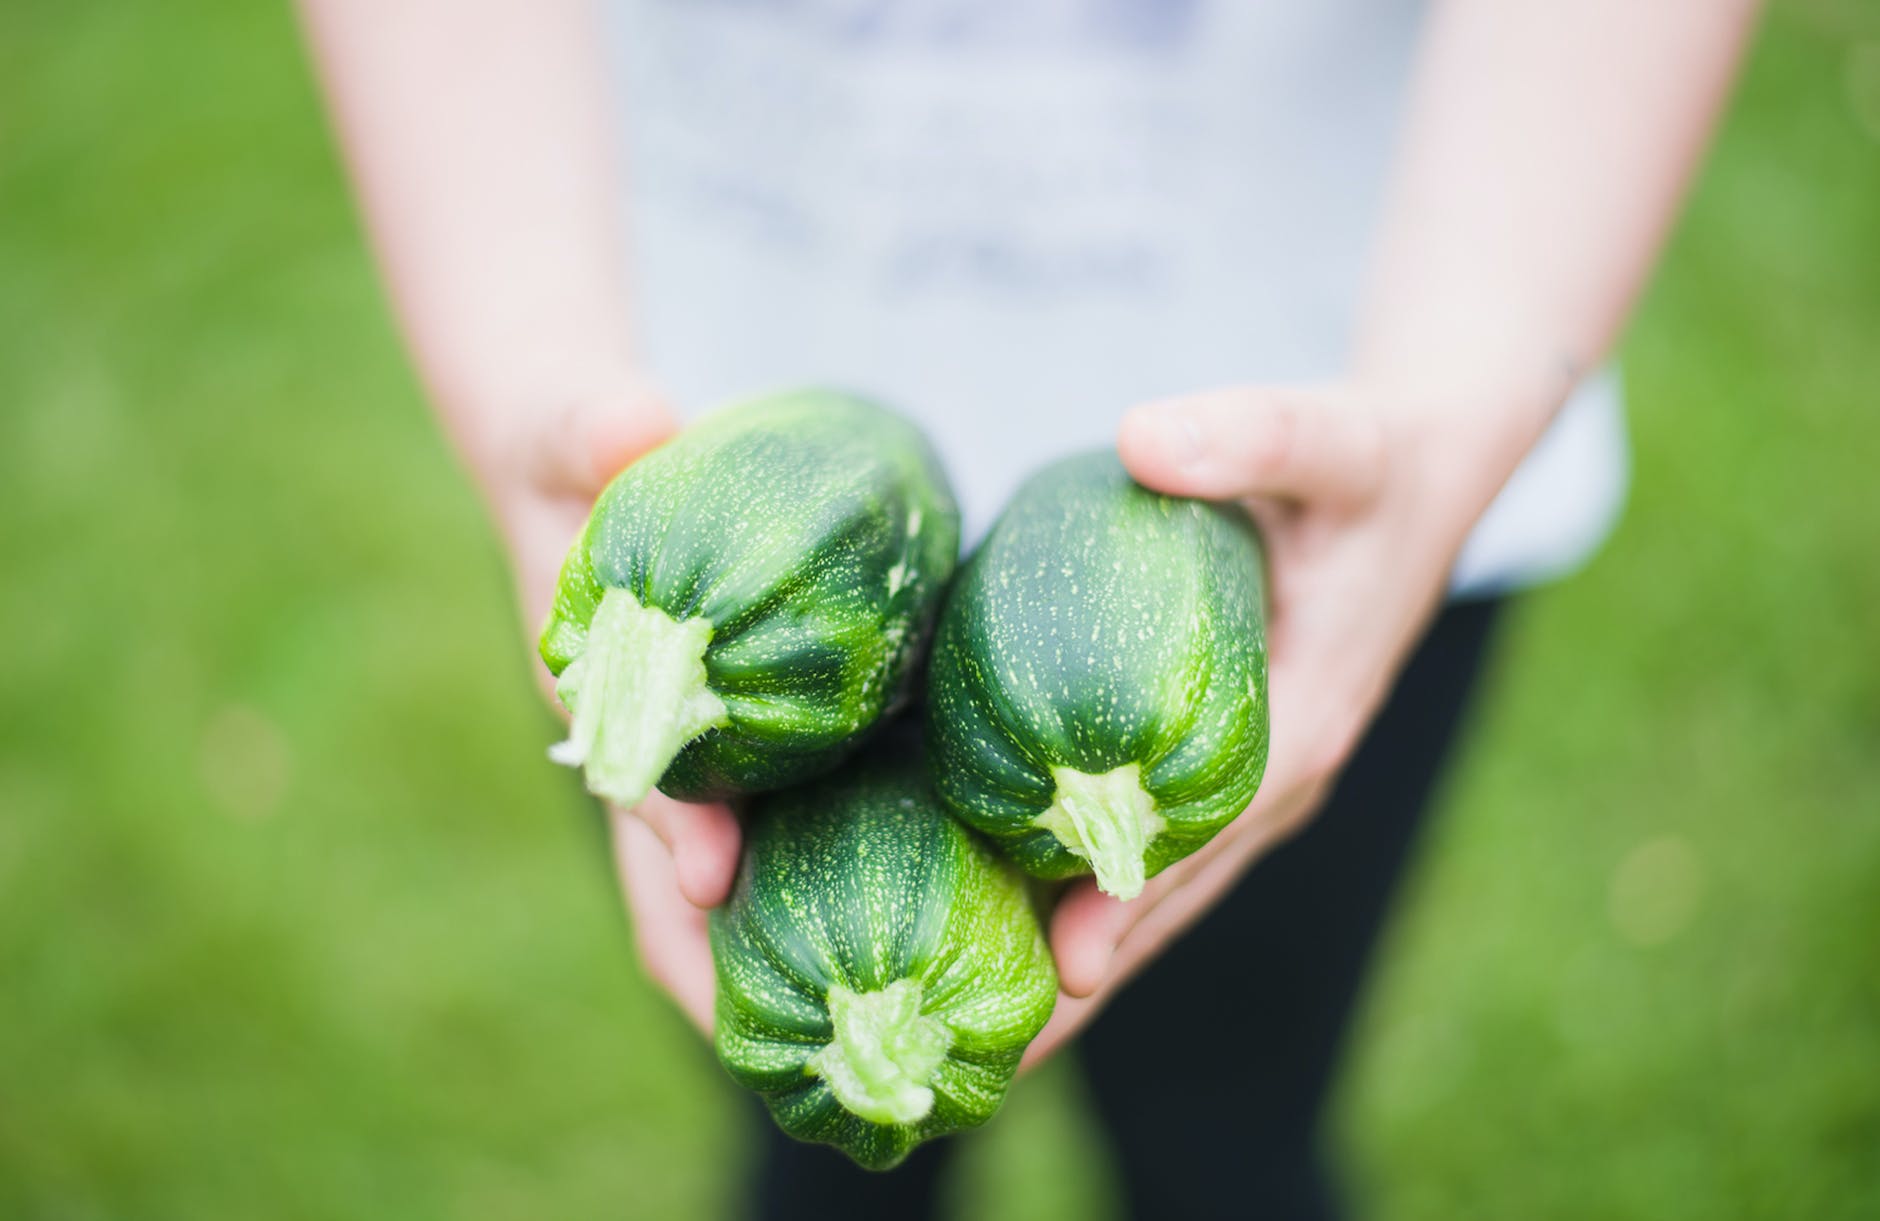
Ah, zucchini – that prolific green gem of the garden that seems to multiply overnight! If you’ve got a bumper crop of this summer squash and are wondering what to do with it all, you’re in for a treat. In this zucchini extravaganza, we’ll explore a variety of delicious and creative recipes to make the most of this versatile vegetable. From savory to sweet, zucchini’s got you covered!

1. Classic Zucchini Bread: A Sweet Beginning

Ingredients:

  • 2 cups grated zucchini
  • 2 1/2 cups all-purpose flour
  • 1 1/2 teaspoons baking powder
  • 1/2 teaspoon baking soda
  • 1 teaspoon ground cinnamon
  • 1/2 teaspoon ground nutmeg
  • 1/2 cup unsalted butter, softened
  • 1 cup granulated sugar
  • 2 large eggs
  • 1 teaspoon vanilla extract
  • 1/2 cup chopped nuts or chocolate chips (optional)

Instructions:

  1. Preheat your oven to 350°F (175°C) and grease a loaf pan.
  2. Squeeze excess moisture from the grated zucchini and set it aside.
  3. In a bowl, whisk together the flour, baking powder, baking soda, cinnamon, and nutmeg.
  4. In another bowl, cream the butter and sugar together until light and fluffy.
  5. Beat in the eggs, one at a time, followed by the vanilla extract.
  6. Gradually add the dry ingredients to the wet mixture, then fold in the grated zucchini and nuts/chocolate chips (if using).
  7. Pour the batter into the prepared loaf pan and bake for 55-60 minutes or until a toothpick inserted into the center comes out clean.
  8. Let it cool before slicing and savoring!

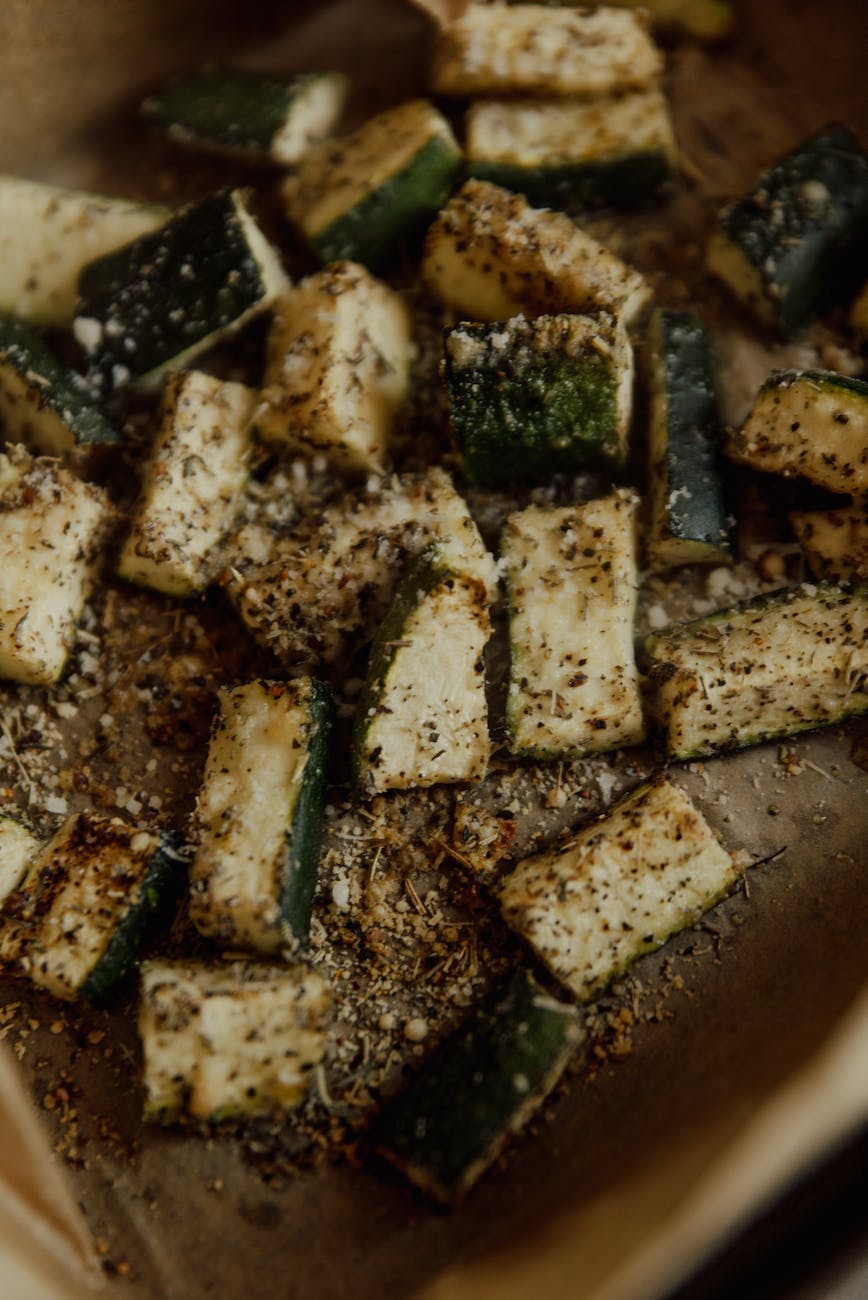
2. Zesty Zucchini Fritters: A Crispy Delight

Ingredients:

  • 2 cups grated zucchini
  • 1/2 cup grated Parmesan cheese
  • 1/4 cup breadcrumbs
  • 2 cloves garlic, minced
  • 1 large egg
  • 1/4 teaspoon salt
  • 1/4 teaspoon black pepper
  • Olive oil for frying

Instructions:

  1. Place the grated zucchini in a clean kitchen towel and squeeze out excess moisture.
  2. In a bowl, combine the grated zucchini, Parmesan cheese, breadcrumbs, minced garlic, egg, salt, and pepper.
  3. Heat olive oil in a skillet over medium-high heat.
  4. Drop spoonfuls of the zucchini mixture into the hot oil and flatten them with the back of a spatula.
  5. Cook for 2-3 minutes on each side or until golden brown and crispy.
  6. Drain on paper towels and serve with a dipping sauce of your choice.

3. Zucchini Noodles with Pesto: A Low-Carb Twist

Ingredients:

  • 4 medium zucchinis, spiralized into noodles
  • 1 cup fresh basil leaves
  • 1/2 cup grated Parmesan cheese
  • 1/4 cup pine nuts
  • 2 cloves garlic
  • 1/2 cup extra-virgin olive oil
  • Salt and pepper to taste

Instructions:

  1. In a food processor, blend the basil, Parmesan cheese, pine nuts, and garlic until well combined.
  2. While blending, slowly drizzle in the olive oil until you have a smooth pesto sauce.
  3. Season the zucchini noodles with salt and pepper.
  4. Toss the zucchini noodles with the pesto sauce until well coated.
  5. Serve immediately, garnished with extra Parmesan cheese and pine nuts if desired.

4. Stuffed Zucchini Boats: A Savory Surprise

Ingredients:

  • 4 medium zucchinis
  • 1 pound ground beef or turkey
  • 1 onion, diced
  • 1 bell pepper, diced
  • 2 cloves garlic, minced
  • 1 cup cooked rice or quinoa
  • 1 cup tomato sauce
  • 1 teaspoon Italian seasoning
  • Salt and pepper to taste
  • Shredded mozzarella cheese for topping (optional)

Instructions:

  1. Preheat your oven to 375°F (190°C).
  2. Cut the zucchinis in half lengthwise and scoop out the flesh, leaving a boat-like shell.
  3. In a skillet, brown the ground meat over medium heat. Drain excess fat if needed.
  4. Add the diced onion, bell pepper, and garlic to the skillet. Cook until the vegetables are tender.
  5. Stir in the cooked rice or quinoa, tomato sauce, Italian seasoning, salt, and pepper.
  6. Stuff each zucchini boat with the meat and vegetable mixture.
  7. Place the stuffed zucchinis in a baking dish and cover with foil.
  8. Bake for 25-30 minutes, or until the zucchinis are tender.
  9. If desired, top with shredded mozzarella cheese and bake for an additional 5 minutes or until the cheese is melted and bubbly.
  10. Serve your delicious zucchini boats hot and enjoy!

5. Chocolate Zucchini Brownies: A Sweet Surprise

Ingredients:

  • 1 1/2 cups grated zucchini
  • 1 cup all-purpose flour
  • 1/2 cup unsweetened cocoa powder
  • 1/2 teaspoon baking soda
  • 1/4 teaspoon baking powder
  • 1/4 teaspoon salt
  • 1/2 cup unsalted butter, melted
  • 1 cup granulated sugar
  • 2 large eggs
  • 1 teaspoon vanilla extract
  • 1/2 cup chocolate chips

Instructions:

  1. Preheat your oven to 350°F (175°C) and grease a 9×9-inch baking pan.
  2. Squeeze excess moisture from the grated zucchini and set it aside.
  3. In a bowl, whisk together the flour, cocoa powder, baking soda, baking powder, and salt.
  4. In another bowl, mix the melted butter and sugar until well combined.
  5. Add the eggs and vanilla extract to the butter-sugar mixture and stir until smooth.
  6. Gradually add the dry ingredients to the wet mixture, then fold in the grated zucchini and chocolate chips.
  7. Pour the batter into the prepared baking pan and spread it evenly.
  8. Bake for 25-30 minutes or until a toothpick inserted into the center comes out with a few moist crumbs.
  9. Allow the brownies to cool before cutting them into squares and indulging in chocolatey goodness!


From sweet to savory, these zucchini recipes are sure to delight your taste buds and make the most of your garden’s green bounty. Whether you’re enjoying zucchini bread for breakfast, zucchini fritters for lunch, or stuffed zucchini boats for dinner, this versatile vegetable offers endless culinary possibilities. So, get creative, get cooking, and savor the goodness of zucchini all summer long!

Gardening

How To Keep Your Garden Healthy In Winter

Old Man Winters’ arrival doesn’t mean that the Winter garden can be neglected. Keeping the garden on an even footing against the ravages that winter can bring is an ongoing. Neglecting proper garden closing chores and winter maintenance tasks is only a recipe for a headache in the spring. Follow a few of these winter garden tips and a bountiful spring will be waiting in a few months time.

Setting the winter garden table

An interesting to look at and healthy winter garden depends upon taking steps in the late fall or early winter. Clean up the garden. Make sure that any garden trash is picked up before the snow flies. If this “trash” is left behind it presents an opportunity for bacteria to find its way into any cuts in the plant or onto the plants roots. Bacteria growth, and possible disease, on the plant is the biggest danger to a winter garden.

Watch out for color when trimming

If you have had your garden for at least one winter season you know what has color during winter and what does not. Trim this color judiciously looking for maverick branches, but be sure to keep the overall form of the shrub so that winter color can shine in a uniform way. If you are not sure, leave it alone and get a feel for what has winter color for next winter. If a shrub has a winter bud on it, leave it be as this is where the flower will come from next spring.

Trim out the cut or torn limbs

Chances are that a torn or cut (looks like a knife cutting into an apple about an eight of an inch deep) limb will end up dangling, or on the ground, as winter progresses. Take care of it early and your garden will look sturdy and ready for whatever the winter has to offer. Look for a nodule on the limb (looks like a knuckle of sorts) and cut about one quarter of an inch above it on an angle for a proper cut. 

Weed to a clean ground

Weeds also present a messy problem through the winter. Not only will they decay and offer disease potential, they will also continue to grow their roots until the ground freezes hard. This will only make them more invasive in the spring. Besides, if you weed to a clean ground you will have a nice clean contrast to the dormant plants in the garden.

A nice clean edge

Unless you are going for a more informal look, give a nice edge job to your garden flower beds before the ground freezes. Not only will this make for a crisp look during the winter months, as the edge freezes, but it will put you one step closer to a solid start in spring.

To wrap or not to wrap

If you look at many winter gardens you may notice that people have wrapped burlap or some other material around their evergreen shrubs. Generally, this is to prevent a snow load or high wind from damaging the plant. Unless you have the potential for a snow load or predictable high winds this is not necessarily needed. The wind issue is an issue, but remember that all plants need air circulation, no matter what type of plant they may be. If you wrap a shrub/plant to tightly air circulation will diminish and present the opportunity for moisture build up and disease. If you wrap your shrubs make sure to do it securely but with air circulation in mind.

It cannot hurt to mound

Mounding around the base of a plant is intended to give the root systems of a shrub/plant a little extra insulation during hard winters. Depending upon which zone you happen to be gardening in the need for mounding rises and falls. In any case, you want to make sure that you compress the dirt of the mound with a firm push of the hands. This gets some of the air out of the mound and generally makes a mound of dirt look a bit nicer. It also shows that you took a little care in your gardening. This sometimes impresses people that visit your winter garden.

Trees are plants too

Take a few moments to assess your trees before the winter winds start to howl. Look for any branches that may have grown old, look to be growing across the desired vertical path of a properly trimmed tree or have died during the season. What you are looking for is any limb or branch that may rub constantly on another opening a wound in the bark. Generally, you would not want to cut a branch as winter approaches, or during the winter months, but sometimes you need to.

Gardening, Sustainability

Fall’s Bounty: Harvesting Seeds for a Thriving Garden Next Year!

Ah, fall—the season of cozy sweaters, pumpkin spice lattes, and, for all you green thumbs out there, the promise of a bountiful garden next year. While the trees shed their leaves, we gardeners are busy collecting seeds for the future. Join me on this journey as we dive into the exciting world of harvesting seeds in the fall, a practice that connects us to nature’s rhythm and guarantees a vibrant garden in the seasons to come.

The Art of Seed Harvesting:

Step 1: Timing is Everything

Fall is the perfect time to start harvesting seeds. As the days grow shorter and cooler, plants begin to focus their energy on producing seeds. The key is to keep an eye out for those seed pods and heads that are dry and brown. This indicates that they are ready for harvest.

Step 2: Gather Your Tools

Before you embark on your seed-harvesting adventure, gather a few essential tools:

  • Small bags or envelopes: For storing and labeling your seeds. I always use paper envelopes to avoid any moisture buildup.
  • Scissors or pruners: To snip seed heads or pods.
  • A marker: To label your seed packets.
  • A notebook: To jot down important details about your seeds.

Choosing the Right Seeds:

Not all seeds are created equal, and some are easier to harvest than others. Here are a few favorites that are perfect for beginners:

  1. Sunflowers: Their large, distinctive heads are easy to spot and collect.
  2. Marigolds: These vibrant flowers produce seeds that resemble tiny arrowheads.
  3. Nasturtiums: Their seed pods are easy to gather and add a peppery punch to salads. These are some of my favorite flowers in the garden!
  4. Basil: Wait for basil to bolt and produce seeds for next year’s pesto.
  5. Dill: these seeds smell amazing and are easy to harvest ones the dill is done producing and dry
  6. Cilantro: cilantro seeds are also super easy to harvest once the plant is dry

Cross-pollination and What You Need To Know:


Gardening isn’t just about planting seeds and watching them grow; it’s also about understanding the intricate dance of nature that happens right before our eyes. One of the most captivating aspects of gardening is cross-pollination, a natural process where plants exchange genetic material.

What is Cross-Pollination?

Cross-pollination occurs when pollen from one plant is transferred to the stigma of another plant, typically of the same species but a different variety. This process is essential for genetic diversity, leading to healthier and more adaptable plant populations. While some plants are self-pollinators, meaning they can fertilize themselves, many rely on pollinators like bees, butterflies, and even the wind to carry pollen from one flower to another.

Why Cross-Pollination Matters:

  1. Biodiversity: Cross-pollination increases genetic diversity, making plants more resilient to pests, diseases, and environmental changes.
  2. Hybridization: Cross-pollination can result in hybrid plants with unique characteristics, such as different colors, sizes, or flavors.
  3. Adaptation: Plants that cross-pollinate have a better chance of adapting to changing environmental conditions, ensuring their survival over time.

Common Cross-Pollinators in the Garden:

  1. Tomatoes: While many tomato varieties are self-pollinating, they can also cross-pollinate if grown in proximity. This can lead to exciting new tomato hybrids.
  2. Squash: Different varieties of summer and winter squash can cross-pollinate, resulting in intriguing squashes with unexpected shapes and colors.
  3. Zucchini and Cucumbers: These garden staples can cross-pollinate since they belong to the same family. You might end up with a cucumber that tastes slightly like zucchini or vice versa.
  4. Lettuce: Lettuce plants can cross-pollinate, leading to variations in leaf color, texture, and shape.

Preventing Unwanted Cross-Pollination:

While cross-pollination can lead to exciting surprises, it may not always be desirable. If you want to maintain the purity of a particular plant variety, follow these tips:

  1. Isolation: Plant different varieties of the same species as far apart as possible to reduce the chances of cross-pollination.
  2. Hand Pollination: For precise control, use a small paintbrush to transfer pollen from one flower to another. This is particularly useful for plants like squash.
  3. Timing: Plant varieties with different flowering times to avoid overlapping pollination periods.

Cross-pollination can definitely impact your next season’s crop, so for many (like myself) that plant a lot of different vegetables in close proximity – I buy new seeds each season that run this risk so I know I am going to get exactly what I want. But, it can be fun to experiement sometimes, too!

The Harvesting Process:

Once you’ve identified your target seeds, it’s time to start the harvesting process. Follow these general steps:

  1. Cut the Seed Heads or Pods: Use your scissors or pruners to carefully snip the seed heads or pods from the plant. Make sure to do this on a dry, sunny day when the plants are free of moisture.
  2. Drying: Place the seed heads or pods in a warm, dry location for about a week to ensure they’re completely dry. This prevents mold and rot during storage.
  3. Extraction: Once your seeds are dry, gently remove them from their seed heads or pods. Be patient; this can be a bit time-consuming but is incredibly rewarding.
  4. Labeling: Don’t forget to label your seed packets with the plant’s name, the date of harvest, and any other relevant information, such as flower color or special care instructions.

Here are a few seed saving items I use and love:

  1. A binder – I use this to hold and organize my seeds
  2. Postcard Sleeves – these fit your seed packets (your own or purchased) perfectly
  3. Seeds! – You’ll need plenty of seeds for your garden, especially those you aren’t able to harvest yourself or are trying out for the first time.

The Joy of Seed Saving:

Harvesting seeds in the fall isn’t just about saving money on next year’s garden; it’s a way to connect with the natural world and develop a deeper appreciation for your plants. Plus, there’s something truly magical about planting seeds you’ve collected yourself. It’s like tucking a piece of the past season into the ground, nurturing it, and watching it bloom anew.

As we bid farewell to another summer, remember that fall is not just about saying goodbye—it’s also about preparing for the future. Harvesting seeds in the fall is a delightful and rewarding practice that allows you to play a role in the circle of life in your garden. So, grab your pruners, embrace the crisp autumn air, and get ready to sow the seeds of future beauty and bounty in your garden. Happy harvesting!

Gardening, Sustainability

Permaculture: Gardening Like Mother Nature

Hello, fellow green thumbs and dirt enthusiasts! Today, we’re diving headfirst into the wonderfully weird world of permaculture. But hold onto your garden hats, because this ain’t your grandma’s gardening club. Permaculture is like gardening, but with a side of cosmic wisdom and a sprinkle of eco-friendly magic.

What the Heck is Permaculture?

Permaculture isn’t just a gardening method; it’s a lifestyle, a philosophy, and a quirky dance with Mother Nature herself. It’s like telling the planet, “Hey, let’s get cozy and grow some stuff together, but also, let’s keep it weird.”

Permaculture is all about observing how nature does its thing and then copying it. Picture this: You’re in your garden, and you spot a squirrel. Instead of chasing it away with a broom (admit it, we’ve all done it), you start taking notes. “Squirrel,” you write. “Good at planting acorns. Hmm.”

The Three Permaculture Ethics

Permaculture has three ethics that are as noble as they are amusing:

  1. Earth Care: This one’s a no-brainer. Take care of the planet like it’s your favorite pet hamster. Stroke its furry soil and make sure it gets enough sun (but not too much, we’re talking sunscreen for the Earth here).
  2. People Care: People are like plants. They need love, attention, and a decent amount of hydration. In permaculture, we build communities that thrive like a garden full of happy tomatoes.
  3. Fair Share: Don’t hog all the ripe apples! Share your bounty with your neighbors, or else your karma might end up as worm food.

Designing with Nature

Permaculture design is where the fun really kicks in. Instead of straight rows of vegetables, permaculturists design their gardens like a forest. It’s like creating a salad bowl where the lettuce, tomatoes, and cucumbers have a jam session together, swapping nutrients and stories about their latest compost pile gossip.

And here’s the kicker: permaculture doesn’t just grow food; it grows friendships. In a permaculture garden, you’re more likely to hear plants gossiping about their best fertilizers than see them squabbling over sunlight.

Chickens and Ducks as Garden Gurus

In the permaculture world, chickens and ducks aren’t just poultry; they’re the garden’s secret agents. They scratch, they peck, they patrol for pests, and they provide you with breakfast. It’s like having your own feathered garden ninjas. Here’s a little advice – don’t let your chickens free range your garden competely. They will eat almost everything – including the stuff you don’t want them to. Chicken manure is a fantastic fertilizer because it’s high in nitrogen. Here’s the catch – it’s STRONG so it needs to be composted first as to not burn your plants. We’ll go into composting details in later posts. Chickens also love to eat your weeds which is a great way to keep them happy and lower that food bill.

Plus, they have a hilarious sense of humor. Ever tried explaining to a chicken that it’s time to take a break from laying eggs? Good luck with that! They’re dedicated, even if it means producing enough eggs to fill a swimming pool. Unless of course you are in need of a bunch of eggs, in which case they will decide to take a break or molt.

Meditate with Mulch

In permaculture, mulch isn’t just a gardening tool; it’s a way of life. When you’re not spreading mulch, you’re probably meditating on it. Picture it: You, cross-legged in your garden, surrounded by a zen garden of mulch. Namaste, my friends. We use a locally made mulch from Black Forest Slash. This is a win-win. It’s local branches and slash that are then turned into a fantastic mulch that not only helps conserve water but adds nutrients back into the soil. Mulch will also act as a natural weed barrier.

Permaculture is like gardening’s whimsical, eco-conscious cousin who always brings homemade kombucha to family reunions. It’s about working with nature, not against it, and doing so with a touch of humor and a dash of cosmic insight. A great place to start with permaculture is researching Back to Eden Gardening.

What’s Back to Eden Gardening, Anyway?

Imagine your garden as a laid-back forest shindig where your plants are the groovy party animals. Back to Eden gardening is all about mimicking the natural world, where the soil is rich, moist, and teeming with life. It’s like Mother Nature herself threw a disco for your plants and invited them to dance in style.

Step 1: Mulch Like There’s No Tomorrow

You know that saying, “Mulch is the answer; what was the question?” Well, that’s basically the mantra of Back to Eden gardening. Mulch is like the velvet dance floor for your plant party.

Grab some wood chips, straw, or leaves, and pile ’em up like you’re making a mulch mountain. Spread it around your plants like you’re throwing confetti at a garden parade. The mulch keeps the soil moist, prevents weeds from crashing the party, and lets your plants shimmy their roots down to the rhythm of the Earth.

Step 2: Forget About Tilling (It’s So Last Season)

Tilling is like the garden equivalent of the Macarena – fun in the ’90s, but it’s time to move on. In Back to Eden gardening, you don’t disturb the soil like it owes you money. Just lay that mulch down and let the soil microbes, earthworms, and other underground party animals do their thing.

Remember, your garden is an underground nightclub, and the soil organisms are the DJs spinning the tunes (compost beats, anyone?). Tilling disrupts their groove, and we don’t want any upset earthworms on our dance floor.

Step 3: No Need to Fertilize (Nature’s Buffet Is Open)

Back to Eden gardening believes in letting your plants graze at the buffet of nature. The mulch breaks down over time, releasing nutrients and goodies for your plants to gobble up. It’s like the ultimate all-you-can-eat garden brunch!

Say goodbye to chemical fertilizers – they’re the uninvited guests at this organic garden soirée. Your plants will thank you with vibrant health and the best salsa moves this side of the garden fence.

Ben turning our compost pile

Step 4: Water Like You’re Serenading Your Plants

Watering your Back to Eden garden is like serenading your plants with a love song. You give them a slow, deep drink, and they respond with lush growth and radiant vibes.

The mulch helps retain moisture, so you don’t have to play garden DJ with your hose all day. Water when your plants are looking a bit parched, and watch them sway to the rhythm of hydration.

Step 5: Sit Back and Watch the Garden Disco Unfold

Now that you’ve set the stage for your garden’s dance-off, it’s time to be the VIP guest and enjoy the show. Kick back with a glass of iced tea and let your plants do their thing.

Watch as your garden transforms into a lush, vibrant discotheque of greenery. You’ll have tomatoes twerking, carrots cha-cha-ing, and peppers doing the salsa – it’s a garden party like no other!

So there you have it, folks – Back to Eden gardening, where mulch is king, tilling is taboo, and your plants are the life of the underground dance party. Get out there and let your garden boogie like it’s 1979!