DIY, Gardening, Sustainability

Sweeten Your Life and Save the World: Why You Should Have Bees on Your Homestead

Imagine a world without honey drizzling over warm biscuits or buzzing gardens filled with colorful flowers and bountiful harvests. Now, envision a homestead teeming with industrious little workers – bees! While bees are often associated with the painful prospect of getting stung, having a colony of these fuzzy pollinators can be a sweet addition to your homestead. In this entertaining blog post, we’ll explore why having bees on your homestead is a brilliant idea that promises to sweeten your life and help save the world.

  1. Honey: The Liquid Gold of Nature

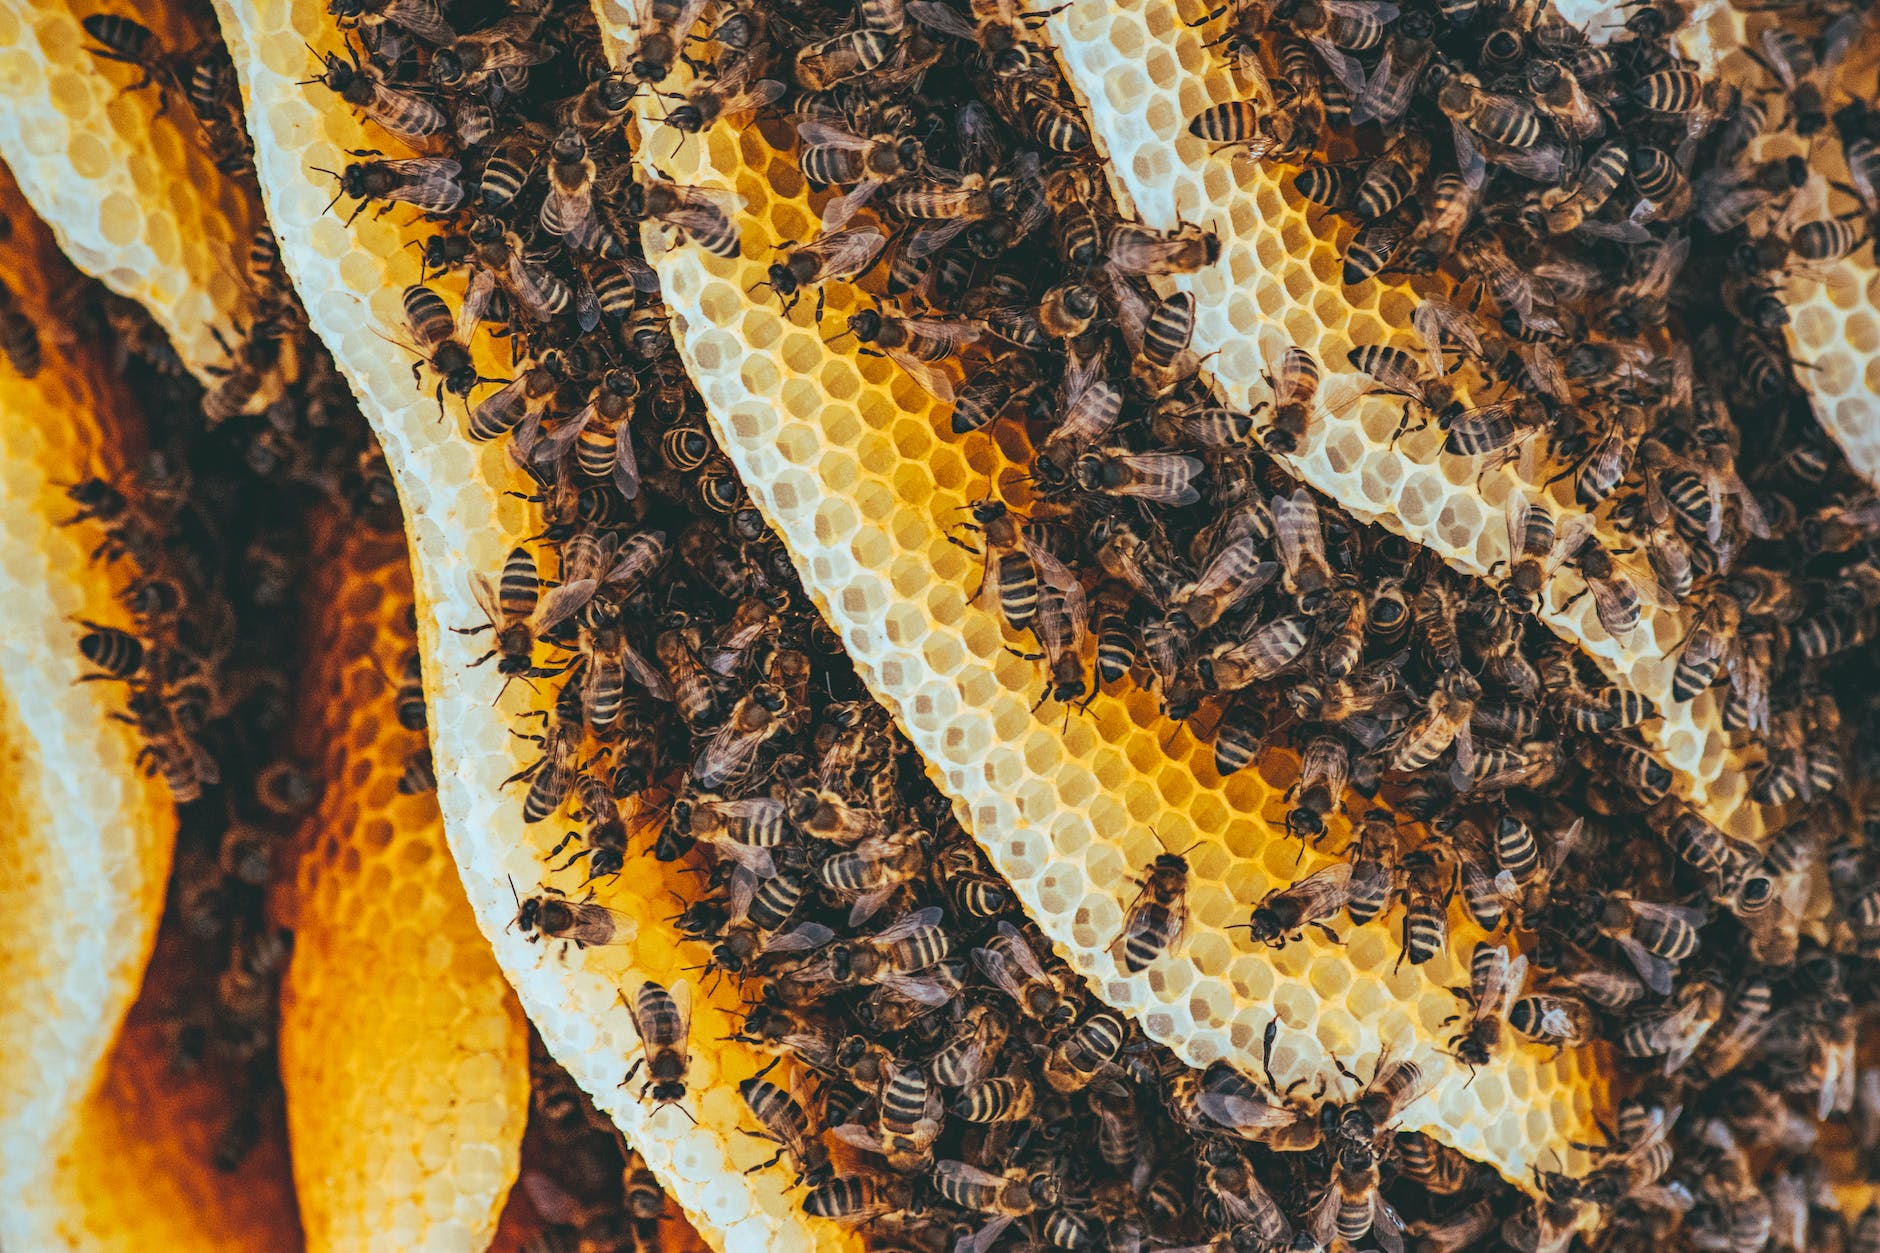
Let’s start with the most obvious and delectable reason: honey! Bees are like nature’s tiny alchemists, transforming nectar into the golden nectar of the gods. Having your own beehive means a constant supply of this sweet elixir right at your doorstep. Use it to sweeten your tea, drizzle it over pancakes, or concoct your homemade honey mustard dressing.

Honey is not just a sweet treat; it also offers a range of potential health benefits when consumed in moderation. Here are some of the health benefits of raw honey:

  1. Antioxidant Properties: Honey contains various antioxidants, such as flavonoids and phenolic compounds, which can help protect the body’s cells from oxidative stress and reduce the risk of chronic diseases.
  2. Wound Healing: Honey has been used for centuries as a natural remedy for wound healing. Its antibacterial and anti-inflammatory properties can help soothe and heal minor burns, cuts, and wounds.
  3. Cough and Throat Irritation Relief: Honey can be an effective remedy for soothing a sore throat and suppressing coughs. Its thick consistency coats the throat, reducing irritation, and its antimicrobial properties may help fight infections.
  4. Improved Sleep: Consuming honey before bedtime may improve sleep quality. Honey helps increase insulin levels slightly, which promotes the release of tryptophan in the brain. Tryptophan is then converted into serotonin and melatonin, hormones that regulate sleep.
  5. Digestive Health: Honey is known to have mild laxative effects and can help alleviate constipation when consumed in moderation. It may also aid in overall digestive health.
  6. Allergy Symptom Relief: Some people believe that consuming locally sourced honey may help alleviate allergy symptoms. The idea is that exposure to trace amounts of pollen in honey can desensitize the body to pollen allergies. However, scientific evidence supporting this claim is limited.
  7. Heart Health: Regular consumption of honey has been associated with potential improvements in heart health. It may help reduce risk factors for cardiovascular diseases, such as high blood pressure and high cholesterol levels.
  8. Blood Sugar Regulation: While honey is a natural sweetener, it has a lower glycemic index compared to sugar. This means it may cause a slower and smaller rise in blood sugar levels when consumed in moderation. However, people with diabetes should still monitor their honey intake and consult a healthcare provider.
  9. Antibacterial and Antifungal Properties: Honey’s natural composition, including low water content and acidity, can create an environment that inhibits the growth of bacteria and fungi. It has been used topically to treat minor skin infections.
  10. Weight Management: Replacing sugar with honey in some recipes may help reduce overall calorie intake. However, it’s essential to use honey in moderation, as it still contains calories.
  1. Pollination Powerhouse

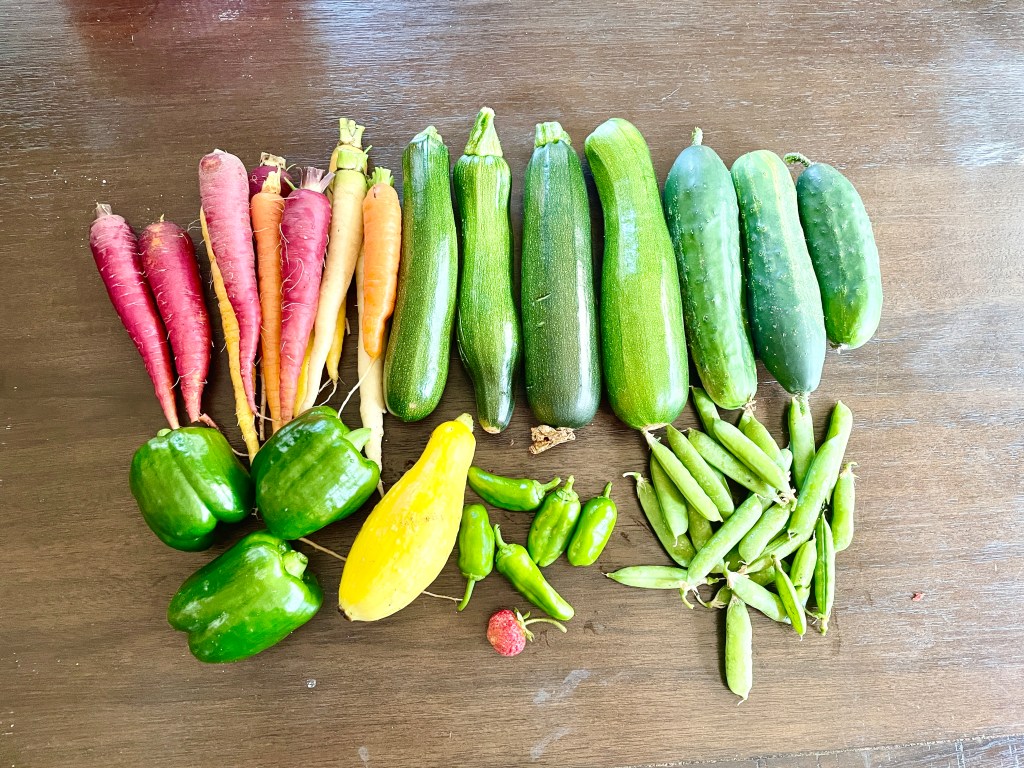
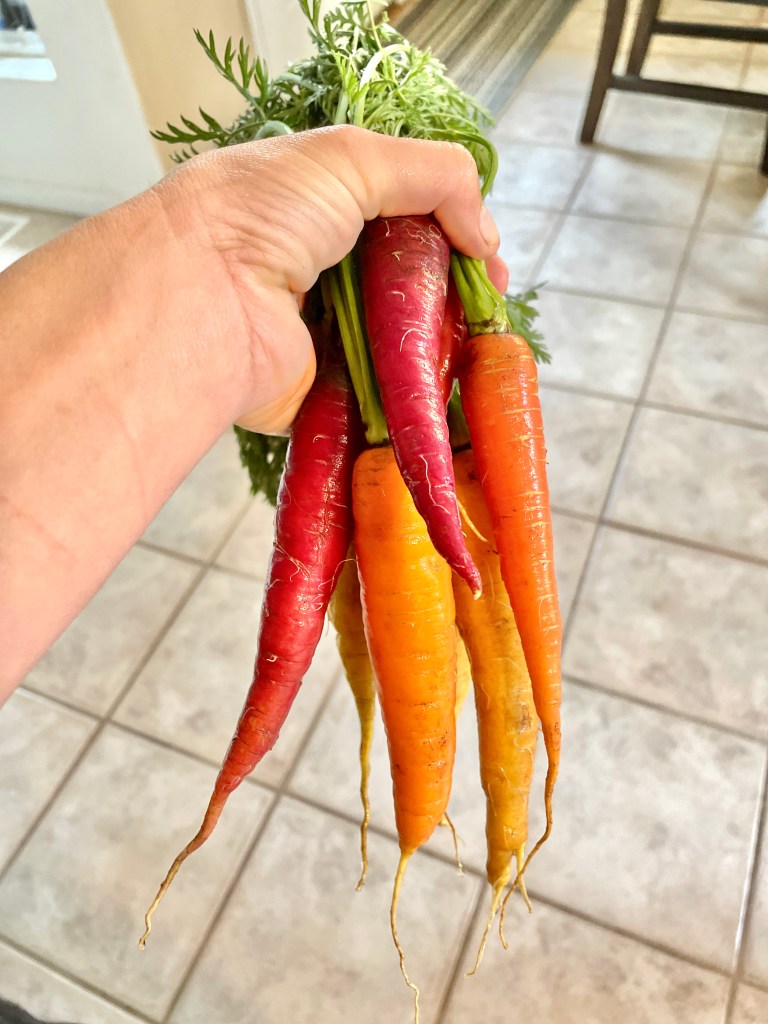
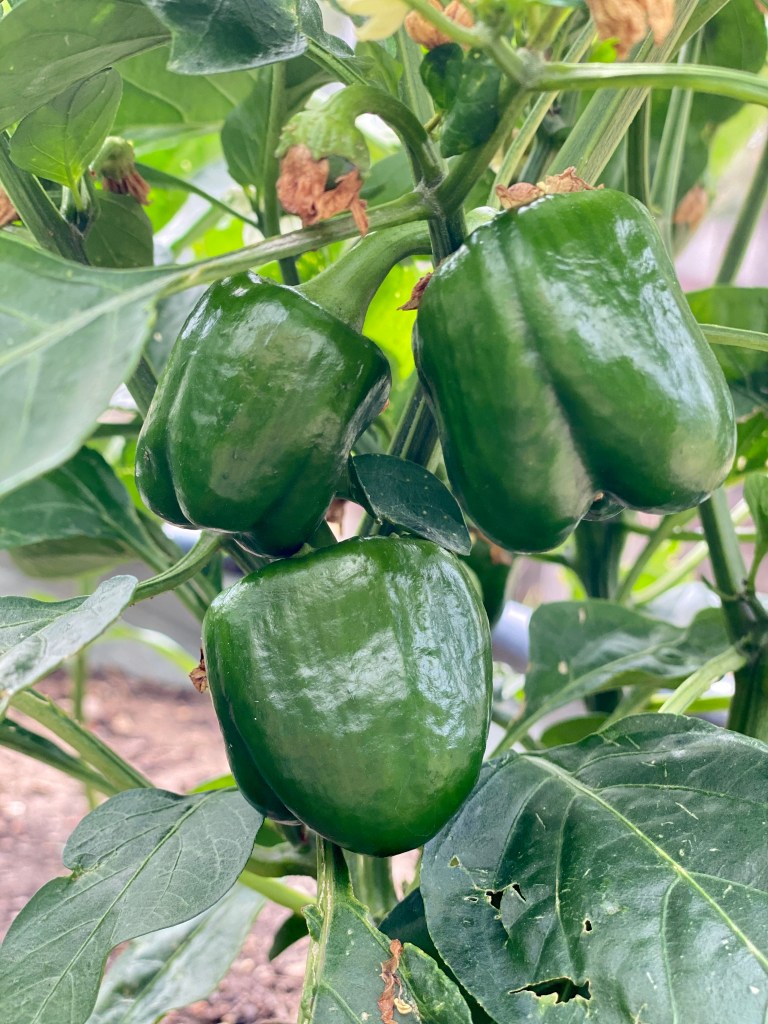
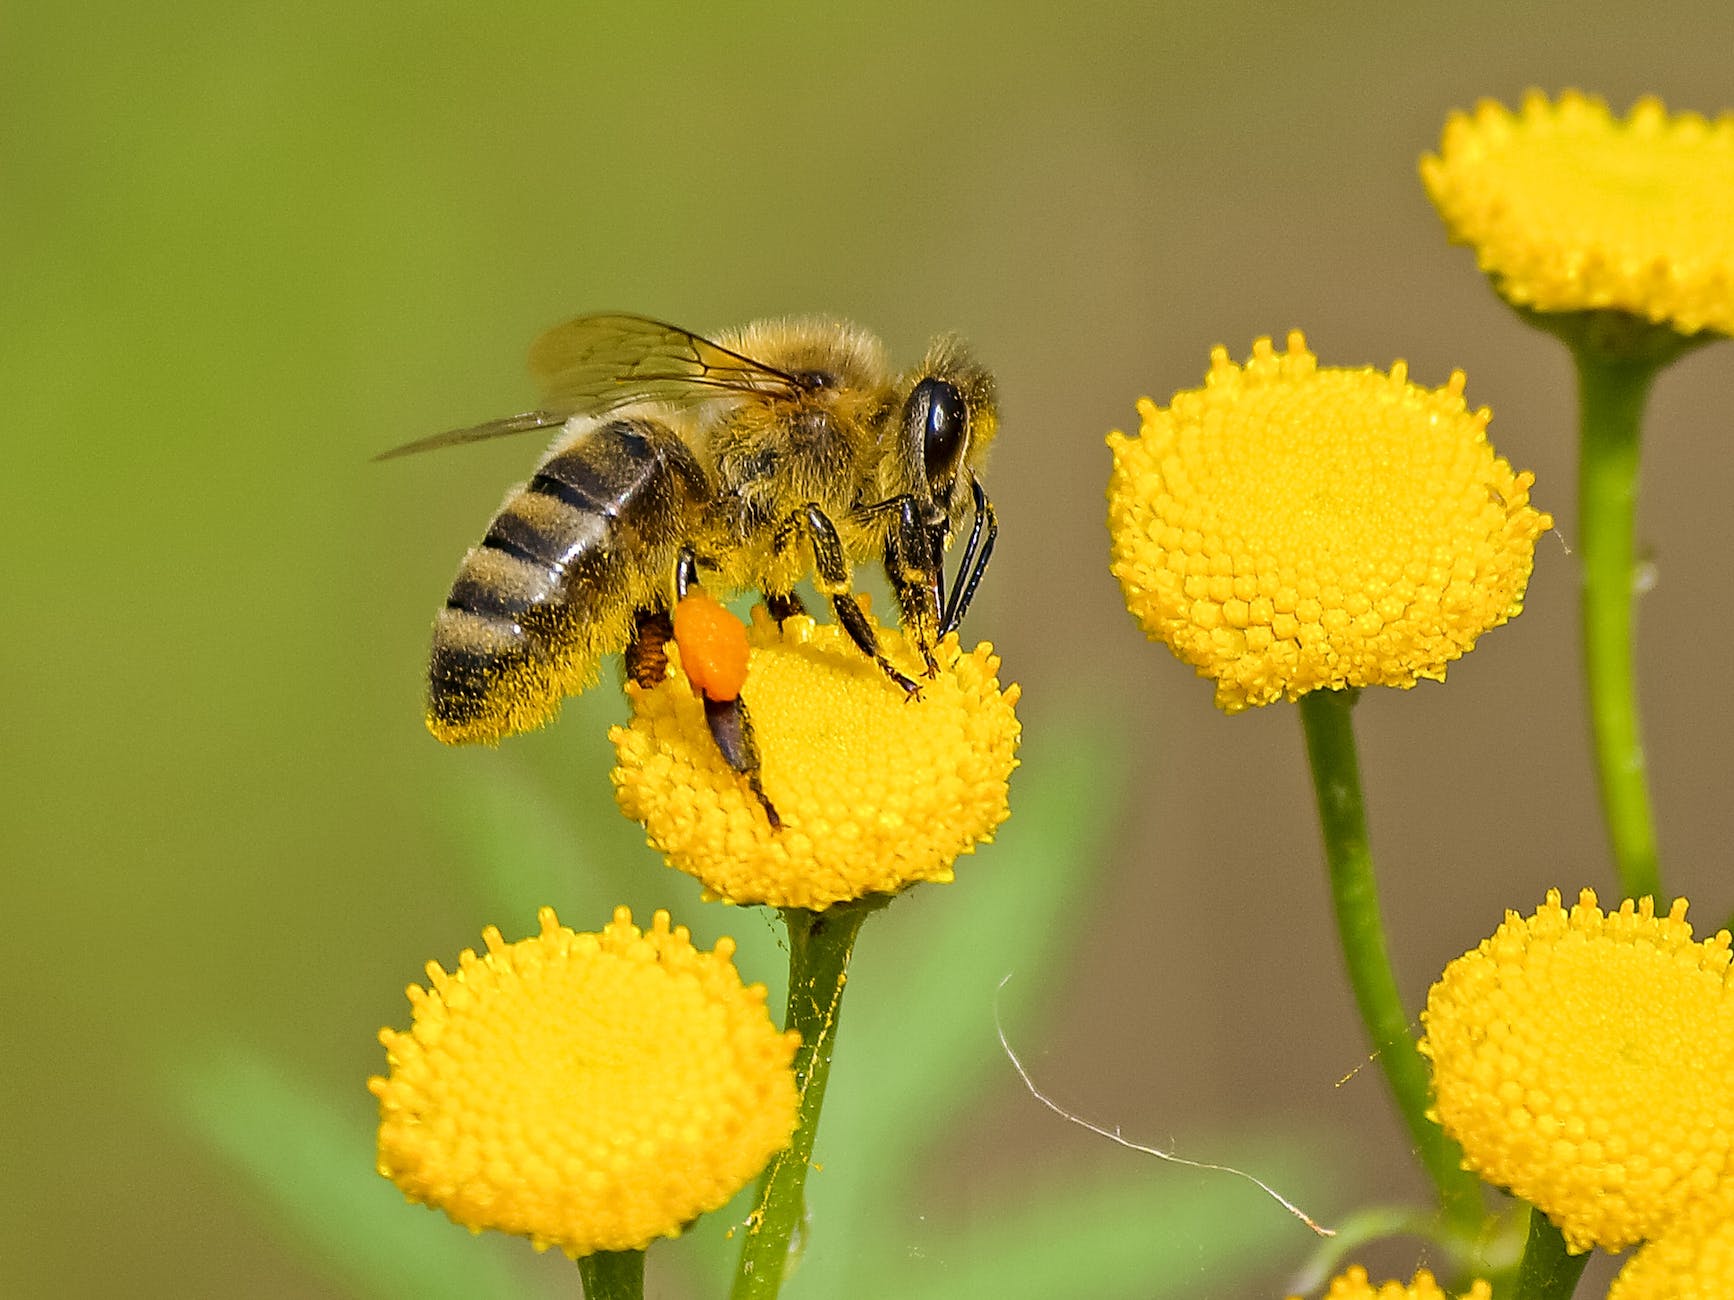
Bees are nature’s most efficient pollinators. They flit from flower to flower, helping plants reproduce by carrying pollen from the male to the female parts. Having bees on your homestead means better pollination for your fruit trees, berry bushes, and garden veggies. Expect larger, juicier, and more abundant crops as a result. Bees turn your homestead into a buzzing pollination party!

Photo by Pixabay on Pexels.com
  1. Supporting Biodiversity

By hosting a beehive, you’re contributing to the conservation of local flora and fauna. Bees play a crucial role in the ecosystem by pollinating not only crops but also wildflowers. When you keep bees, you’re doing your part to protect biodiversity and preserve the delicate balance of nature.

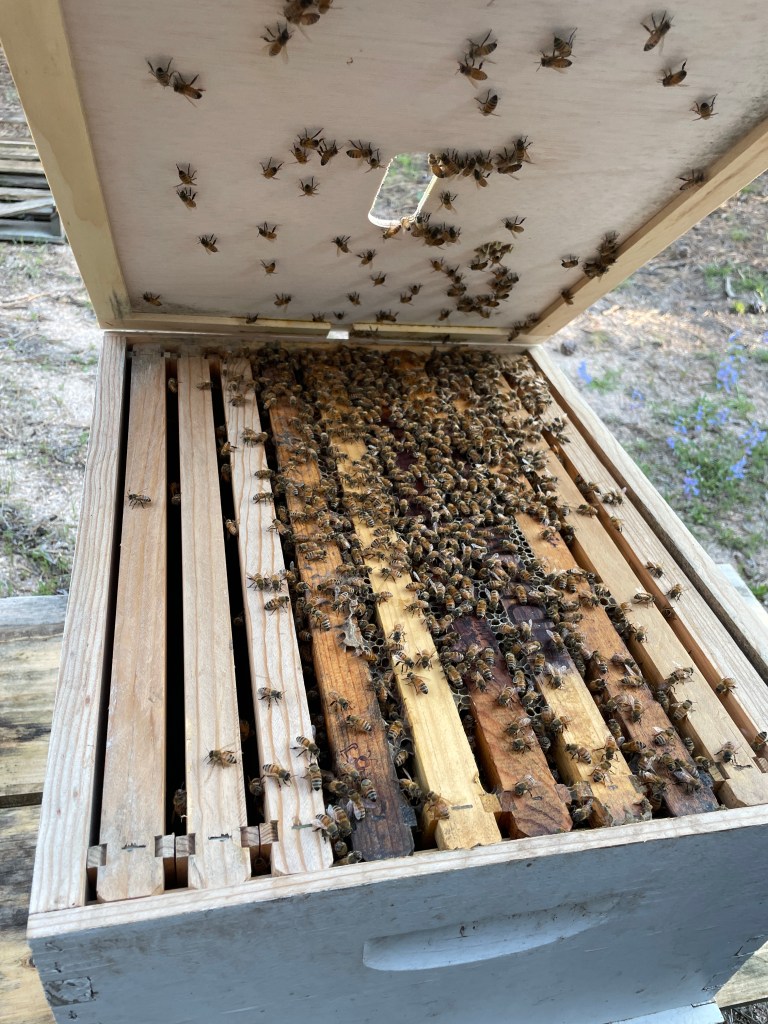
  1. Educational Entertainment

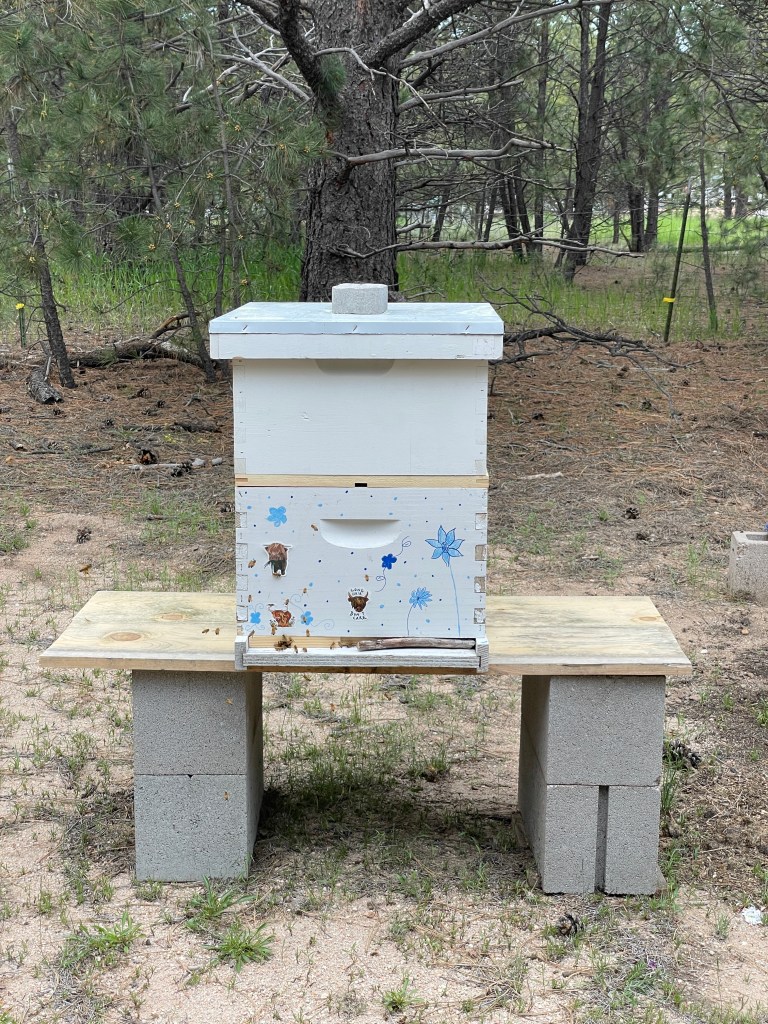
If you’ve ever wondered about the secret life of bees, having a hive on your homestead offers a front-row seat. Beekeeping is an educational and fascinating hobby that will keep you entertained for hours. From observing their intricate dances to learning about hive dynamics, bees are like tiny philosophers who have much to teach us.

  1. Wax Wonders

Honey isn’t the only treasure bees bestow upon us. Beeswax is a versatile and valuable resource. You can use it to make candles, lip balms, soaps, and even furniture polish. Beeswax products also make thoughtful and eco-friendly gifts for friends and family.

Beeswax is a versatile natural substance with a wide range of uses due to its unique properties. Here are some common and creative applications for beeswax:

  1. Candles: Beeswax candles are famous for their clean and natural burn. They emit a pleasant honey scent and are often preferred over paraffin candles, which can release harmful chemicals when burned.
  2. Cosmetics and Skincare Products: Beeswax is a common ingredient in lip balms, lotions, creams, and salves. It helps lock in moisture and provides a protective barrier for the skin.
  3. Soap Making: Beeswax can be added to homemade soap recipes to enhance hardness and provide a smooth texture.
  4. Wood Polish: Mix beeswax with a carrier oil (such as olive oil) to create a natural wood polish. It adds a protective layer to wooden surfaces and enhances their shine.
  5. Leather Conditioner: Beeswax can be used to condition and waterproof leather goods like boots, belts, and bags.
  6. Thread Conditioning: Running a piece of beeswax over sewing thread can make it stronger, reduce friction, and prevent fraying during sewing.
  7. Art and Craft Projects: Beeswax can be used in various art and craft projects, such as encaustic painting, sculpting, and making wax seals.
  8. Food Preservation: Historically, beeswax was used to coat cheese to protect it from mold and dehydration. While less common today, it’s still used in some specialty cheeses.
  9. Grafting and Budding: In horticulture, beeswax is used to seal grafts and buds on plants to promote successful propagation.
  10. Homemade Deodorant: Beeswax is used in some DIY deodorant recipes for its consistency and skin-friendly properties.
  11. Tack Cloth: Beeswax-soaked cloths are used in woodworking as tack cloths to remove sawdust and debris from surfaces before finishing.
  12. Crayons: Beeswax crayons are a non-toxic alternative to traditional crayons, making them safe for children to use.
  13. Fire Starters: Mix beeswax with sawdust or wood shavings to create fire starters for camping or heating.
  14. Tool Lubrication: Apply a thin layer of beeswax to saw blades, hand tools, or even the soles of hand planes to reduce friction and improve performance.
  15. Dreadlock Maintenance: Beeswax is sometimes used to maintain and shape dreadlocks by providing hold and structure.
  16. Modeling and Sculpting: Beeswax’s pliability makes it a great material for modeling and sculpting, especially in educational settings.
  17. Embalming and Taxidermy: Historically, beeswax was used in embalming and taxidermy to preserve and shape tissue and feathers.
  18. Sealing and Waterproofing: Beeswax can be used to seal envelopes, containers, and seams to make them waterproof and airtight.

Remember that the quality of beeswax can vary, so using high-quality, pure beeswax is essential for some applications, such as cosmetics and skincare products. Additionally, when working with beeswax, consider proper safety precautions, as it can be flammable when heated, and melting it should be done with care.

  1. Environmental Stewardship

Bees are facing multiple threats, including habitat loss and pesticide exposure. By keeping bees on your homestead, you’re contributing to their conservation. Creating a bee-friendly environment, free of harmful pesticides, is a small but impactful step toward preserving these essential pollinators.

  1. Community Building

Beekeeping isn’t just about bees; it’s also about building a buzzing community. Joining local beekeeping clubs or sharing your honey and beeswax products with neighbors can foster camaraderie and a sense of shared responsibility for the environment.

Bees are like the unsung heroes of our ecosystem. They provide us with honey, improve our harvests, and support biodiversity, all while working tirelessly without asking for much in return. So, why not consider welcoming a beehive to your homestead? It’s a decision that promises to sweeten your life, provide hours of entertainment, and contribute to the well-being of our planet. Beekeeping isn’t just a hobby; it’s a way to become a guardian of these remarkable creatures and a steward of the environment. So, put on your beekeeper’s suit and embark on a sweet journey of discovery with these marvelous little insects!

Gardening, Recipes, Vegetables

Zucchini Extravaganza: A Garden’s Green Goldmine of Recipes!


Ah, zucchini – that prolific green gem of the garden that seems to multiply overnight! If you’ve got a bumper crop of this summer squash and are wondering what to do with it all, you’re in for a treat. In this zucchini extravaganza, we’ll explore a variety of delicious and creative recipes to make the most of this versatile vegetable. From savory to sweet, zucchini’s got you covered!

1. Classic Zucchini Bread: A Sweet Beginning

Ingredients:

  • 2 cups grated zucchini
  • 2 1/2 cups all-purpose flour
  • 1 1/2 teaspoons baking powder
  • 1/2 teaspoon baking soda
  • 1 teaspoon ground cinnamon
  • 1/2 teaspoon ground nutmeg
  • 1/2 cup unsalted butter, softened
  • 1 cup granulated sugar
  • 2 large eggs
  • 1 teaspoon vanilla extract
  • 1/2 cup chopped nuts or chocolate chips (optional)

Instructions:

  1. Preheat your oven to 350°F (175°C) and grease a loaf pan.
  2. Squeeze excess moisture from the grated zucchini and set it aside.
  3. In a bowl, whisk together the flour, baking powder, baking soda, cinnamon, and nutmeg.
  4. In another bowl, cream the butter and sugar together until light and fluffy.
  5. Beat in the eggs, one at a time, followed by the vanilla extract.
  6. Gradually add the dry ingredients to the wet mixture, then fold in the grated zucchini and nuts/chocolate chips (if using).
  7. Pour the batter into the prepared loaf pan and bake for 55-60 minutes or until a toothpick inserted into the center comes out clean.
  8. Let it cool before slicing and savoring!

2. Zesty Zucchini Fritters: A Crispy Delight

Ingredients:

  • 2 cups grated zucchini
  • 1/2 cup grated Parmesan cheese
  • 1/4 cup breadcrumbs
  • 2 cloves garlic, minced
  • 1 large egg
  • 1/4 teaspoon salt
  • 1/4 teaspoon black pepper
  • Olive oil for frying

Instructions:

  1. Place the grated zucchini in a clean kitchen towel and squeeze out excess moisture.
  2. In a bowl, combine the grated zucchini, Parmesan cheese, breadcrumbs, minced garlic, egg, salt, and pepper.
  3. Heat olive oil in a skillet over medium-high heat.
  4. Drop spoonfuls of the zucchini mixture into the hot oil and flatten them with the back of a spatula.
  5. Cook for 2-3 minutes on each side or until golden brown and crispy.
  6. Drain on paper towels and serve with a dipping sauce of your choice.

3. Zucchini Noodles with Pesto: A Low-Carb Twist

Ingredients:

  • 4 medium zucchinis, spiralized into noodles
  • 1 cup fresh basil leaves
  • 1/2 cup grated Parmesan cheese
  • 1/4 cup pine nuts
  • 2 cloves garlic
  • 1/2 cup extra-virgin olive oil
  • Salt and pepper to taste

Instructions:

  1. In a food processor, blend the basil, Parmesan cheese, pine nuts, and garlic until well combined.
  2. While blending, slowly drizzle in the olive oil until you have a smooth pesto sauce.
  3. Season the zucchini noodles with salt and pepper.
  4. Toss the zucchini noodles with the pesto sauce until well coated.
  5. Serve immediately, garnished with extra Parmesan cheese and pine nuts if desired.

4. Stuffed Zucchini Boats: A Savory Surprise

Ingredients:

  • 4 medium zucchinis
  • 1 pound ground beef or turkey
  • 1 onion, diced
  • 1 bell pepper, diced
  • 2 cloves garlic, minced
  • 1 cup cooked rice or quinoa
  • 1 cup tomato sauce
  • 1 teaspoon Italian seasoning
  • Salt and pepper to taste
  • Shredded mozzarella cheese for topping (optional)

Instructions:

  1. Preheat your oven to 375°F (190°C).
  2. Cut the zucchinis in half lengthwise and scoop out the flesh, leaving a boat-like shell.
  3. In a skillet, brown the ground meat over medium heat. Drain excess fat if needed.
  4. Add the diced onion, bell pepper, and garlic to the skillet. Cook until the vegetables are tender.
  5. Stir in the cooked rice or quinoa, tomato sauce, Italian seasoning, salt, and pepper.
  6. Stuff each zucchini boat with the meat and vegetable mixture.
  7. Place the stuffed zucchinis in a baking dish and cover with foil.
  8. Bake for 25-30 minutes, or until the zucchinis are tender.
  9. If desired, top with shredded mozzarella cheese and bake for an additional 5 minutes or until the cheese is melted and bubbly.
  10. Serve your delicious zucchini boats hot and enjoy!

5. Chocolate Zucchini Brownies: A Sweet Surprise

Ingredients:

  • 1 1/2 cups grated zucchini
  • 1 cup all-purpose flour
  • 1/2 cup unsweetened cocoa powder
  • 1/2 teaspoon baking soda
  • 1/4 teaspoon baking powder
  • 1/4 teaspoon salt
  • 1/2 cup unsalted butter, melted
  • 1 cup granulated sugar
  • 2 large eggs
  • 1 teaspoon vanilla extract
  • 1/2 cup chocolate chips

Instructions:

  1. Preheat your oven to 350°F (175°C) and grease a 9×9-inch baking pan.
  2. Squeeze excess moisture from the grated zucchini and set it aside.
  3. In a bowl, whisk together the flour, cocoa powder, baking soda, baking powder, and salt.
  4. In another bowl, mix the melted butter and sugar until well combined.
  5. Add the eggs and vanilla extract to the butter-sugar mixture and stir until smooth.
  6. Gradually add the dry ingredients to the wet mixture, then fold in the grated zucchini and chocolate chips.
  7. Pour the batter into the prepared baking pan and spread it evenly.
  8. Bake for 25-30 minutes or until a toothpick inserted into the center comes out with a few moist crumbs.
  9. Allow the brownies to cool before cutting them into squares and indulging in chocolatey goodness!


From sweet to savory, these zucchini recipes are sure to delight your taste buds and make the most of your garden’s green bounty. Whether you’re enjoying zucchini bread for breakfast, zucchini fritters for lunch, or stuffed zucchini boats for dinner, this versatile vegetable offers endless culinary possibilities. So, get creative, get cooking, and savor the goodness of zucchini all summer long!

Health, Herbs, Recipes

Sip Your Way to Immunity: Delicious Herbal Teas to Boost Your Defenses


In a world where staying healthy is more important than ever, our immune systems deserve all the support they can get. While a well-balanced diet and regular exercise play crucial roles in maintaining good health, sometimes a comforting cup of herbal tea can be just the thing to give your immune system a little extra love. Join us on a flavorful journey as we explore some delightful, immunity-boosting herbal tea recipes that not only taste amazing but also provide a much-needed dose of wellness.

1. Ginger-Lemon Zest Tea: The Wake-Up Call Your Immune System Needs

Ingredients:

  • 1-inch piece of fresh ginger, sliced
  • 1 lemon, sliced
  • 1 teaspoon honey (optional)
  • 2 cups of water

Instructions:

  1. Boil 2 cups of water and add the ginger and lemon slices.
  2. Let it simmer for 5-7 minutes.
  3. Strain the tea into your favorite mug, and sweeten with honey if desired.
  4. Sip and enjoy the zesty goodness!

2. Turmeric Gold Elixir: The Warrior of Immunity

Ingredients:

  • 1 teaspoon turmeric powder
  • 1/2 teaspoon ground cinnamon
  • A pinch of black pepper
  • 1 teaspoon honey
  • 2 cups of almond milk (or any milk of your choice)

Instructions:

  1. In a saucepan, gently heat the almond milk.
  2. Add the turmeric, cinnamon, and a pinch of black pepper.
  3. Stir well and let it simmer for 5 minutes.
  4. Sweeten with honey and savor the golden goodness.

3. Minty Fresh Immune Tea: Cool and Calm Your Way to Wellness

Ingredients:

  • A handful of fresh mint leaves
  • 1 green tea bag (or 1 teaspoon loose green tea leaves)
  • 1 teaspoon honey (optional)
  • 2 cups of hot water

Instructions:

  1. Place the green tea bag (or loose leaves) and mint leaves in a teapot.
  2. Pour hot water over them and steep for 3-4 minutes.
  3. Remove the tea bag or strain the tea if using loose leaves.
  4. Sweeten with honey, if desired, and enjoy the refreshing minty flavor.

4. Elderberry Delight: Berry Blast for Immunity

Ingredients:

  • 2 tablespoons dried elderberries
  • 1 cinnamon stick
  • 1 teaspoon honey (optional)
  • 2 cups of water

Instructions:

  1. In a saucepan, combine the dried elderberries and cinnamon stick with water.
  2. Bring to a boil, then reduce heat and simmer for 15-20 minutes.
  3. Remove from heat, strain into a cup, and sweeten with honey if desired.
  4. Sip this berry-infused delight to boost your immune system.

5. Chamomile-Lavender Dream Tea: Sweet Dreams and Strong Immunity

Ingredients:

  • 1 chamomile tea bag (or 1 teaspoon dried chamomile flowers)
  • 1/2 teaspoon dried lavender buds
  • 1 teaspoon honey (optional)
  • 2 cups of hot water

Instructions:

  1. Place the chamomile tea bag (or chamomile flowers) and dried lavender buds in a teapot.
  2. Pour hot water over them and steep for 5-7 minutes.
  3. Remove the tea bag or strain the tea if using loose flowers.
  4. Sweeten with honey if desired, and sip your way to relaxation and immunity.


These delightful herbal teas not only tantalize your taste buds but also provide a comforting boost to your immune system. Incorporating these recipes into your daily routine can be a flavorful and enjoyable way to stay healthy. If you like to use dried herbs and prepare these ingredients ahead of time, I recommend tea bags like these or reusable ones otherwise a tea strainer like this works great. I also like adding my ingredients to a tea pot with the infuser in it. So, brew a cup, cozy up with a blanket, and let these immune-supporting herbal teas become your wellness companions in every season. Cheers to health and happiness!

Gardening

How To Keep Your Garden Healthy In Winter

Old Man Winters’ arrival doesn’t mean that the Winter garden can be neglected. Keeping the garden on an even footing against the ravages that winter can bring is an ongoing. Neglecting proper garden closing chores and winter maintenance tasks is only a recipe for a headache in the spring. Follow a few of these winter garden tips and a bountiful spring will be waiting in a few months time.

Setting the winter garden table

An interesting to look at and healthy winter garden depends upon taking steps in the late fall or early winter. Clean up the garden. Make sure that any garden trash is picked up before the snow flies. If this “trash” is left behind it presents an opportunity for bacteria to find its way into any cuts in the plant or onto the plants roots. Bacteria growth, and possible disease, on the plant is the biggest danger to a winter garden.

Watch out for color when trimming

If you have had your garden for at least one winter season you know what has color during winter and what does not. Trim this color judiciously looking for maverick branches, but be sure to keep the overall form of the shrub so that winter color can shine in a uniform way. If you are not sure, leave it alone and get a feel for what has winter color for next winter. If a shrub has a winter bud on it, leave it be as this is where the flower will come from next spring.

Trim out the cut or torn limbs

Chances are that a torn or cut (looks like a knife cutting into an apple about an eight of an inch deep) limb will end up dangling, or on the ground, as winter progresses. Take care of it early and your garden will look sturdy and ready for whatever the winter has to offer. Look for a nodule on the limb (looks like a knuckle of sorts) and cut about one quarter of an inch above it on an angle for a proper cut. 

Weed to a clean ground

Weeds also present a messy problem through the winter. Not only will they decay and offer disease potential, they will also continue to grow their roots until the ground freezes hard. This will only make them more invasive in the spring. Besides, if you weed to a clean ground you will have a nice clean contrast to the dormant plants in the garden.

A nice clean edge

Unless you are going for a more informal look, give a nice edge job to your garden flower beds before the ground freezes. Not only will this make for a crisp look during the winter months, as the edge freezes, but it will put you one step closer to a solid start in spring.

To wrap or not to wrap

If you look at many winter gardens you may notice that people have wrapped burlap or some other material around their evergreen shrubs. Generally, this is to prevent a snow load or high wind from damaging the plant. Unless you have the potential for a snow load or predictable high winds this is not necessarily needed. The wind issue is an issue, but remember that all plants need air circulation, no matter what type of plant they may be. If you wrap a shrub/plant to tightly air circulation will diminish and present the opportunity for moisture build up and disease. If you wrap your shrubs make sure to do it securely but with air circulation in mind.

It cannot hurt to mound

Mounding around the base of a plant is intended to give the root systems of a shrub/plant a little extra insulation during hard winters. Depending upon which zone you happen to be gardening in the need for mounding rises and falls. In any case, you want to make sure that you compress the dirt of the mound with a firm push of the hands. This gets some of the air out of the mound and generally makes a mound of dirt look a bit nicer. It also shows that you took a little care in your gardening. This sometimes impresses people that visit your winter garden.

Trees are plants too

Take a few moments to assess your trees before the winter winds start to howl. Look for any branches that may have grown old, look to be growing across the desired vertical path of a properly trimmed tree or have died during the season. What you are looking for is any limb or branch that may rub constantly on another opening a wound in the bark. Generally, you would not want to cut a branch as winter approaches, or during the winter months, but sometimes you need to.

Gardening, Sustainability

Fall’s Bounty: Harvesting Seeds for a Thriving Garden Next Year!

Ah, fall—the season of cozy sweaters, pumpkin spice lattes, and, for all you green thumbs out there, the promise of a bountiful garden next year. While the trees shed their leaves, we gardeners are busy collecting seeds for the future. Join me on this journey as we dive into the exciting world of harvesting seeds in the fall, a practice that connects us to nature’s rhythm and guarantees a vibrant garden in the seasons to come.

The Art of Seed Harvesting:

Step 1: Timing is Everything

Fall is the perfect time to start harvesting seeds. As the days grow shorter and cooler, plants begin to focus their energy on producing seeds. The key is to keep an eye out for those seed pods and heads that are dry and brown. This indicates that they are ready for harvest.

Step 2: Gather Your Tools

Before you embark on your seed-harvesting adventure, gather a few essential tools:

  • Small bags or envelopes: For storing and labeling your seeds. I always use paper envelopes to avoid any moisture buildup.
  • Scissors or pruners: To snip seed heads or pods.
  • A marker: To label your seed packets.
  • A notebook: To jot down important details about your seeds.

Choosing the Right Seeds:

Not all seeds are created equal, and some are easier to harvest than others. Here are a few favorites that are perfect for beginners:

  1. Sunflowers: Their large, distinctive heads are easy to spot and collect.
  2. Marigolds: These vibrant flowers produce seeds that resemble tiny arrowheads.
  3. Nasturtiums: Their seed pods are easy to gather and add a peppery punch to salads. These are some of my favorite flowers in the garden!
  4. Basil: Wait for basil to bolt and produce seeds for next year’s pesto.
  5. Dill: these seeds smell amazing and are easy to harvest ones the dill is done producing and dry
  6. Cilantro: cilantro seeds are also super easy to harvest once the plant is dry

Cross-pollination and What You Need To Know:


Gardening isn’t just about planting seeds and watching them grow; it’s also about understanding the intricate dance of nature that happens right before our eyes. One of the most captivating aspects of gardening is cross-pollination, a natural process where plants exchange genetic material.

What is Cross-Pollination?

Cross-pollination occurs when pollen from one plant is transferred to the stigma of another plant, typically of the same species but a different variety. This process is essential for genetic diversity, leading to healthier and more adaptable plant populations. While some plants are self-pollinators, meaning they can fertilize themselves, many rely on pollinators like bees, butterflies, and even the wind to carry pollen from one flower to another.

Why Cross-Pollination Matters:

  1. Biodiversity: Cross-pollination increases genetic diversity, making plants more resilient to pests, diseases, and environmental changes.
  2. Hybridization: Cross-pollination can result in hybrid plants with unique characteristics, such as different colors, sizes, or flavors.
  3. Adaptation: Plants that cross-pollinate have a better chance of adapting to changing environmental conditions, ensuring their survival over time.

Common Cross-Pollinators in the Garden:

  1. Tomatoes: While many tomato varieties are self-pollinating, they can also cross-pollinate if grown in proximity. This can lead to exciting new tomato hybrids.
  2. Squash: Different varieties of summer and winter squash can cross-pollinate, resulting in intriguing squashes with unexpected shapes and colors.
  3. Zucchini and Cucumbers: These garden staples can cross-pollinate since they belong to the same family. You might end up with a cucumber that tastes slightly like zucchini or vice versa.
  4. Lettuce: Lettuce plants can cross-pollinate, leading to variations in leaf color, texture, and shape.

Preventing Unwanted Cross-Pollination:

While cross-pollination can lead to exciting surprises, it may not always be desirable. If you want to maintain the purity of a particular plant variety, follow these tips:

  1. Isolation: Plant different varieties of the same species as far apart as possible to reduce the chances of cross-pollination.
  2. Hand Pollination: For precise control, use a small paintbrush to transfer pollen from one flower to another. This is particularly useful for plants like squash.
  3. Timing: Plant varieties with different flowering times to avoid overlapping pollination periods.

Cross-pollination can definitely impact your next season’s crop, so for many (like myself) that plant a lot of different vegetables in close proximity – I buy new seeds each season that run this risk so I know I am going to get exactly what I want. But, it can be fun to experiement sometimes, too!

The Harvesting Process:

Once you’ve identified your target seeds, it’s time to start the harvesting process. Follow these general steps:

  1. Cut the Seed Heads or Pods: Use your scissors or pruners to carefully snip the seed heads or pods from the plant. Make sure to do this on a dry, sunny day when the plants are free of moisture.
  2. Drying: Place the seed heads or pods in a warm, dry location for about a week to ensure they’re completely dry. This prevents mold and rot during storage.
  3. Extraction: Once your seeds are dry, gently remove them from their seed heads or pods. Be patient; this can be a bit time-consuming but is incredibly rewarding.
  4. Labeling: Don’t forget to label your seed packets with the plant’s name, the date of harvest, and any other relevant information, such as flower color or special care instructions.

Here are a few seed saving items I use and love:

  1. A binder – I use this to hold and organize my seeds
  2. Postcard Sleeves – these fit your seed packets (your own or purchased) perfectly
  3. Seeds! – You’ll need plenty of seeds for your garden, especially those you aren’t able to harvest yourself or are trying out for the first time.

The Joy of Seed Saving:

Harvesting seeds in the fall isn’t just about saving money on next year’s garden; it’s a way to connect with the natural world and develop a deeper appreciation for your plants. Plus, there’s something truly magical about planting seeds you’ve collected yourself. It’s like tucking a piece of the past season into the ground, nurturing it, and watching it bloom anew.

As we bid farewell to another summer, remember that fall is not just about saying goodbye—it’s also about preparing for the future. Harvesting seeds in the fall is a delightful and rewarding practice that allows you to play a role in the circle of life in your garden. So, grab your pruners, embrace the crisp autumn air, and get ready to sow the seeds of future beauty and bounty in your garden. Happy harvesting!

Gardening, Herbs

The Indoor Herb Party: Growing Your Green Thumb During the Cold Months

Hey there, my fellow plant enthusiasts! As the colder weather is moving in and winter approaches, it’s time to bring the garden party inside. Don’t let Jack Frost dampen your green spirit; instead, let’s embark on a lively adventure into the world of indoor herb gardening. Get ready to flex your green thumb and infuse your home with fresh flavors, aromatic scents, and a whole lot of green goodness!

The Herbal Extravaganza: What Herbs to Grow Indoors

When it’s too chilly to venture outdoors, there’s a plethora of herbs that thrive in the cozy confines of your home. Here are a few stars of the indoor herb garden show:

  1. Basil: The rockstar of the herb world. Basil brings a burst of flavor to pasta, salads, and pizzas, all while looking effortlessly chic on your windowsill.
  2. Mint: Whether you’re sipping on a hot cup of tea or whipping up a mojito, mint has your back. Just be warned: it’s a bit of a garden party animal.
  3. Rosemary: A fragrant herb that pairs perfectly with roasted potatoes and chicken. Plus, it adds a touch of Mediterranean elegance to your indoor garden.
  4. Thyme: Versatile and aromatic, thyme is your culinary secret weapon. It’s like having a Michelin-starred chef at your fingertips.
  5. Chives: These mild, oniony delights are perfect for garnishing your dishes with a burst of fresh flavor.

I love to order my herbs from Baker Creek Seeds. They have a wide variety to choose from and always grow well.

The Indoor Garden Dance Party

Indoor herb gardening isn’t just about growing herbs; it’s about throwing a non-stop dance party for your senses. Here’s how to make your herb garden groove:

  • The Right Location: Herbs love sunshine, so find a sunny spot near a window. It’s like creating a VIP area for your herbs to soak up some rays. I have a window above my kitchen sink that works perfectly.
  • The Hippest Pots: Choose containers that suit your style. Whether it’s elegant clay pots or quirky recycled containers, let your herb garden reflect your personality. I like simple ones like these, but the options are limitless!
  • Soil and Watering: Use well-draining potting soil and water your herbs when the top inch of soil feels dry. Don’t drown the party; herbs like to keep their feet (or roots) dry! I usually layer the bottom of the pot with some natural mulch and then add a good soil like this one.
  • Pruning and Harvesting: Don’t be shy about trimming your herbs; they’ll thank you with fresh growth. Plus, you get to enjoy the spoils of your harvest in your dishes. If you have extra you can always dry or dehydrate it for later use.
  • Companionship: Some herbs are social butterflies and love sharing a pot with others. Others prefer their own space. Respect their preferences, and your garden will thrive.

Herb-tastic Recipes for Cold Days

Now that you’ve got your indoor herb garden flourishing, it’s time to put those fresh flavors to work. Here are some herb-tastic recipes to warm your soul during the cold months:

  1. Basil Pesto Pasta: Blend fresh basil, pine nuts, garlic, Parmesan cheese, and olive oil for a fragrant pesto sauce. Toss it with your favorite pasta for a taste of summer in the middle of winter.
  2. Minty Hot Chocolate: Add a sprig of fresh mint to your hot chocolate for a refreshing twist. Top it with whipped cream and a sprinkle of cocoa for pure indulgence.
  3. Rosemary Roasted Vegetables: Toss your winter vegetables in olive oil, minced rosemary, and a pinch of salt before roasting. The aroma alone will transport you to a cozy cabin in the woods.
  4. Thyme-Infused Lemonade: Brew a pot of thyme-infused tea and mix it with freshly squeezed lemon juice and a touch of honey. A soothing winter beverage with a hint of summer.
  5. Chive and Cheese Scones: Add chopped chives and grated cheese to your scone dough for savory delights that pair perfectly with a warm bowl of soup.

Indoor herb gardening during the cold months isn’t just about surviving; it’s about thriving. With a little greenery and a lot of love, you can bring the garden party indoors, tantalizing your senses and warming your heart. So, roll up your sleeves, grab your gardening gloves, and let the indoor herb festivities begin!

Gardening, Sustainability

Mulch Ado About Nothing: How to Embrace Your Inner Mulch-ologist for Homesteading Success

Welcome, fellow homesteaders and mulch enthusiasts! Today, we’re diving headfirst into the delightful world of natural mulch – because who needs synthetic garden bling when you can have a forest floor party right in your backyard? Get ready for a barrel of laughs and some seriously leafy wisdom on how to use natural mulch for homesteading.

Chapter 1: Mulch, Mulch Everywhere

If you’re new to the mulch scene, don’t worry; we’ve got your back. Natural mulch is like the fairy godmother of the gardening world – it covers your soil with a cozy blanket and whispers, “Sweet dreams, little plants.”

But here’s the kicker: it’s not just about wood chips and leaves. Get creative! Think straw, grass clippings, pine needles, or even that unsolicited junk mail. Your garden is the runway, and mulch is the haute couture of the soil.

We live on almost 6 acres in Black Forest, Colorado. We have an abundance of pine needles which work amazing as a mulch and additive to our compost. We also like to use a local mulch that is made from trees, branches and slash from our little community. Not only is it cost effective, there are no added chemicals and we are nurturing our little slive of heaven by adding good nutrients back into the soil as the mulch breaks down.

We get our mulch from Black Forest Slash but a quick google search should help you to find local mulch in your area. Another great resource is Chip Drop. This helps find local, free mulch delivered to your home. I have never needed to personally use this service, but I know many who have and loved it.

Chapter 2: The Mulch Mafia – Weed Whisperers

Picture this: you’ve just laid down a fresh mulch bed, and your weeds are thinking, “Oh, snap! We’ve landed in a hostile jungle!” Mulch is like their worst nightmare, a fortress of doom where they can’t see the light of day.

So, instead of hand-to-hand combat with those pesky dandelions, let the mulch mafia handle it. Lay down a thick layer of mulch, and those weeds will be sending you thank-you cards – for their one-way trip to the underground weed club.

Chapter 3: Mulch-a-Palooza – The Moisture Masterclass

Mulch doesn’t just keep weeds at bay; it’s also the king of hydration. It’s like your garden’s personal butler, making sure everyone’s glass is full. You see, mulch holds moisture better than a kitchen sponge at a pool party.

No more running around with a hose, giving your plants the 24/7 spa treatment. With natural mulch, your garden will be sipping cocktails in style, and your water bill can take a vacation!

Chapter 4: Compost and Chill

Here’s a secret: mulch and compost are like the dynamic duo of soil health. Think Batman and Robin, but with more earthworms. When you mix mulch and compost, you create a superhero team that’s ready to save the world – or at least your garden.

Spread some compost, then crown it with mulch, and watch your plants burst into the most vibrant, superheroic growth spurt of their lives. Cue the capes and epic music!

Chapter 5: Mulch Magic and the Lazy Gardener

Are you a homesteader who values your beauty sleep? Well, welcome to the club, because mulch is your new BFF. It’s the laziest gardener’s dream come true.

With mulch in charge, you can snooze while your garden thrives. Less weeding, less watering, and more time for hammock naps – because you’ve got mulch to handle the heavy lifting.

Chapter 6: Pine Straw/Mulch For Animals

Pine straw, also known as pine needles or pine straw mulch, can be used as bedding for some types of livestock, particularly poultry like chickens.

  1. Comfort and Insulation: Pine straw can provide a comfortable and insulated surface for animals to rest on. It’s soft, which is suitable for animals with more delicate feet like chickens.
  2. Absorbency: Pine straw is not as absorbent as some other bedding materials like wood shavings or straw. This means that it may not be the best choice for animals that produce a lot of moisture, such as horses or cows. For poultry, it can work, but you may need to replace it more frequently if it becomes wet.
  3. Aromatic Qualities: Pine straw has a distinctive pine scent. This scent can help mask odors and also help keep bugs down.
  4. Availability: The availability of pine straw can vary depending on your location. In some regions, pine straw may be a readily available and cost-effective bedding option. Where we live, we have a never ending supply – which is amazingly helpful once we figured out what to do with it.
  5. Cleaning and Maintenance: Pine straw can be relatively easy to clean and replace when necessary. Regular cleaning and changing of soiled bedding are essential to maintain a healthy environment for your animals. Take the old pine straw with the manure and add it to your compost pile. It will help create an amazing compost for your garden or yard.

Chapter 7: The Grand Finale – Mulch, Naturally Yours

So, there you have it, fellow mulch-ologists: the art of using natural mulch for homesteading success. It’s a laughably simple way to keep your garden lush, your weeds at bay, and your garden dance floor hydrated.

Embrace your inner mulch maestro, and let your garden bask in the leafy, organic glory that only natural mulch can provide. Remember, a well-mulched garden is a happy garden, and a happy garden is a mulch-tastic adventure waiting to happen. Happy mulching!

Gardening, Sustainability

Permaculture: Gardening Like Mother Nature

Hello, fellow green thumbs and dirt enthusiasts! Today, we’re diving headfirst into the wonderfully weird world of permaculture. But hold onto your garden hats, because this ain’t your grandma’s gardening club. Permaculture is like gardening, but with a side of cosmic wisdom and a sprinkle of eco-friendly magic.

What the Heck is Permaculture?

Permaculture isn’t just a gardening method; it’s a lifestyle, a philosophy, and a quirky dance with Mother Nature herself. It’s like telling the planet, “Hey, let’s get cozy and grow some stuff together, but also, let’s keep it weird.”

Permaculture is all about observing how nature does its thing and then copying it. Picture this: You’re in your garden, and you spot a squirrel. Instead of chasing it away with a broom (admit it, we’ve all done it), you start taking notes. “Squirrel,” you write. “Good at planting acorns. Hmm.”

The Three Permaculture Ethics

Permaculture has three ethics that are as noble as they are amusing:

  1. Earth Care: This one’s a no-brainer. Take care of the planet like it’s your favorite pet hamster. Stroke its furry soil and make sure it gets enough sun (but not too much, we’re talking sunscreen for the Earth here).
  2. People Care: People are like plants. They need love, attention, and a decent amount of hydration. In permaculture, we build communities that thrive like a garden full of happy tomatoes.
  3. Fair Share: Don’t hog all the ripe apples! Share your bounty with your neighbors, or else your karma might end up as worm food.

Designing with Nature

Permaculture design is where the fun really kicks in. Instead of straight rows of vegetables, permaculturists design their gardens like a forest. It’s like creating a salad bowl where the lettuce, tomatoes, and cucumbers have a jam session together, swapping nutrients and stories about their latest compost pile gossip.

And here’s the kicker: permaculture doesn’t just grow food; it grows friendships. In a permaculture garden, you’re more likely to hear plants gossiping about their best fertilizers than see them squabbling over sunlight.

Chickens and Ducks as Garden Gurus

In the permaculture world, chickens and ducks aren’t just poultry; they’re the garden’s secret agents. They scratch, they peck, they patrol for pests, and they provide you with breakfast. It’s like having your own feathered garden ninjas. Here’s a little advice – don’t let your chickens free range your garden competely. They will eat almost everything – including the stuff you don’t want them to. Chicken manure is a fantastic fertilizer because it’s high in nitrogen. Here’s the catch – it’s STRONG so it needs to be composted first as to not burn your plants. We’ll go into composting details in later posts. Chickens also love to eat your weeds which is a great way to keep them happy and lower that food bill.

Plus, they have a hilarious sense of humor. Ever tried explaining to a chicken that it’s time to take a break from laying eggs? Good luck with that! They’re dedicated, even if it means producing enough eggs to fill a swimming pool. Unless of course you are in need of a bunch of eggs, in which case they will decide to take a break or molt.

Meditate with Mulch

In permaculture, mulch isn’t just a gardening tool; it’s a way of life. When you’re not spreading mulch, you’re probably meditating on it. Picture it: You, cross-legged in your garden, surrounded by a zen garden of mulch. Namaste, my friends. We use a locally made mulch from Black Forest Slash. This is a win-win. It’s local branches and slash that are then turned into a fantastic mulch that not only helps conserve water but adds nutrients back into the soil. Mulch will also act as a natural weed barrier.

Permaculture is like gardening’s whimsical, eco-conscious cousin who always brings homemade kombucha to family reunions. It’s about working with nature, not against it, and doing so with a touch of humor and a dash of cosmic insight. A great place to start with permaculture is researching Back to Eden Gardening.

What’s Back to Eden Gardening, Anyway?

Imagine your garden as a laid-back forest shindig where your plants are the groovy party animals. Back to Eden gardening is all about mimicking the natural world, where the soil is rich, moist, and teeming with life. It’s like Mother Nature herself threw a disco for your plants and invited them to dance in style.

Step 1: Mulch Like There’s No Tomorrow

You know that saying, “Mulch is the answer; what was the question?” Well, that’s basically the mantra of Back to Eden gardening. Mulch is like the velvet dance floor for your plant party.

Grab some wood chips, straw, or leaves, and pile ’em up like you’re making a mulch mountain. Spread it around your plants like you’re throwing confetti at a garden parade. The mulch keeps the soil moist, prevents weeds from crashing the party, and lets your plants shimmy their roots down to the rhythm of the Earth.

Step 2: Forget About Tilling (It’s So Last Season)

Tilling is like the garden equivalent of the Macarena – fun in the ’90s, but it’s time to move on. In Back to Eden gardening, you don’t disturb the soil like it owes you money. Just lay that mulch down and let the soil microbes, earthworms, and other underground party animals do their thing.

Remember, your garden is an underground nightclub, and the soil organisms are the DJs spinning the tunes (compost beats, anyone?). Tilling disrupts their groove, and we don’t want any upset earthworms on our dance floor.

Step 3: No Need to Fertilize (Nature’s Buffet Is Open)

Back to Eden gardening believes in letting your plants graze at the buffet of nature. The mulch breaks down over time, releasing nutrients and goodies for your plants to gobble up. It’s like the ultimate all-you-can-eat garden brunch!

Say goodbye to chemical fertilizers – they’re the uninvited guests at this organic garden soirée. Your plants will thank you with vibrant health and the best salsa moves this side of the garden fence.

Ben turning our compost pile

Step 4: Water Like You’re Serenading Your Plants

Watering your Back to Eden garden is like serenading your plants with a love song. You give them a slow, deep drink, and they respond with lush growth and radiant vibes.

The mulch helps retain moisture, so you don’t have to play garden DJ with your hose all day. Water when your plants are looking a bit parched, and watch them sway to the rhythm of hydration.

Step 5: Sit Back and Watch the Garden Disco Unfold

Now that you’ve set the stage for your garden’s dance-off, it’s time to be the VIP guest and enjoy the show. Kick back with a glass of iced tea and let your plants do their thing.

Watch as your garden transforms into a lush, vibrant discotheque of greenery. You’ll have tomatoes twerking, carrots cha-cha-ing, and peppers doing the salsa – it’s a garden party like no other!

So there you have it, folks – Back to Eden gardening, where mulch is king, tilling is taboo, and your plants are the life of the underground dance party. Get out there and let your garden boogie like it’s 1979!

Gardening, Herbs

Borage: The Unveiled Beauty with Health and Culinary Secrets

In the realm of herbs, there’s one often overlooked gem that deserves the spotlight: borage. With its striking blue flowers, cucumber-like flavor, and an array of health benefits, borage is a remarkable addition to both your garden and your culinary repertoire. Join us as we dive into the world of borage, uncovering its unique attributes and the hidden treasures it brings to your table and wellness routine.

Borage (Borago officinalis) is an herbaceous plant that boasts vibrant blue star-shaped flowers. These blossoms are not only visually stunning but are also edible, making them a delightful addition to salads, desserts, and beverages.

Here is a great place to get borage seeds.

Culinary Creativity:

Borage leaves and flowers are renowned for their mild, cucumber-like flavor. The delicate taste makes borage a versatile ingredient in the kitchen. From adding blooms to cocktails for a splash of color to tossing young leaves into salads, this herb invites creativity in the culinary realm.

Nourishment for Health:

Beyond its culinary charm, borage offers a host of health benefits:

  • Rich in Nutrients: Borage leaves are a source of important nutrients such as vitamins A and C, calcium, potassium, and more.
  • Anti-Inflammatory Power: Borage contains gamma-linolenic acid (GLA), an omega-6 fatty acid known for its anti-inflammatory properties.
  • Skin Health: Borage oil, extracted from the plant’s seeds, is used in skincare products for its potential to nourish and hydrate the skin.
  • Supports Heart Health: The GLA content in borage oil may contribute to cardiovascular health by helping to regulate inflammation and cholesterol levels.

Elevating Your Garden:

Borage isn’t just a feast for the palate; it’s also a boon to your garden ecosystem:

  • Pollinator Attraction: Borage flowers are a magnet for pollinators, particularly bees. Planting borage can support local pollinator populations and enhance overall garden health.
  • Natural Pest Control: Borage has a reputation for deterring certain pests, making it a beneficial companion plant in vegetable gardens.

Growing Borage:

Borage is relatively easy to grow, making it a great choice for both novice and experienced gardeners:

  • Sunlight: Borage thrives in full sun but can tolerate partial shade.
  • Soil: Well-draining soil is essential for borage. It prefers moderately fertile soil with a slightly acidic to neutral pH.
  • Planting: Directly sow borage seeds in the spring or fall. Space plants about 18 to 24 inches apart.
  • Watering: Borage appreciates regular watering but is relatively drought-tolerant once established.

Harvesting and Using Borage:

Harvest borage leaves and flowers when they’re young and vibrant. The flowers are particularly delicate, so handle them gently. Use them as garnishes, in salads, or to infuse beverages with their subtle flavor.

Precautions:

While borage offers numerous benefits, its GLA content can interact with certain medications and may not be suitable for everyone. Consult a healthcare professional before incorporating borage supplements or oil into your routine.

Borage, with its enchanting blooms and multifaceted contributions to health and cuisine, is a treasure trove waiting to be explored. From brightening your garden with pollinator activity to enriching your dishes with a hint of freshness, borage offers a myriad of ways to infuse your life with its unique charm. So, whether you’re sipping on a borage-infused drink or admiring its azure blooms in your garden, let this unheralded beauty inspire you to explore its many wonders.

Gardening, Sustainability

From Garden to Table: The Best Plants to Grow for Self-Sufficiency

In an era where self-sufficiency and sustainability are increasingly valued, one of the most rewarding endeavors you can embark upon is growing your own food. Cultivating a diverse garden of edible plants not only empowers you to be more self-reliant but also provides you with fresh, nutritious produce right at your doorstep. In this blog post, we’ll explore some of the best plants to grow to achieve self-sufficiency in your home garden.

1. Potatoes: The Staple Crop

Potatoes are a versatile and high-yield crop that can provide sustenance throughout the year. They store well, are rich in carbohydrates, and can be used in various dishes. Varieties like russet, Yukon Gold, and red potatoes offer a range of flavors and textures.

2. Tomatoes: The Garden Superstar

Tomatoes are a garden favorite due to their prolific production and countless culinary uses. Grow a mix of heirloom and hybrid varieties for salads, sauces, and canning. Indeterminate types will keep producing throughout the season.

3. Beans: A Protein-Packed Option

Beans, such as bush beans, pole beans, and soybeans, are excellent for self-sufficiency. They provide protein, fiber, and essential nutrients. Dry beans can be stored for an extended period, making them a valuable addition to your pantry.

4. Greens: Leafy Nutrition

Leafy greens like spinach, kale, Swiss chard, and lettuce are nutrient powerhouses that are easy to grow. They can be harvested continuously, ensuring a steady supply of fresh greens for salads and cooking.

5. Squash: Abundant Harvests

Squash, including zucchini, butternut, and acorn varieties, can produce prolifically. They’re not only delicious but also store well. Consider growing vining types on trellises to save space.

6. Carrots: Underground Bounty

Carrots are a reliable root crop that can be left in the ground until needed. They provide essential vitamins and add sweetness to soups, stews, and salads. Try different colors for variety.

7. Herbs: Flavor and Medicine

Growing herbs like basil, rosemary, thyme, and mint can enhance the flavors of your dishes and even serve as natural remedies. Dry or preserve excess herbs for year-round use.

8. Fruit Trees: Abundance of Fresh Fruit

Fruit trees, such as apple, pear, and cherry, provide an abundance of fresh fruit with proper care. They can be preserved as jams, canned, or dried for long-term storage.

9. Berries: Fresh and Preserved

Raspberries, blueberries, and strawberries are nutrient-rich and easy to grow. Enjoy them fresh or preserve them as jams, jellies, or frozen berries for year-round use.

10. Onions and Garlic: Flavor Staples

Onions and garlic are essential flavorings in countless recipes. They can be stored for months, making them a valuable addition to your self-sufficiency garden.

11. Cabbage: Fermentation Hero

Cabbage is not only nutritious but also a star in homemade sauerkraut and kimchi. Fermented foods can provide valuable probiotics for gut health.

12. Peppers: Spice Up Your Dishes

Bell peppers, chili peppers, and sweet peppers add flavor and spice to your meals. Preserve excess peppers by freezing, canning, or drying.


Cultivating a garden with these essential plants is a significant step toward self-sufficiency. Not only will you reduce your reliance on commercial food sources, but you’ll also enjoy the satisfaction of nurturing your own sustenance. Remember that successful gardening requires planning, dedication, and a bit of trial and error. Whether you have a small urban plot or a sprawling rural garden, growing your own food is a fulfilling journey that contributes to your well-being and sustainability. So, roll up your sleeves, get your hands in the soil, and start your journey toward greater self-sufficiency through gardening.