Blog

Animals, chickens

Why Chickens Molt and How to Help Them Through

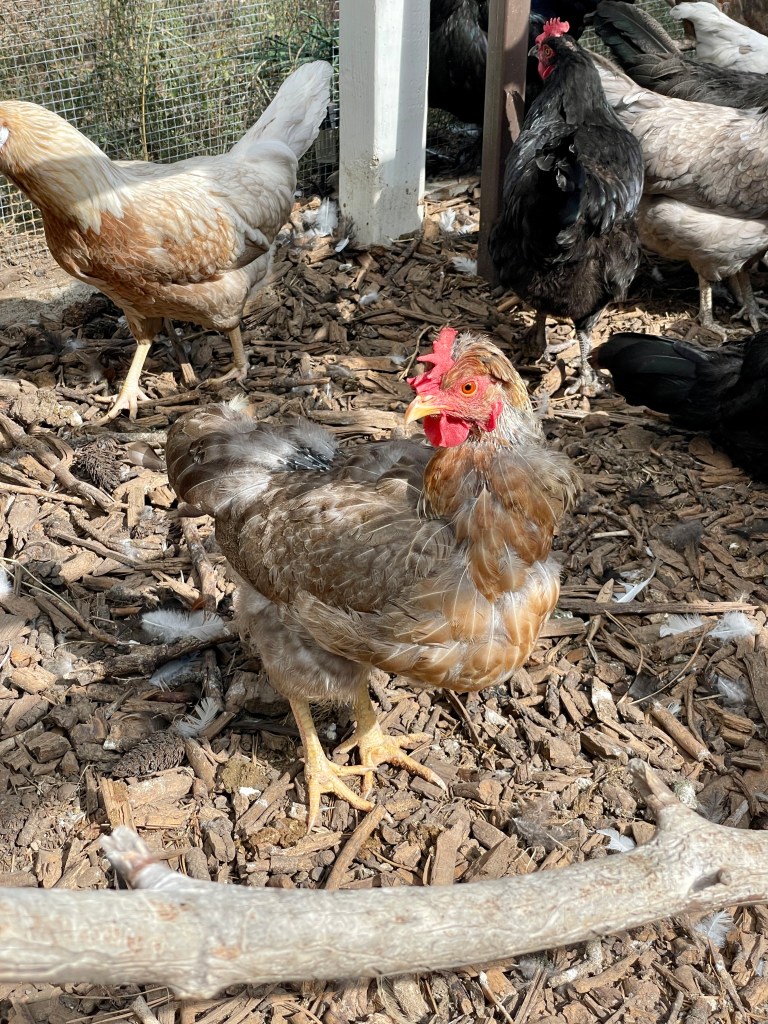
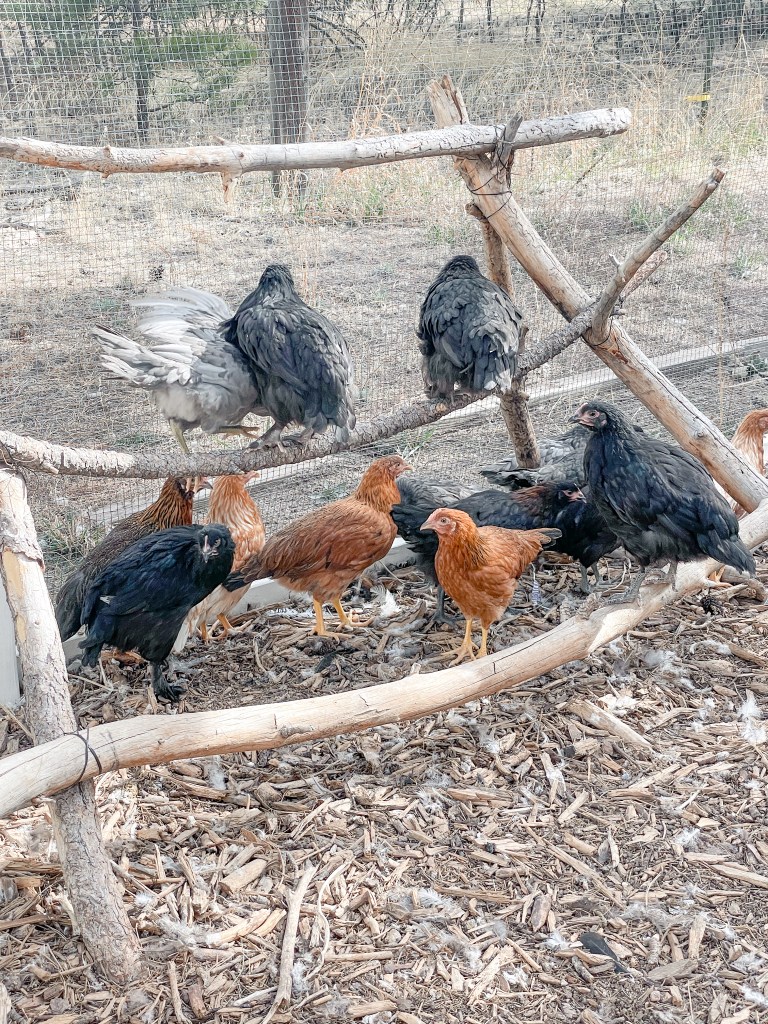
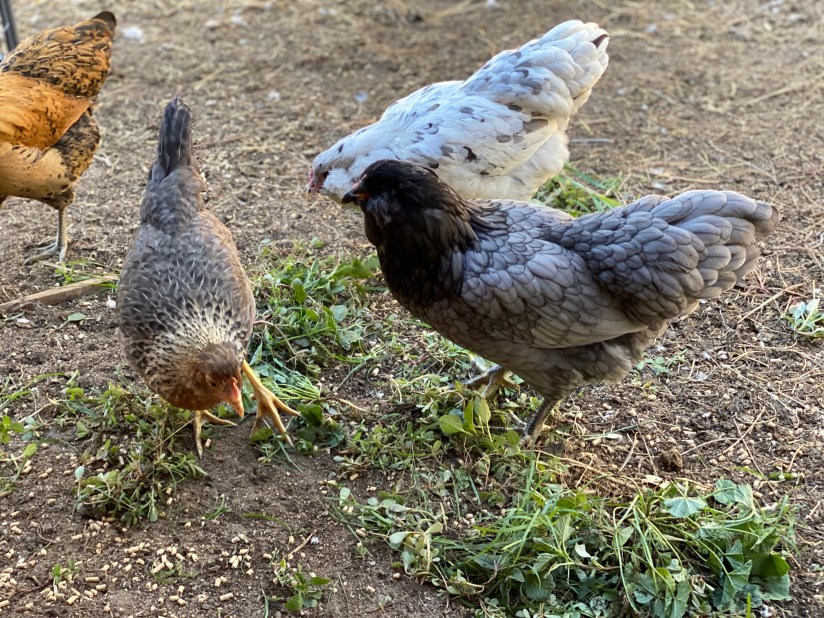
Imagine you’re strutting your stuff down the poultry runway, sporting your most fabulous feathers, and suddenly, they start falling out! This scenario isn’t just a chicken’s worst fashion nightmare; it’s a natural process known as molting. We’re going to dive into the world of chicken molting, discover why it happens, and learn how to help your feathered friends regain their beautiful plumage.

Feather Frustration: Why Do Chickens Molt?

Molting is like a seasonal makeover for chickens, and just like the leaves falling off trees in autumn, it’s all about rejuvenation. Here’s why those feathers need to hit the hay:

  1. Wear and Tear: Chickens wear their feathers like a badge of honor. Over time, feathers become damaged and lose their luster. Molting allows them to shed the old, worn-out feathers and replace them with fresh, fabulous ones.
  2. Seasonal Changes: Chickens molt in response to changes in daylight and temperature. The shorter days and cooler weather of fall trigger the molting process, helping chickens prepare for the winter ahead.
  3. Energy Conservation: Growing new feathers is no small feat; it requires a lot of energy. By molting when food is plentiful in late summer and early fall, chickens can invest their energy in feather regrowth without compromising their overall health.
  4. Feather Mites and Lice: Sometimes, molting can be a response to an infestation of feather mites or lice. Chickens shed their feathers to get rid of these pesky hitchhikers and grow new, parasite-free plumage.

How to Help Molting Chickens

Now that we know why chickens molt, let’s explore some ways to help them through this feathered frenzy:

  1. Warm, Dry Shelter: Providing your chickens with a cozy, warm coop is essential during molt. Make sure they have a draft-free space to rest and stay warm and dry.
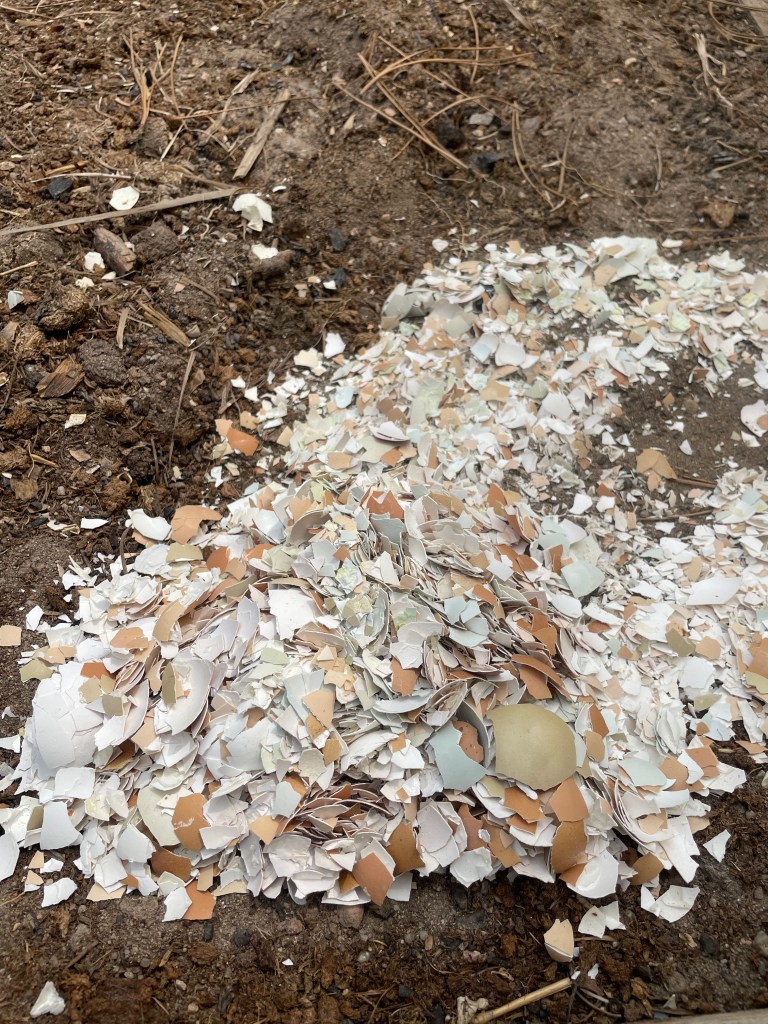
  2. Pamper with Protein: Chickens need extra protein during molt to grow strong, healthy feathers. Treat them to some mealworms, black soldier fly larvae, or scrambled eggs. Another great option is to add black sunflower seeds to their feed as they are high in protein and vitamins.
  1. Flock Support Group: Chickens are social creatures, and molting can be a tough time emotionally. Make sure they have plenty of companionship and keep an eye out for bullying in the coop.
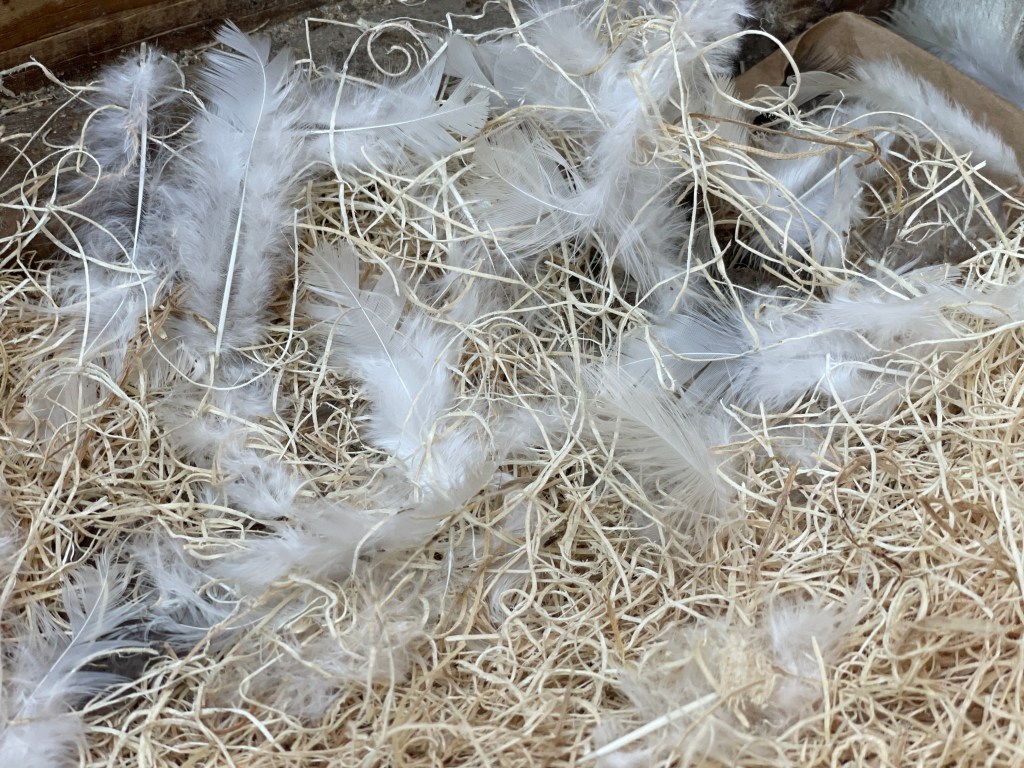
  2. Fluff and Feather Bedding: Soft, cozy bedding in the coop helps reduce stress on the skin and keeps your molting chickens comfortable. Hemp or pine shaving bedding works well.
  3. Feather-Boosting Supplements: Consider adding supplements like poultry vitamins or omega-3 fatty acids to their diet to support feather regrowth.
  4. Avoid unnecessary irritation: Growing new feathers can be painful so try not to handle molting chickens too much and make sure their flockmates aren’t picking on them.

Molting may leave your chickens looking a bit disheveled, but it’s all part of their natural feathered journey. With a little TLC and a few fun strategies, you can help your molting chickens feel fabulous during this transitional period. Before you know it, they’ll be flaunting their beautiful new feathers with pride. So, embrace the molting season, and remember, all chickens need a little extra love from time to time!

DIY, Sustainability

Mix and Match Magic: The Best Ingredients for DIY Skincare Adventures

Picture this: You, in your cozy kitchen, donning a DIY skincare wizard’s hat, concocting potions and elixirs that make your skin sing with joy. Welcome to the world of DIY skincare, where your favorite ingredients from the pantry and garden become the stars of your skincare routine. In this blog post, we’ll take you on a magical journey through the best ingredients for DIY skincare that will leave you glowing and feeling like a skincare sorcerer.

  1. Coconut Oil: The Enchanting Moisturizer

Ah, the versatile coconut oil! This kitchen staple doubles as a skin savior. It’s rich in fatty acids, making it a fantastic natural moisturizer. Whip up a luxurious body butter by combining coconut oil with a few drops of your favorite essential oil, and you’ll be on cloud nine.

  1. Honey: The Sweet Elixir of Youth

Honey is more than just a drizzle for your tea; it’s a natural humectant that locks moisture into your skin. Mix honey with a bit of yogurt for a soothing face mask, or blend it with oats for a gentle exfoliant. It’s the sweet secret to youthful and radiant skin.

  1. Avocado: The Creamy Complexion Booster

Avocado is a superfood for your skin! Its natural oils and vitamins can hydrate, nourish, and soothe your skin. Mash up some ripe avocado and create a hydrating face mask that’ll make your skin feel as smooth as butter.

  1. Aloe Vera: The Soothing Sorceress

Aloe vera is your go-to ingredient for soothing irritated or sunburned skin. Just slice open a leaf and apply the gel directly or mix it with a bit of coconut oil for an ultra-hydrating potion. Aloe vera’s magical touch will have you feeling refreshed in no time.

  1. Oatmeal: The Gentle Exfoliator

Oatmeal isn’t just for breakfast; it’s a gentle exfoliant that can soothe sensitive skin. Blend oats into a fine powder and mix with yogurt or honey for a soothing face scrub. Your skin will thank you for the pampering.

  1. Tea: The Brew of Radiance

Tea isn’t just for sipping; it can also work wonders for your skin. Green tea, in particular, is loaded with antioxidants that fight signs of aging. Brew a strong cup, let it cool, and use it as a toner or mix it into your DIY skincare creations for an extra boost of radiance.

  1. Lemon: The Zesty Brightener

Lemon is like a burst of sunshine for your skin! Its high vitamin C content can brighten your complexion and even out skin tone. Mix fresh lemon juice with yogurt for a brightening face mask, but be cautious with sun exposure afterward, as lemon juice can make your skin more sensitive to UV rays.

  1. Sugar: The Sweet Scrub

Sugar isn’t just for sweetening your tea; it’s also an excellent natural exfoliant. Create a simple sugar scrub by mixing sugar with olive oil and a few drops of essential oil. Gently massage it onto your skin to reveal a soft and radiant complexion.

Creating your own DIY lotions and skincare products can be a rewarding and natural way to care for your skin. Here are some of the best ingredients for DIY lotions and skincare:

  1. Carrier Oils: Carrier oils provide the base for your skincare products and offer various benefits. Some popular options include:
  • Jojoba oil: Suitable for most skin types, as it closely resembles the skin’s natural sebum.
  • Coconut oil: Known for its moisturizing properties, but may not be suitable for acne-prone skin.
  • Sweet almond oil: A versatile and nourishing oil suitable for most skin types.
  • Argan oil: High in antioxidants and excellent for dry or mature skin.
  1. Shea Butter: Shea butter is a rich and creamy ingredient that provides intense hydration and helps improve skin elasticity. It’s ideal for making thick, luxurious creams.
  2. Beeswax: Beeswax is used to thicken lotions and create a protective barrier on the skin. It’s especially helpful in recipes for lip balms and salves. Ask around your local beekeeping community to see if they have extra wax!
  3. Essential Oils: Essential oils add fragrance and therapeutic properties to your skincare products. Be cautious with essential oils, as they are potent and should be diluted properly. Some popular options include:
  • Lavender oil: Known for its calming and soothing properties.
  • Tea tree oil: A powerful antimicrobial that’s excellent for acne-prone skin.
  • Rosehip oil: Contains vitamins and antioxidants, suitable for anti-aging formulations.
  • Chamomile oil: Soothing and gentle, suitable for sensitive skin.
  1. Aloe Vera Gel: Aloe vera is known for its soothing and moisturizing properties. It’s great for sunburn relief and sensitive skin.
  2. Honey: Honey is a natural humectant, which means it helps retain moisture. It’s also antimicrobial and can be added to facial masks or cleansers.
  3. Glycerin: Glycerin is a hydrating ingredient that draws moisture from the air into your skin. It’s commonly used in serums and moisturizers.
  4. Vitamin E Oil: Vitamin E is an antioxidant that can help protect the skin from free radicals and promote skin healing. It’s often added to anti-aging skincare products.
  5. Clay: Different types of clay, such as bentonite or kaolin clay, can be used in face masks and cleansers to absorb excess oil, unclog pores, and provide gentle exfoliation.
  6. Hydrosols (Floral Waters): Hydrosols are byproducts of essential oil distillation and offer a mild, fragrant alternative to plain water in skincare formulations.
  7. Oatmeal: Ground oats can be used in masks and cleansers for gentle exfoliation and soothing properties, making it suitable for sensitive skin.
  8. Green Tea: Brewed and cooled green tea can be added to toners and serums for its antioxidant and anti-inflammatory benefits.
  9. Witch Hazel: Witch hazel is a natural astringent and can be used in toners to help balance oily or acne-prone skin.

Remember that it’s essential to use clean containers and follow proper storage guidelines when making DIY skincare products. Additionally, be mindful of any allergies or sensitivities you may have to these ingredients and perform patch tests when trying new formulations. DIY skincare can be a fun and rewarding way to tailor products to your specific needs while using natural ingredients that are gentle on your skin.

With these enchanting ingredients from your kitchen and garden, you’re well on your way to becoming a DIY skincare magician. These natural treasures are not only easy on your wallet but also free from harsh chemicals and additives. So, whip up your own skincare potions, experiment with combinations, and let your inner skincare sorcerer shine. Your skin will thank you for the magic you’ve brought into your daily routine, and you’ll be glowing with confidence!

DIY, Gardening, Sustainability

Sweeten Your Life and Save the World: Why You Should Have Bees on Your Homestead

Imagine a world without honey drizzling over warm biscuits or buzzing gardens filled with colorful flowers and bountiful harvests. Now, envision a homestead teeming with industrious little workers – bees! While bees are often associated with the painful prospect of getting stung, having a colony of these fuzzy pollinators can be a sweet addition to your homestead. In this entertaining blog post, we’ll explore why having bees on your homestead is a brilliant idea that promises to sweeten your life and help save the world.

  1. Honey: The Liquid Gold of Nature

Let’s start with the most obvious and delectable reason: honey! Bees are like nature’s tiny alchemists, transforming nectar into the golden nectar of the gods. Having your own beehive means a constant supply of this sweet elixir right at your doorstep. Use it to sweeten your tea, drizzle it over pancakes, or concoct your homemade honey mustard dressing.

Honey is not just a sweet treat; it also offers a range of potential health benefits when consumed in moderation. Here are some of the health benefits of raw honey:

  1. Antioxidant Properties: Honey contains various antioxidants, such as flavonoids and phenolic compounds, which can help protect the body’s cells from oxidative stress and reduce the risk of chronic diseases.
  2. Wound Healing: Honey has been used for centuries as a natural remedy for wound healing. Its antibacterial and anti-inflammatory properties can help soothe and heal minor burns, cuts, and wounds.
  3. Cough and Throat Irritation Relief: Honey can be an effective remedy for soothing a sore throat and suppressing coughs. Its thick consistency coats the throat, reducing irritation, and its antimicrobial properties may help fight infections.
  4. Improved Sleep: Consuming honey before bedtime may improve sleep quality. Honey helps increase insulin levels slightly, which promotes the release of tryptophan in the brain. Tryptophan is then converted into serotonin and melatonin, hormones that regulate sleep.
  5. Digestive Health: Honey is known to have mild laxative effects and can help alleviate constipation when consumed in moderation. It may also aid in overall digestive health.
  6. Allergy Symptom Relief: Some people believe that consuming locally sourced honey may help alleviate allergy symptoms. The idea is that exposure to trace amounts of pollen in honey can desensitize the body to pollen allergies. However, scientific evidence supporting this claim is limited.
  7. Heart Health: Regular consumption of honey has been associated with potential improvements in heart health. It may help reduce risk factors for cardiovascular diseases, such as high blood pressure and high cholesterol levels.
  8. Blood Sugar Regulation: While honey is a natural sweetener, it has a lower glycemic index compared to sugar. This means it may cause a slower and smaller rise in blood sugar levels when consumed in moderation. However, people with diabetes should still monitor their honey intake and consult a healthcare provider.
  9. Antibacterial and Antifungal Properties: Honey’s natural composition, including low water content and acidity, can create an environment that inhibits the growth of bacteria and fungi. It has been used topically to treat minor skin infections.
  10. Weight Management: Replacing sugar with honey in some recipes may help reduce overall calorie intake. However, it’s essential to use honey in moderation, as it still contains calories.
  1. Pollination Powerhouse

Bees are nature’s most efficient pollinators. They flit from flower to flower, helping plants reproduce by carrying pollen from the male to the female parts. Having bees on your homestead means better pollination for your fruit trees, berry bushes, and garden veggies. Expect larger, juicier, and more abundant crops as a result. Bees turn your homestead into a buzzing pollination party!

Photo by Pixabay on Pexels.com
  1. Supporting Biodiversity

By hosting a beehive, you’re contributing to the conservation of local flora and fauna. Bees play a crucial role in the ecosystem by pollinating not only crops but also wildflowers. When you keep bees, you’re doing your part to protect biodiversity and preserve the delicate balance of nature.

  1. Educational Entertainment

If you’ve ever wondered about the secret life of bees, having a hive on your homestead offers a front-row seat. Beekeeping is an educational and fascinating hobby that will keep you entertained for hours. From observing their intricate dances to learning about hive dynamics, bees are like tiny philosophers who have much to teach us.

  1. Wax Wonders

Honey isn’t the only treasure bees bestow upon us. Beeswax is a versatile and valuable resource. You can use it to make candles, lip balms, soaps, and even furniture polish. Beeswax products also make thoughtful and eco-friendly gifts for friends and family.

Beeswax is a versatile natural substance with a wide range of uses due to its unique properties. Here are some common and creative applications for beeswax:

  1. Candles: Beeswax candles are famous for their clean and natural burn. They emit a pleasant honey scent and are often preferred over paraffin candles, which can release harmful chemicals when burned.
  2. Cosmetics and Skincare Products: Beeswax is a common ingredient in lip balms, lotions, creams, and salves. It helps lock in moisture and provides a protective barrier for the skin.
  3. Soap Making: Beeswax can be added to homemade soap recipes to enhance hardness and provide a smooth texture.
  4. Wood Polish: Mix beeswax with a carrier oil (such as olive oil) to create a natural wood polish. It adds a protective layer to wooden surfaces and enhances their shine.
  5. Leather Conditioner: Beeswax can be used to condition and waterproof leather goods like boots, belts, and bags.
  6. Thread Conditioning: Running a piece of beeswax over sewing thread can make it stronger, reduce friction, and prevent fraying during sewing.
  7. Art and Craft Projects: Beeswax can be used in various art and craft projects, such as encaustic painting, sculpting, and making wax seals.
  8. Food Preservation: Historically, beeswax was used to coat cheese to protect it from mold and dehydration. While less common today, it’s still used in some specialty cheeses.
  9. Grafting and Budding: In horticulture, beeswax is used to seal grafts and buds on plants to promote successful propagation.
  10. Homemade Deodorant: Beeswax is used in some DIY deodorant recipes for its consistency and skin-friendly properties.
  11. Tack Cloth: Beeswax-soaked cloths are used in woodworking as tack cloths to remove sawdust and debris from surfaces before finishing.
  12. Crayons: Beeswax crayons are a non-toxic alternative to traditional crayons, making them safe for children to use.
  13. Fire Starters: Mix beeswax with sawdust or wood shavings to create fire starters for camping or heating.
  14. Tool Lubrication: Apply a thin layer of beeswax to saw blades, hand tools, or even the soles of hand planes to reduce friction and improve performance.
  15. Dreadlock Maintenance: Beeswax is sometimes used to maintain and shape dreadlocks by providing hold and structure.
  16. Modeling and Sculpting: Beeswax’s pliability makes it a great material for modeling and sculpting, especially in educational settings.
  17. Embalming and Taxidermy: Historically, beeswax was used in embalming and taxidermy to preserve and shape tissue and feathers.
  18. Sealing and Waterproofing: Beeswax can be used to seal envelopes, containers, and seams to make them waterproof and airtight.

Remember that the quality of beeswax can vary, so using high-quality, pure beeswax is essential for some applications, such as cosmetics and skincare products. Additionally, when working with beeswax, consider proper safety precautions, as it can be flammable when heated, and melting it should be done with care.

  1. Environmental Stewardship

Bees are facing multiple threats, including habitat loss and pesticide exposure. By keeping bees on your homestead, you’re contributing to their conservation. Creating a bee-friendly environment, free of harmful pesticides, is a small but impactful step toward preserving these essential pollinators.

  1. Community Building

Beekeeping isn’t just about bees; it’s also about building a buzzing community. Joining local beekeeping clubs or sharing your honey and beeswax products with neighbors can foster camaraderie and a sense of shared responsibility for the environment.

Bees are like the unsung heroes of our ecosystem. They provide us with honey, improve our harvests, and support biodiversity, all while working tirelessly without asking for much in return. So, why not consider welcoming a beehive to your homestead? It’s a decision that promises to sweeten your life, provide hours of entertainment, and contribute to the well-being of our planet. Beekeeping isn’t just a hobby; it’s a way to become a guardian of these remarkable creatures and a steward of the environment. So, put on your beekeeper’s suit and embark on a sweet journey of discovery with these marvelous little insects!

DIY, Sustainability

Harnessing the Power of Vinegar: Natural DIY Cleaning Recipes

When it comes to cleaning our homes, many of us reach for commercial cleaning products that promise to eliminate dirt, stains, and odors. However, these products often contain harsh chemicals that can be harmful to both our health and the environment. Fortunately, there’s a natural alternative that has been used for centuries – vinegar! In this blog post, we’ll explore the versatility of vinegar as a cleaner and provide you with some simple and effective DIY cleaning recipes that harness its power.

The Magic of Vinegar

Vinegar, specifically white distilled vinegar, is a powerful and natural cleaning agent. It’s non-toxic, eco-friendly, and readily available. Its acidity makes it effective at dissolving mineral deposits, cutting through grease, and neutralizing odors. Plus, it’s incredibly affordable, making it a budget-friendly option for eco-conscious homeowners. I like to infuse my vinegar beforehand to give it a fresh, clean smell before cleaning. Alternately, you can add your favorite essential oils.

Creating Your Own Infused Vinegar: A Step-by-Step Guide

Ingredients:

  • Herbs: Choose fresh herbs like mint, thyme, rosemary, or lemongrass. You can also experiment with dried herbs.
  • Citrus: Lemons, limes, oranges, or a combination work beautifully. Organic citrus fruits are preferred, as they are free from chemical residues.
  • Vinegar: Use a high-quality vinegar white vinegar
  • A clean glass bottle or jar with a tight-fitting lid

Instructions:

  1. Wash and Dry: Thoroughly wash and dry the herbs and citrus fruits to remove any dirt or residue.
  2. Prepare the Herbs: If using fresh herbs, remove the leaves from the stems and lightly bruise them to release their essential oils. If using dried herbs, measure them out according to your preference.
  3. Citrus: Simply use the rinds of citrus fruits.
  4. Combine Ingredients: In your glass bottle or jar, layer the herbs and/or citrus rinds. Start with a layer of herbs, followed by citrus zest, and repeat until the bottle is filled, leaving a small gap at the top.
  5. Heat the Vinegar: In a saucepan, heat the vinegar until it’s just about to simmer. Avoid boiling it. Heating the vinegar helps it extract scent more effectively. This is an optional step – you can just use cold vinegar.
  6. Pour the Vinegar: Carefully pour the hot vinegar over the herbs and citrus zest in the bottle. Seal the bottle tightly with its lid.
  7. Infusion Time: Store the bottle in a cool, dark place for at least one to two weeks, allowing the scents to be extracted out. Shake the bottle gently every few days to mix the contents.
  8. Strain and Store: After the infusion period, strain out the herbs and citrus using a fine mesh strainer or cheesecloth. Transfer the infused vinegar to a clean, sterilized bottle or jar and seal it.

DIY Vinegar Cleaning Recipes

All-Purpose Cleaner

Ingredients:

  • 1 part white distilled vinegar
  • 1 part water
  • Optional: 10-15 drops of essential oil (e.g., lavender, lemon, tea tree) for a pleasant scent

Instructions:

  1. Mix the vinegar and water in a spray bottle.
  2. Add essential oils if desired.
  3. Shake well before use.
  4. Use this solution to clean countertops, sinks, appliances, and more.

    Glass and Mirror Cleaner

Ingredients:

  • 1 part white distilled vinegar
  • 1 part water

Instructions:

  1. Mix the vinegar and water in a spray bottle.
  2. Spray the solution onto glass surfaces.
  3. Wipe clean with a lint-free cloth or newspaper for streak-free results.

    Oven Cleaner

Ingredients:

  • 1/2 cup white distilled vinegar
  • 1/2 cup baking soda
  • Water

Instructions:

  1. Remove oven racks and sprinkle baking soda on the oven’s interior surfaces.
  2. Spray the baking soda with water until it forms a paste.
  3. Let the paste sit overnight.
  4. The next day, wipe away the paste and grime with a cloth or sponge soaked in vinegar.

    Toilet Bowl Cleaner

Ingredients:

  • 1 cup white distilled vinegar
  • 1/2 cup baking soda

Instructions:

  1. Sprinkle the baking soda into the toilet bowl.
  2. Pour the vinegar over the baking soda.
  3. Let it fizz and sit for 10-15 minutes.
  4. Scrub the bowl with a toilet brush and flush.

    Floor Cleaner

Ingredients:

  • 1 gallon of warm water
  • 1 cup white distilled vinegar

Instructions:

  1. Mix the vinegar and warm water in a bucket.
  2. Mop your floors as usual, using this solution.

Vinegar is a natural, budget-friendly, and eco-friendly alternative to commercial cleaning products. These DIY vinegar-based cleaning recipes are not only effective but also safe for you, your family, and the environment. So, the next time you embark on your cleaning spree, give vinegar a chance to shine – you might be surprised at the fantastic results it delivers. Embrace the power of vinegar and make your home cleaner and greener today!

DIY

Embrace Autumn’s Aromas: DIY Natural Potpourri for a Cozy Fall Atmosphere


As the leaves change colors and a crispness fills the air, there’s no denying that fall has arrived. To truly savor the essence of this wonderful season, let’s bring some of its signature scents indoors. Forget store-bought potpourri; in this blog post, we’ll dive into the world of DIY natural potpourri. It’s easy, budget-friendly, and the perfect way to infuse your home with the warm, inviting fragrances of autumn. Get ready to transform your space into a cozy autumn oasis!

1. Cinnamon Spice and Everything Nice

Ingredients:

  • 4-5 cinnamon sticks
  • 1 orange peel (dried)
  • 1 tablespoon whole cloves
  • 2-3 star anise pods
  • 1 vanilla bean (optional)

Instructions:

  1. Break the cinnamon sticks into smaller pieces.
  2. Combine all the ingredients in a bowl or a decorative dish.
  3. Place your potpourri mix in various spots around your home, like the living room, kitchen, or bathroom.
  4. The combination of cinnamon, cloves, and orange will fill your home with a warm, spicy aroma.

2. Apple Orchard Delight

Ingredients:

  • 1-2 dried apple slices (homemade or store-bought)
  • A handful of dried cranberries
  • 1-2 cinnamon sticks
  • A few whole nutmegs (optional)

Instructions:

  1. Cut dried apple slices into smaller pieces if they’re too large.
  2. Combine all the ingredients in a bowl or a sachet.
  3. Place your potpourri in a decorative bowl or arrange it in a small mesh bag.
  4. The sweet and fruity aroma of apple and cranberry will evoke memories of orchard adventures.

3. Autumn Woodsy Wonderland

Ingredients:

  • 1 small pinecone
  • A handful of acorns
  • 2-3 small cedar branches or pine needles
  • 2-3 juniper berries (optional)

Instructions:

  1. Gather the natural elements like pinecones, acorns, and cedar branches.
  2. Place them in a decorative bowl or basket.
  3. Add juniper berries if you want an extra woodsy touch.
  4. The scent of pine and cedar will bring the essence of a forest right into your home.

4. Pumpkin Pie Paradise

Ingredients:

  • 1-2 small dried pumpkin slices (homemade or store-bought)
  • 1-2 cinnamon sticks
  • A pinch of ground cloves
  • A pinch of ground nutmeg

Instructions:

  1. Cut dried pumpkin slices into smaller pieces.
  2. Combine the pumpkin slices, cinnamon sticks, and ground spices in a bowl.
  3. Display your potpourri in a pretty dish.
  4. The delightful aroma of pumpkin pie will have everyone craving a slice.

5. Spiced Citrus Dream

Ingredients:

  • 1 dried orange slice (homemade or store-bought)
  • 1-2 star anise pods
  • 2-3 cloves
  • A few dried lemon or lime slices (optional)

Instructions:

  1. Cut the dried orange slice into smaller pieces if needed.
  2. Combine all the ingredients in a bowl or a decorative dish.
  3. If you have dried citrus slices, you can add them for an extra burst of citrusy fragrance.
  4. The combination of orange and spice will create a zesty, invigorating scent.

6. Harvest Bounty Medley

Ingredients:

  • A mix of dried apple slices, cinnamon sticks, and whole cloves
  • A few dried leaves (maple or oak, if available)

Instructions:

  • Combine all the ingredients in a bowl or a decorative container.
  • Tuck in some dried leaves for an authentic harvest feel.
  • Place your potpourri on your coffee table or in a decorative dish.
  • The aroma of apples and spices mixed with the earthy scent of dried leaves will transport you to an autumn harvest festival.


With these DIY natural potpourri recipes, your home will be filled with the scents of fall in no time. These simple yet creative blends will not only make your space smell fantastic but also add a touch of seasonal charm to your decor. Embrace autumn’s aromas and enjoy the cozy ambiance they create as you sip on your pumpkin spice latte and cozy up with a blanket. Happy potpourri crafting!

Animals, dogs

Pamper Your Pup: Natural Paw and Skin Care Recipes for Your Furry Friend!


Our four-legged companions deserve all the love and care in the world, and that includes taking care of their paws and skin. While there are plenty of commercial pet products out there, why not try some natural, DIY remedies that are not only effective but also fun to make? In this blog post, we’ll explore a collection of natural recipes to pamper your furry friend’s paws and skin. Let’s get started on the journey to happy and healthy pet paws!

1. Soothing Paw Balm

Ingredients:

  • 2 tablespoons coconut oil
  • 1 tablespoon shea butter
  • 1 tablespoon beeswax pellets
  • 1 tablespoon olive oil
  • 5-6 drops lavender essential oil

Instructions:

  1. In a double boiler, melt the coconut oil, shea butter, and beeswax pellets together.
  2. Once melted, remove from heat and stir in the olive oil and lavender essential oil (if using).
  3. Pour the mixture into small containers or silicone molds and allow it to cool and solidify.
  4. Apply a small amount to your dog’s paws for protection and moisture.

2. Oatmeal and Honey Dog Shampoo

Ingredients:

  • 1 cup old-fashioned oats
  • 1 cup warm water
  • 2 tablespoons honey
  • 2 tablespoons aloe vera gel
  • 2-3 drops lavender essential oil

Instructions:

  1. Grind the oats in a food processor or coffee grinder to create a fine powder.
  2. Mix the oatmeal powder with warm water to create a paste.
  3. Stir in the honey, aloe vera gel, and lavender essential oil.
  4. Wet your dog’s fur, apply the shampoo, and massage it in.
  5. Rinse thoroughly, and your pup will have soft, clean skin.

3. Calming Chamomile Paw Soak

Ingredients:

  • 4-5 chamomile tea bags or dried chamomile from your garden
  • 2 cups warm water

Instructions:

  1. Steep the chamomile tea bags in warm water until it cools to room temperature.
  2. Remove the tea bags and discard them.
  3. Pour the chamomile tea into a shallow basin.
  4. Gently dip your dog’s paws into the soothing soak for a few minutes.
  5. Pat the paws dry afterward and apply paw balm for extra soft paws

4. Coconut Oil Paw Massage

Ingredients:

  • Extra virgin coconut oil

Instructions:

  1. Simply take a small amount of coconut oil in your hands and allow it to melt.
  2. Gently massage your dog’s paws, paying attention to dry or cracked areas.
  3. Coconut oil is safe for dogs to lick, so no need to worry if they try!

5. DIY Anti-Itch Spray

Ingredients:

  • 1 cup distilled water
  • 2 tablespoons apple cider vinegar
  • 2 tablespoons aloe vera gel
  • 2-3 drops lavender or tea tree essential oil

Instructions:

  1. Combine all the ingredients in a spray bottle and shake well.
  2. Spray the mixture on itchy or irritated areas of your dog’s skin.
  3. Avoid spraying it in their eyes or sensitive areas.

6. Healing Lavender and Calendula Salve

Ingredients:

  • 1/4 cup dried calendula flowers
  • 1/4 cup dried lavender flowers
  • 1 cup olive oil
  • 1/4 cup beeswax pellets
  • 5-6 drops lavender essential oil

Instructions:

  1. Infuse the dried calendula and lavender flowers in olive oil for 1-2 weeks in a dark, cool place.
  2. Strain the infused oil into a clean glass jar.
  3. In a double boiler, melt the beeswax pellets and infused oil together.
  4. Remove from heat, stir in the lavender essential oil, and pour into containers.
  5. Apply this salve to your dog’s minor cuts, scrapes, or irritated skin.


Taking care of your furry friend’s paws and skin can be both nurturing and rewarding. These natural DIY recipes not only provide essential care but also strengthen the bond between you and your beloved pet. Whether you’re applying soothing paw balm or creating a calming chamomile paw soak, these natural remedies ensure that your pup’s skin and paws stay healthy, happy, and pampered!

Gardening, Recipes, Vegetables

Zucchini Extravaganza: A Garden’s Green Goldmine of Recipes!


Ah, zucchini – that prolific green gem of the garden that seems to multiply overnight! If you’ve got a bumper crop of this summer squash and are wondering what to do with it all, you’re in for a treat. In this zucchini extravaganza, we’ll explore a variety of delicious and creative recipes to make the most of this versatile vegetable. From savory to sweet, zucchini’s got you covered!

1. Classic Zucchini Bread: A Sweet Beginning

Ingredients:

  • 2 cups grated zucchini
  • 2 1/2 cups all-purpose flour
  • 1 1/2 teaspoons baking powder
  • 1/2 teaspoon baking soda
  • 1 teaspoon ground cinnamon
  • 1/2 teaspoon ground nutmeg
  • 1/2 cup unsalted butter, softened
  • 1 cup granulated sugar
  • 2 large eggs
  • 1 teaspoon vanilla extract
  • 1/2 cup chopped nuts or chocolate chips (optional)

Instructions:

  1. Preheat your oven to 350°F (175°C) and grease a loaf pan.
  2. Squeeze excess moisture from the grated zucchini and set it aside.
  3. In a bowl, whisk together the flour, baking powder, baking soda, cinnamon, and nutmeg.
  4. In another bowl, cream the butter and sugar together until light and fluffy.
  5. Beat in the eggs, one at a time, followed by the vanilla extract.
  6. Gradually add the dry ingredients to the wet mixture, then fold in the grated zucchini and nuts/chocolate chips (if using).
  7. Pour the batter into the prepared loaf pan and bake for 55-60 minutes or until a toothpick inserted into the center comes out clean.
  8. Let it cool before slicing and savoring!

2. Zesty Zucchini Fritters: A Crispy Delight

Ingredients:

  • 2 cups grated zucchini
  • 1/2 cup grated Parmesan cheese
  • 1/4 cup breadcrumbs
  • 2 cloves garlic, minced
  • 1 large egg
  • 1/4 teaspoon salt
  • 1/4 teaspoon black pepper
  • Olive oil for frying

Instructions:

  1. Place the grated zucchini in a clean kitchen towel and squeeze out excess moisture.
  2. In a bowl, combine the grated zucchini, Parmesan cheese, breadcrumbs, minced garlic, egg, salt, and pepper.
  3. Heat olive oil in a skillet over medium-high heat.
  4. Drop spoonfuls of the zucchini mixture into the hot oil and flatten them with the back of a spatula.
  5. Cook for 2-3 minutes on each side or until golden brown and crispy.
  6. Drain on paper towels and serve with a dipping sauce of your choice.

3. Zucchini Noodles with Pesto: A Low-Carb Twist

Ingredients:

  • 4 medium zucchinis, spiralized into noodles
  • 1 cup fresh basil leaves
  • 1/2 cup grated Parmesan cheese
  • 1/4 cup pine nuts
  • 2 cloves garlic
  • 1/2 cup extra-virgin olive oil
  • Salt and pepper to taste

Instructions:

  1. In a food processor, blend the basil, Parmesan cheese, pine nuts, and garlic until well combined.
  2. While blending, slowly drizzle in the olive oil until you have a smooth pesto sauce.
  3. Season the zucchini noodles with salt and pepper.
  4. Toss the zucchini noodles with the pesto sauce until well coated.
  5. Serve immediately, garnished with extra Parmesan cheese and pine nuts if desired.

4. Stuffed Zucchini Boats: A Savory Surprise

Ingredients:

  • 4 medium zucchinis
  • 1 pound ground beef or turkey
  • 1 onion, diced
  • 1 bell pepper, diced
  • 2 cloves garlic, minced
  • 1 cup cooked rice or quinoa
  • 1 cup tomato sauce
  • 1 teaspoon Italian seasoning
  • Salt and pepper to taste
  • Shredded mozzarella cheese for topping (optional)

Instructions:

  1. Preheat your oven to 375°F (190°C).
  2. Cut the zucchinis in half lengthwise and scoop out the flesh, leaving a boat-like shell.
  3. In a skillet, brown the ground meat over medium heat. Drain excess fat if needed.
  4. Add the diced onion, bell pepper, and garlic to the skillet. Cook until the vegetables are tender.
  5. Stir in the cooked rice or quinoa, tomato sauce, Italian seasoning, salt, and pepper.
  6. Stuff each zucchini boat with the meat and vegetable mixture.
  7. Place the stuffed zucchinis in a baking dish and cover with foil.
  8. Bake for 25-30 minutes, or until the zucchinis are tender.
  9. If desired, top with shredded mozzarella cheese and bake for an additional 5 minutes or until the cheese is melted and bubbly.
  10. Serve your delicious zucchini boats hot and enjoy!

5. Chocolate Zucchini Brownies: A Sweet Surprise

Ingredients:

  • 1 1/2 cups grated zucchini
  • 1 cup all-purpose flour
  • 1/2 cup unsweetened cocoa powder
  • 1/2 teaspoon baking soda
  • 1/4 teaspoon baking powder
  • 1/4 teaspoon salt
  • 1/2 cup unsalted butter, melted
  • 1 cup granulated sugar
  • 2 large eggs
  • 1 teaspoon vanilla extract
  • 1/2 cup chocolate chips

Instructions:

  1. Preheat your oven to 350°F (175°C) and grease a 9×9-inch baking pan.
  2. Squeeze excess moisture from the grated zucchini and set it aside.
  3. In a bowl, whisk together the flour, cocoa powder, baking soda, baking powder, and salt.
  4. In another bowl, mix the melted butter and sugar until well combined.
  5. Add the eggs and vanilla extract to the butter-sugar mixture and stir until smooth.
  6. Gradually add the dry ingredients to the wet mixture, then fold in the grated zucchini and chocolate chips.
  7. Pour the batter into the prepared baking pan and spread it evenly.
  8. Bake for 25-30 minutes or until a toothpick inserted into the center comes out with a few moist crumbs.
  9. Allow the brownies to cool before cutting them into squares and indulging in chocolatey goodness!


From sweet to savory, these zucchini recipes are sure to delight your taste buds and make the most of your garden’s green bounty. Whether you’re enjoying zucchini bread for breakfast, zucchini fritters for lunch, or stuffed zucchini boats for dinner, this versatile vegetable offers endless culinary possibilities. So, get creative, get cooking, and savor the goodness of zucchini all summer long!

Animals, chickens, Sustainability

Egg-citing Savings: How to Feed Your Chickens on a Budget


If you’re a proud chicken keeper, you already know that these feathered friends are the gift that keeps on giving – fresh, delicious eggs! However, keeping your cluckers happy and well-fed doesn’t have to break the bank. In this budget-friendly guide, we’ll show you how to feed your chickens without feathering out your wallet.

1. The Grain Train: Mixing Your Own Chicken Feed

One of the most cost-effective ways to feed your chickens is by creating your own feed mix. You can buy bulk grains like corn, wheat, and oats, which are typically less expensive than pre-made feeds. Mix these grains in ratios suitable for your chickens’ age and purpose (layers, broilers, etc.). Sometimes you can find local business that mix their own for a much better price than buying at a traditional feed store.

2. Garden Goodies: Let Your Chickens Do the Work

Chickens love to forage, and allowing them access to your garden or a designated area can significantly reduce your feed expenses. They’ll feast on weeds, insects, and even kitchen scraps like vegetable peels, fruit cores, and leftover bread.

3. Dumpster Diving for Chickens (Legally, of Course!)

Okay, maybe not diving, but dumpster diving for your chickens can be a fantastic way to score free or nearly free food for your flock. Visit your local bakery or grocery store to inquire about getting their food scraps, like stale bread or produce that’s past its prime. Your chickens will be thrilled with the variety!

One of our favorite things to do is get spent grain from local breweries. This can supplement the feed of our chickens and goats.

4. Egg-cellent Supplements: Nutritional Bonuses

Instead of purchasing expensive commercial supplements, look for budget-friendly alternatives. Crushed eggshells, for example, can provide calcium, while mixing in yogurt or cottage cheese offers an extra protein boost. Plus, it’s a fun treat for your feathered friends!

5. Shop Smart: Find Deals and Discounts

Keep an eye out for sales and discounts at your local feed store or online. Buying in bulk can also save you money in the long run. Just ensure you have proper storage to keep your feed fresh and pest-free.

6. Flock Gardening: Grow Your Own Chicken Food

Consider planting a chicken-friendly garden. Grow crops like sunflowers, clover, or alfalfa that chickens love to munch on. Not only will this save you money, but it’ll also provide a natural source of nutrition for your flock.

7. DIY Chicken Treats: Homemade Goodies

Get creative with DIY chicken treats. Make your own suet blocks by mixing birdseed, cornmeal, and melted suet or lard. Freeze it in a mold, and voila – a budget-friendly chicken snack that’ll keep them clucking happily.

8. Share the Load: Collaborate with Fellow Chicken Keepers

Join a local poultry enthusiasts’ group or connect with friends and neighbors who also raise chickens. You can share resources, bulk purchases, or even take turns watching each other’s flocks when someone goes on vacation.

9. Chickens on a Diet: Optimize Their Food Consumption

Don’t overfeed your chickens. Monitor their consumption, and only provide what they can finish in a day to minimize waste. Investing in a good-quality feeder that prevents spillage can save you money in the long run.

10. Barter with Your Bounty: Trade Eggs or Chickens

If you have more eggs or chickens than you can handle, consider bartering with neighbors, friends, or local farmers. Trade for fresh produce, homemade goods, or even services to keep your chicken budget in check.

Feeding your chickens on a budget doesn’t mean sacrificing their health or happiness. With a little creativity, resourcefulness, and a dash of chicken charm, you can provide your feathered companions with a nutritious diet without emptying your wallet. So, get clucking and start saving – your chickens and your bank account will thank you!

Recipes

Spiced Pumpkin Soup

Ingredients

  • 1 Tablespoon butter
  • 1 cup onion, chopped
  • 3 Tablespoons all-purpose flour
  • 1/2 teaspoon curry powder
  • 1/4 teaspoon cumin
  • 1/4 teaspoon ground nutmeg
  • 2 garlic cloves, crushed
  • 1 cup peeled and cubed sweet potato
  • 1/4 teaspoon salt
  • 2 14-oz cans of nonfat and low-sodium chicken broth or vegetable stock
  • 1 15-oz can of pumpkin
  • 1 cup 1% milk
  • 1 Tablespoon fresh lime juice

Procedure

  1. Melt butter in a Dutch oven or large saucepan over medium-high heat. Saute onion for 3-4 minutes then add flour, curry, cumin and nutmeg and saute for 1 minute.
  2. Add sweet potato, salt, chicken broth and pumpkin and bring to a boil. Reduce heat to medium-low and simmer, partially covered for about 20-25 minutes or until sweet potatoes are cooked through and softened. Remove from heat and let stand for 10 minutes to cool.
  3. Place half of the pumpkin mixture in a blender and process until smooth. Using a strainer, pour soup back into pan. Repeat with rest of soup.
  4. Raise heat to medium then stir in milk and cook for 5 minutes or until soup is heated through.
  5. Remove from heat and add lime juice.

Health, Herbs, Recipes

Sip Your Way to Immunity: Delicious Herbal Teas to Boost Your Defenses


In a world where staying healthy is more important than ever, our immune systems deserve all the support they can get. While a well-balanced diet and regular exercise play crucial roles in maintaining good health, sometimes a comforting cup of herbal tea can be just the thing to give your immune system a little extra love. Join us on a flavorful journey as we explore some delightful, immunity-boosting herbal tea recipes that not only taste amazing but also provide a much-needed dose of wellness.

1. Ginger-Lemon Zest Tea: The Wake-Up Call Your Immune System Needs

Ingredients:

  • 1-inch piece of fresh ginger, sliced
  • 1 lemon, sliced
  • 1 teaspoon honey (optional)
  • 2 cups of water

Instructions:

  1. Boil 2 cups of water and add the ginger and lemon slices.
  2. Let it simmer for 5-7 minutes.
  3. Strain the tea into your favorite mug, and sweeten with honey if desired.
  4. Sip and enjoy the zesty goodness!

2. Turmeric Gold Elixir: The Warrior of Immunity

Ingredients:

  • 1 teaspoon turmeric powder
  • 1/2 teaspoon ground cinnamon
  • A pinch of black pepper
  • 1 teaspoon honey
  • 2 cups of almond milk (or any milk of your choice)

Instructions:

  1. In a saucepan, gently heat the almond milk.
  2. Add the turmeric, cinnamon, and a pinch of black pepper.
  3. Stir well and let it simmer for 5 minutes.
  4. Sweeten with honey and savor the golden goodness.

3. Minty Fresh Immune Tea: Cool and Calm Your Way to Wellness

Ingredients:

  • A handful of fresh mint leaves
  • 1 green tea bag (or 1 teaspoon loose green tea leaves)
  • 1 teaspoon honey (optional)
  • 2 cups of hot water

Instructions:

  1. Place the green tea bag (or loose leaves) and mint leaves in a teapot.
  2. Pour hot water over them and steep for 3-4 minutes.
  3. Remove the tea bag or strain the tea if using loose leaves.
  4. Sweeten with honey, if desired, and enjoy the refreshing minty flavor.

4. Elderberry Delight: Berry Blast for Immunity

Ingredients:

  • 2 tablespoons dried elderberries
  • 1 cinnamon stick
  • 1 teaspoon honey (optional)
  • 2 cups of water

Instructions:

  1. In a saucepan, combine the dried elderberries and cinnamon stick with water.
  2. Bring to a boil, then reduce heat and simmer for 15-20 minutes.
  3. Remove from heat, strain into a cup, and sweeten with honey if desired.
  4. Sip this berry-infused delight to boost your immune system.

5. Chamomile-Lavender Dream Tea: Sweet Dreams and Strong Immunity

Ingredients:

  • 1 chamomile tea bag (or 1 teaspoon dried chamomile flowers)
  • 1/2 teaspoon dried lavender buds
  • 1 teaspoon honey (optional)
  • 2 cups of hot water

Instructions:

  1. Place the chamomile tea bag (or chamomile flowers) and dried lavender buds in a teapot.
  2. Pour hot water over them and steep for 5-7 minutes.
  3. Remove the tea bag or strain the tea if using loose flowers.
  4. Sweeten with honey if desired, and sip your way to relaxation and immunity.


These delightful herbal teas not only tantalize your taste buds but also provide a comforting boost to your immune system. Incorporating these recipes into your daily routine can be a flavorful and enjoyable way to stay healthy. If you like to use dried herbs and prepare these ingredients ahead of time, I recommend tea bags like these or reusable ones otherwise a tea strainer like this works great. I also like adding my ingredients to a tea pot with the infuser in it. So, brew a cup, cozy up with a blanket, and let these immune-supporting herbal teas become your wellness companions in every season. Cheers to health and happiness!