Animals, chickens

Winter Care for Happy Hens: Keeping Your Chickens Healthy and Cozy


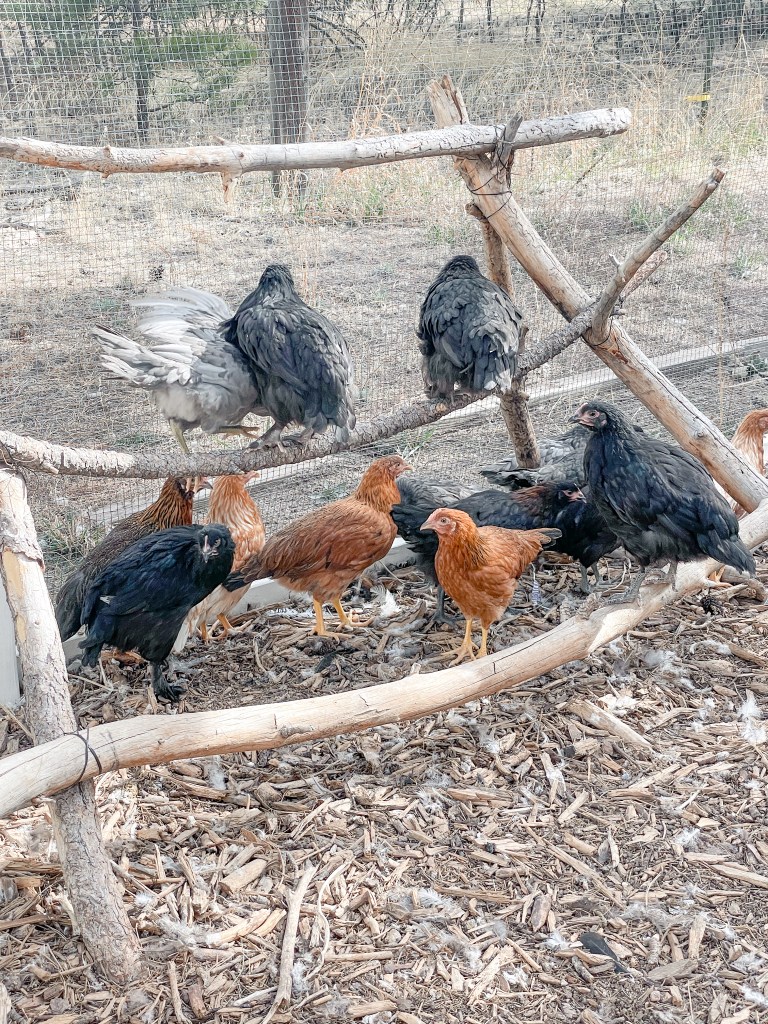
As winter blankets the landscape with snow and chilly temperatures, your feathered friends – the chickens – require a little extra care to ensure their well-being. Just like any other season, maintaining the health and comfort of your flock during winter is vital. In this blog post, we’ll explore essential tips and practices to keep your chickens healthy, happy, and thriving through the colder months.

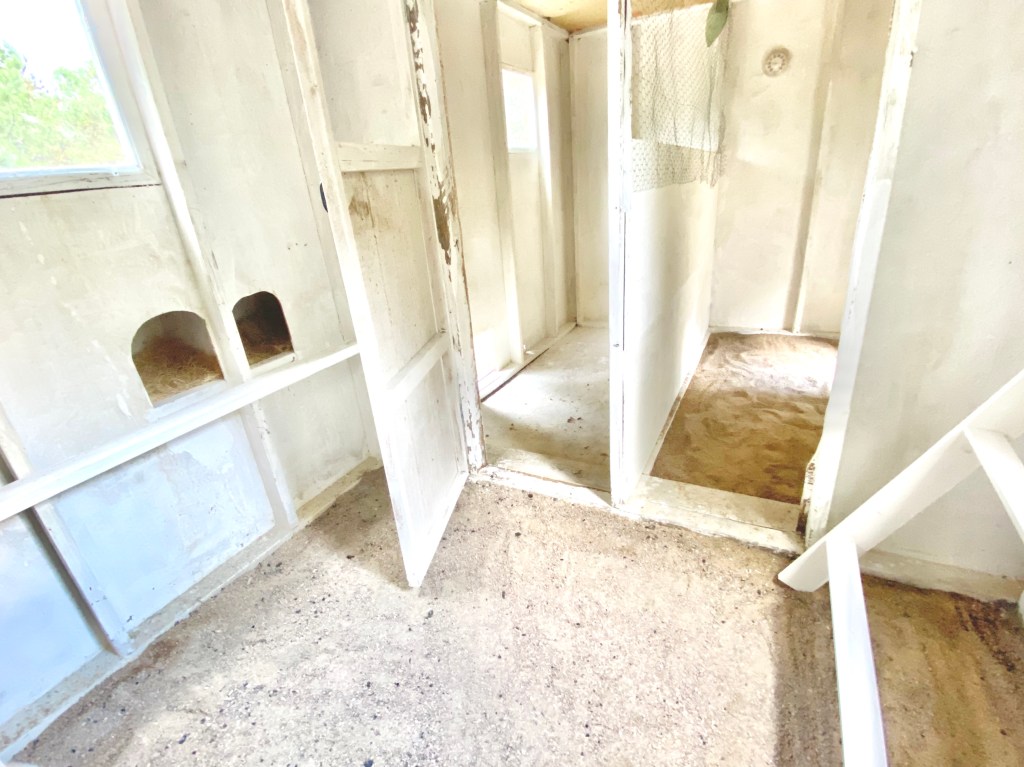
1. Provide Adequate Shelter:

A warm and dry coop is essential for your chickens’ winter comfort:

  • Insulation: Ensure your coop is well-insulated to prevent drafts and keep the interior temperature more stable. Preventing drafts is one of the most important things you can do to keep your chickens warm in the winter.
  • Ventilation: While insulation is important, proper ventilation is equally crucial to prevent moisture buildup and ammonia odors. Ventilation should be towards the top of the coop to keep air flow without drafts or allowing moisture to enter the coop.
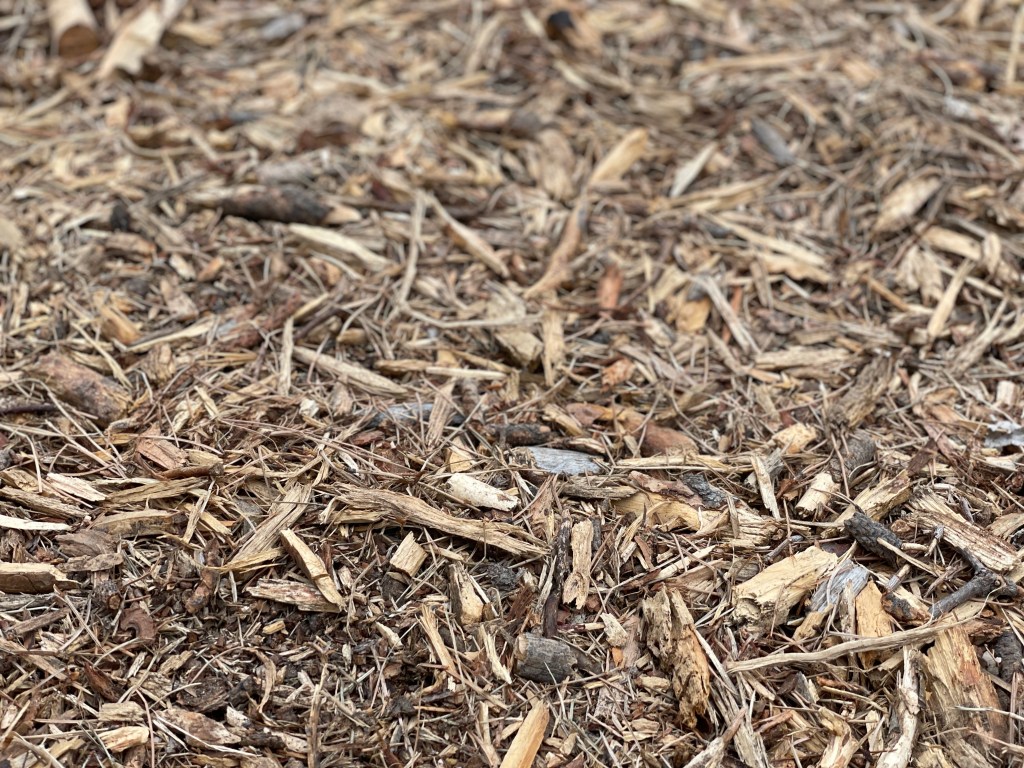
2. Deep Bedding:

Bedding helps insulate the coop and provides a cozy environment:

  • Deep Layers: Use straw, wood shavings, or other bedding materials to create a thick layer on the coop floor.
  • Regular Cleaning: While deep bedding provides warmth, it’s important to keep it clean and dry to avoid mold and odors.

3. Provide Ample Food and Water:

Winter requires extra energy to stay warm, so ensure your chickens have access to plenty of food and fresh water:

  • High-Quality Feed: Feed your chickens a balanced diet rich in protein to help them maintain their body heat.
  • Heated Water: Invest in a heated waterer to prevent water from freezing and provide hydration.

4. Keep Active:

Encourage your chickens to move around and stay active even during cold weather:

  • Clear Pathways: Clear snow and ice from outdoor areas where they roam to prevent frostbite and encourage movement.
  • Dust Baths: Provide a dry area for dust baths to help keep feathers clean and free from pests.

5. Provide Extra Heat Sparingly:

Chickens are naturally equipped to handle the cold, but in extreme cold conditions, you can consider supplemental heat:

  • Safe Heaters: If you decide to use a heater, opt for safe heating options designed for coops and ensure proper ventilation. I highly discourage the use of heat lamps because of the risk of fire.
  • Avoid Overheating: Chickens can be sensitive to sudden temperature changes, so avoid drastic shifts in temperature.

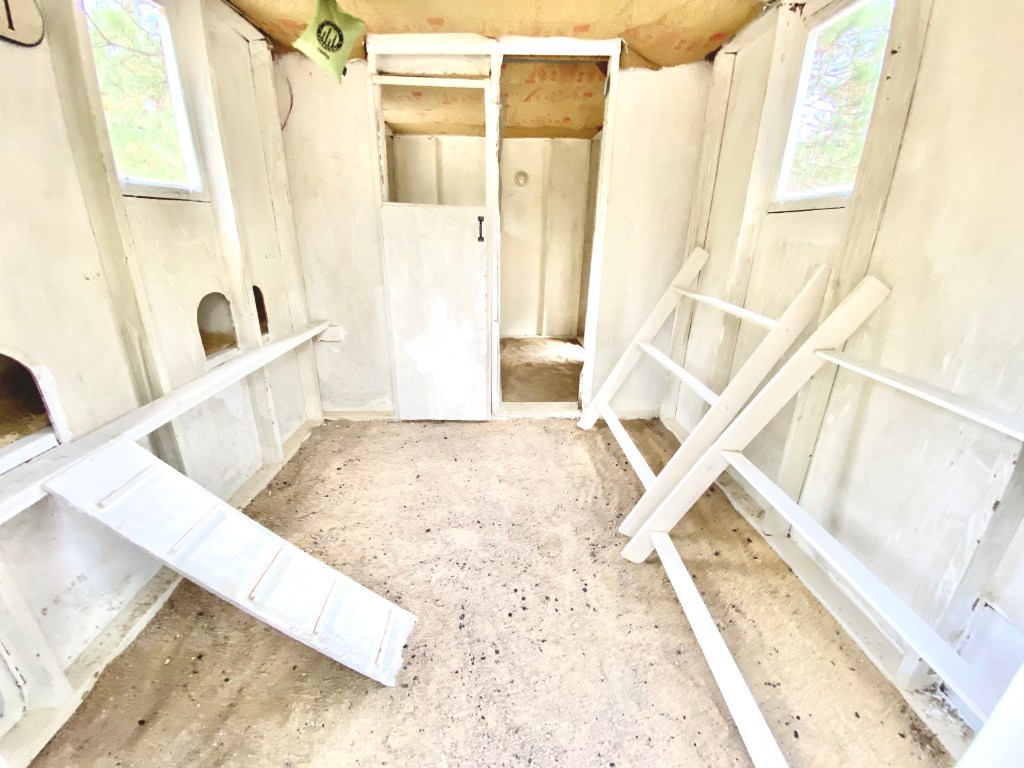
6. Prevent Frostbite:

Frostbite can affect combs, wattles, and toes:

  • Apply Petroleum Jelly or Bag Balm: Apply a thin layer of petroleum jelly to combs and wattles to help protect against frostbite.
  • Wide Roosting Bars: Provide wide roosting bars to allow chickens to tuck their feet under their bodies and keep them warm. We use 2x4s as roosting bars to help keep their feet warm.

7. Check Health Regularly:

Regular health checks are important during winter:

  • Observe Behavior: Watch for signs of illness, such as lethargy, decreased appetite, or difficulty breathing.
  • Separate Sick Birds: If you suspect a chicken is sick, isolate it from the rest of the flock to prevent the spread of illness.

Winter care for chickens is all about creating a comfortable environment that addresses their specific needs during cold weather. By providing adequate shelter, food, water, and attention to their health, you can ensure that your feathered companions stay healthy, warm, and content throughout the winter months. With a little extra effort and care, you’ll have a flock that continues to thrive and produce even in the chilliest of seasons.

Gardening

How To Keep Your Garden Healthy In Winter

Old Man Winters’ arrival doesn’t mean that the Winter garden can be neglected. Keeping the garden on an even footing against the ravages that winter can bring is an ongoing. Neglecting proper garden closing chores and winter maintenance tasks is only a recipe for a headache in the spring. Follow a few of these winter garden tips and a bountiful spring will be waiting in a few months time.

Setting the winter garden table

An interesting to look at and healthy winter garden depends upon taking steps in the late fall or early winter. Clean up the garden. Make sure that any garden trash is picked up before the snow flies. If this “trash” is left behind it presents an opportunity for bacteria to find its way into any cuts in the plant or onto the plants roots. Bacteria growth, and possible disease, on the plant is the biggest danger to a winter garden.

Watch out for color when trimming

If you have had your garden for at least one winter season you know what has color during winter and what does not. Trim this color judiciously looking for maverick branches, but be sure to keep the overall form of the shrub so that winter color can shine in a uniform way. If you are not sure, leave it alone and get a feel for what has winter color for next winter. If a shrub has a winter bud on it, leave it be as this is where the flower will come from next spring.

Trim out the cut or torn limbs

Chances are that a torn or cut (looks like a knife cutting into an apple about an eight of an inch deep) limb will end up dangling, or on the ground, as winter progresses. Take care of it early and your garden will look sturdy and ready for whatever the winter has to offer. Look for a nodule on the limb (looks like a knuckle of sorts) and cut about one quarter of an inch above it on an angle for a proper cut. 

Weed to a clean ground

Weeds also present a messy problem through the winter. Not only will they decay and offer disease potential, they will also continue to grow their roots until the ground freezes hard. This will only make them more invasive in the spring. Besides, if you weed to a clean ground you will have a nice clean contrast to the dormant plants in the garden.

A nice clean edge

Unless you are going for a more informal look, give a nice edge job to your garden flower beds before the ground freezes. Not only will this make for a crisp look during the winter months, as the edge freezes, but it will put you one step closer to a solid start in spring.

To wrap or not to wrap

If you look at many winter gardens you may notice that people have wrapped burlap or some other material around their evergreen shrubs. Generally, this is to prevent a snow load or high wind from damaging the plant. Unless you have the potential for a snow load or predictable high winds this is not necessarily needed. The wind issue is an issue, but remember that all plants need air circulation, no matter what type of plant they may be. If you wrap a shrub/plant to tightly air circulation will diminish and present the opportunity for moisture build up and disease. If you wrap your shrubs make sure to do it securely but with air circulation in mind.

It cannot hurt to mound

Mounding around the base of a plant is intended to give the root systems of a shrub/plant a little extra insulation during hard winters. Depending upon which zone you happen to be gardening in the need for mounding rises and falls. In any case, you want to make sure that you compress the dirt of the mound with a firm push of the hands. This gets some of the air out of the mound and generally makes a mound of dirt look a bit nicer. It also shows that you took a little care in your gardening. This sometimes impresses people that visit your winter garden.

Trees are plants too

Take a few moments to assess your trees before the winter winds start to howl. Look for any branches that may have grown old, look to be growing across the desired vertical path of a properly trimmed tree or have died during the season. What you are looking for is any limb or branch that may rub constantly on another opening a wound in the bark. Generally, you would not want to cut a branch as winter approaches, or during the winter months, but sometimes you need to.

Gardening, Sustainability

Fall’s Bounty: Harvesting Seeds for a Thriving Garden Next Year!

Ah, fall—the season of cozy sweaters, pumpkin spice lattes, and, for all you green thumbs out there, the promise of a bountiful garden next year. While the trees shed their leaves, we gardeners are busy collecting seeds for the future. Join me on this journey as we dive into the exciting world of harvesting seeds in the fall, a practice that connects us to nature’s rhythm and guarantees a vibrant garden in the seasons to come.

The Art of Seed Harvesting:

Step 1: Timing is Everything

Fall is the perfect time to start harvesting seeds. As the days grow shorter and cooler, plants begin to focus their energy on producing seeds. The key is to keep an eye out for those seed pods and heads that are dry and brown. This indicates that they are ready for harvest.

Step 2: Gather Your Tools

Before you embark on your seed-harvesting adventure, gather a few essential tools:

  • Small bags or envelopes: For storing and labeling your seeds. I always use paper envelopes to avoid any moisture buildup.
  • Scissors or pruners: To snip seed heads or pods.
  • A marker: To label your seed packets.
  • A notebook: To jot down important details about your seeds.

Choosing the Right Seeds:

Not all seeds are created equal, and some are easier to harvest than others. Here are a few favorites that are perfect for beginners:

  1. Sunflowers: Their large, distinctive heads are easy to spot and collect.
  2. Marigolds: These vibrant flowers produce seeds that resemble tiny arrowheads.
  3. Nasturtiums: Their seed pods are easy to gather and add a peppery punch to salads. These are some of my favorite flowers in the garden!
  4. Basil: Wait for basil to bolt and produce seeds for next year’s pesto.
  5. Dill: these seeds smell amazing and are easy to harvest ones the dill is done producing and dry
  6. Cilantro: cilantro seeds are also super easy to harvest once the plant is dry

Cross-pollination and What You Need To Know:


Gardening isn’t just about planting seeds and watching them grow; it’s also about understanding the intricate dance of nature that happens right before our eyes. One of the most captivating aspects of gardening is cross-pollination, a natural process where plants exchange genetic material.

What is Cross-Pollination?

Cross-pollination occurs when pollen from one plant is transferred to the stigma of another plant, typically of the same species but a different variety. This process is essential for genetic diversity, leading to healthier and more adaptable plant populations. While some plants are self-pollinators, meaning they can fertilize themselves, many rely on pollinators like bees, butterflies, and even the wind to carry pollen from one flower to another.

Why Cross-Pollination Matters:

  1. Biodiversity: Cross-pollination increases genetic diversity, making plants more resilient to pests, diseases, and environmental changes.
  2. Hybridization: Cross-pollination can result in hybrid plants with unique characteristics, such as different colors, sizes, or flavors.
  3. Adaptation: Plants that cross-pollinate have a better chance of adapting to changing environmental conditions, ensuring their survival over time.

Common Cross-Pollinators in the Garden:

  1. Tomatoes: While many tomato varieties are self-pollinating, they can also cross-pollinate if grown in proximity. This can lead to exciting new tomato hybrids.
  2. Squash: Different varieties of summer and winter squash can cross-pollinate, resulting in intriguing squashes with unexpected shapes and colors.
  3. Zucchini and Cucumbers: These garden staples can cross-pollinate since they belong to the same family. You might end up with a cucumber that tastes slightly like zucchini or vice versa.
  4. Lettuce: Lettuce plants can cross-pollinate, leading to variations in leaf color, texture, and shape.

Preventing Unwanted Cross-Pollination:

While cross-pollination can lead to exciting surprises, it may not always be desirable. If you want to maintain the purity of a particular plant variety, follow these tips:

  1. Isolation: Plant different varieties of the same species as far apart as possible to reduce the chances of cross-pollination.
  2. Hand Pollination: For precise control, use a small paintbrush to transfer pollen from one flower to another. This is particularly useful for plants like squash.
  3. Timing: Plant varieties with different flowering times to avoid overlapping pollination periods.

Cross-pollination can definitely impact your next season’s crop, so for many (like myself) that plant a lot of different vegetables in close proximity – I buy new seeds each season that run this risk so I know I am going to get exactly what I want. But, it can be fun to experiement sometimes, too!

The Harvesting Process:

Once you’ve identified your target seeds, it’s time to start the harvesting process. Follow these general steps:

  1. Cut the Seed Heads or Pods: Use your scissors or pruners to carefully snip the seed heads or pods from the plant. Make sure to do this on a dry, sunny day when the plants are free of moisture.
  2. Drying: Place the seed heads or pods in a warm, dry location for about a week to ensure they’re completely dry. This prevents mold and rot during storage.
  3. Extraction: Once your seeds are dry, gently remove them from their seed heads or pods. Be patient; this can be a bit time-consuming but is incredibly rewarding.
  4. Labeling: Don’t forget to label your seed packets with the plant’s name, the date of harvest, and any other relevant information, such as flower color or special care instructions.

Here are a few seed saving items I use and love:

  1. A binder – I use this to hold and organize my seeds
  2. Postcard Sleeves – these fit your seed packets (your own or purchased) perfectly
  3. Seeds! – You’ll need plenty of seeds for your garden, especially those you aren’t able to harvest yourself or are trying out for the first time.

The Joy of Seed Saving:

Harvesting seeds in the fall isn’t just about saving money on next year’s garden; it’s a way to connect with the natural world and develop a deeper appreciation for your plants. Plus, there’s something truly magical about planting seeds you’ve collected yourself. It’s like tucking a piece of the past season into the ground, nurturing it, and watching it bloom anew.

As we bid farewell to another summer, remember that fall is not just about saying goodbye—it’s also about preparing for the future. Harvesting seeds in the fall is a delightful and rewarding practice that allows you to play a role in the circle of life in your garden. So, grab your pruners, embrace the crisp autumn air, and get ready to sow the seeds of future beauty and bounty in your garden. Happy harvesting!

Animals, DIY, dogs, Recipes

Paws & Play: Natural Dog Treat Recipes for Canine Delight

Ladies and gentlemen, put on your aprons, preheat the oven, and get ready to embark on a culinary adventure that’ll have your canine companion wagging their tail in delight! Today, we’re serving up a feast of natural dog treats that are not only delicious but also packed with wholesome goodness. Get ready to pamper your furry friend with these homemade delights!

The ‘Pawsitively’ Perfect Ingredients

Before we start whipping up treats, let’s go over the ingredients for our canine culinary masterpieces:

  1. Peanut Butter: The nutty sensation that makes every dog do their best “scooby-doo” impression.
  2. Bananas: healthy and add natural sweetness.
  3. Pumpkin Puree: For a dash of autumnal charm and some digestive benefits that’ll keep your pup regular (no more “accidents” on the carpet).
  4. Carrots: carrots bring the zing and add vitamins for a shiny coat.
  5. Oats: The heart-healthy ingredient keeps your pup’s ticker going strong.
  6. Greek Yogurt: Great for probiotics and a creamy texture your dog will love.

If you are looking for some great molds or dough cutters – here are some I use.

“Banana Bark Biscuits”

Ingredients:

  • 2 ripe bananas
  • 1 cup rolled oats
  • 1/4 cup unsweetened applesauce
  • 1/4 cup natural peanut butter

Instructions:

  1. Mash the bananas until smooth, like a perfectly delivered punchline.
  2. Mix in the rolled oats, applesauce, and peanut butter until you have a doughy consistency.
  3. Roll out the dough and use cookie cutters to create fun shapes. Let your inner artist shine!
  4. Place the treats on a lined baking sheet and bake at 350°F (175°C) for about 15-20 minutes, until they’re golden brown.
  5. Let them cool before sharing the laughter with your furry friend.

Pumpkin Paw-tato Chips

Ingredients:

  • 1 sweet potato
  • 1/2 cup canned pumpkin (unsweetened and unseasoned)

Instructions:

  1. Slice the sweet potato into thin rounds – the thinner, the better, just like a crisp punchline.
  2. Mix the sweet potato slices with canned pumpkin.
  3. Place them on a baking sheet and bake at 250°F (120°C) for about 2 hours until they’re crispy and your dog is impatiently tapping their paw for a taste.
  4. Let them cool, and then watch your pup devour these crispy, healthy chips.

Appley Ever After Bites

Ingredients:

  • 1 apple (make sure to remove the seeds and core)
  • 1 cup oat flour (made by blending rolled oats until fine)

Instructions:

  1. Dice the apple into small pieces, as if you’re chopping up an apple pie.
  2. Mix the diced apple pieces with oat flour until it forms a dough.
  3. Roll the dough into small bite-sized balls, just like little apple treasures.
  4. Place them on a baking sheet and bake at 350°F (175°C) for about 10-15 minutes.
  5. Let them cool before sharing the apple-y love with your pup.

Coconut Crunchers

Ingredients:

  • 1 cup unsweetened shredded coconut
  • 1 egg

Instructions:

  1. In a bowl, whisk the egg until it’s as frothy as a sitcom plot twist.
  2. Mix in the shredded coconut until it forms a sticky mixture.
  3. Scoop out small portions and roll them into bite-sized balls or any shape your dog finds amusing.
  4. Bake on a parchment-lined sheet at 350°F (175°C) for 10-15 minutes until they’re golden brown.
  5. Cool them down, and let the coconut crunch-fest begin!

The Vegetable Variety Show: Pumpkin and Carrot Popsicles

Ingredients:

  • 1/2 cup of pureed pumpkin
  • 1/2 cup of shredded carrots
  • 1/2 cup of Greek yogurt

Instructions:

  1. Mix the pumpkin, shredded carrots, and Greek yogurt in a bowl. Give it a good stir, like you’re practicing your dog’s “shake” command.
  2. Pour the mixture into ice cube trays and pop them in the freezer. It’s like creating your own doggy stand-up club on ice!
  3. Freeze until they’re solid, then serve your pup a frozen treat that’ll keep them “cool” as a cucumber.

A Stand-Up Act: Peanut Butter and Banana Biscuits

Ingredients:

  • 1 cup of oats
  • 1/2 cup of mashed banana (approximately 2 ripe bananas)
  • 1/2 cup of peanut butter (make sure it’s dog-friendly and free of xylitol)
  • A dash of canine-approved humor

Instructions:

  1. Preheat the oven to 350°F (175°C).
  2. In a mixing bowl, combine the mashed bananas and peanut butter. This is the comedic duo that’ll steal the show!
  3. Gradually mix in the oats, one punchline at a time, until you have a firm dough.
  4. Roll out the dough and use cookie cutters to create fun shapes. Maybe a bone shape for your dog’s inner comedian?
  5. Place the treats on a lined baking sheet and bake for about 15 minutes or until they’re a lovely golden brown.
  6. Let them cool (because hot treats are not funny), and then watch your pup perform their best “sit” and “stay” routines for a taste test.

There you have it, folks – all natural dog treat recipes that will leave your four-legged friend howling for more! With these homemade delights, you’ll not only keep your pup’s tail wagging but also ensure they’re indulging in wholesome, natural ingredients. So, channel your inner dog chef and let the culinary adventure begin – it’s time for paws and play!

Gardening, Herbs

The Indoor Herb Party: Growing Your Green Thumb During the Cold Months

Hey there, my fellow plant enthusiasts! As the colder weather is moving in and winter approaches, it’s time to bring the garden party inside. Don’t let Jack Frost dampen your green spirit; instead, let’s embark on a lively adventure into the world of indoor herb gardening. Get ready to flex your green thumb and infuse your home with fresh flavors, aromatic scents, and a whole lot of green goodness!

The Herbal Extravaganza: What Herbs to Grow Indoors

When it’s too chilly to venture outdoors, there’s a plethora of herbs that thrive in the cozy confines of your home. Here are a few stars of the indoor herb garden show:

  1. Basil: The rockstar of the herb world. Basil brings a burst of flavor to pasta, salads, and pizzas, all while looking effortlessly chic on your windowsill.
  2. Mint: Whether you’re sipping on a hot cup of tea or whipping up a mojito, mint has your back. Just be warned: it’s a bit of a garden party animal.
  3. Rosemary: A fragrant herb that pairs perfectly with roasted potatoes and chicken. Plus, it adds a touch of Mediterranean elegance to your indoor garden.
  4. Thyme: Versatile and aromatic, thyme is your culinary secret weapon. It’s like having a Michelin-starred chef at your fingertips.
  5. Chives: These mild, oniony delights are perfect for garnishing your dishes with a burst of fresh flavor.

I love to order my herbs from Baker Creek Seeds. They have a wide variety to choose from and always grow well.

The Indoor Garden Dance Party

Indoor herb gardening isn’t just about growing herbs; it’s about throwing a non-stop dance party for your senses. Here’s how to make your herb garden groove:

  • The Right Location: Herbs love sunshine, so find a sunny spot near a window. It’s like creating a VIP area for your herbs to soak up some rays. I have a window above my kitchen sink that works perfectly.
  • The Hippest Pots: Choose containers that suit your style. Whether it’s elegant clay pots or quirky recycled containers, let your herb garden reflect your personality. I like simple ones like these, but the options are limitless!
  • Soil and Watering: Use well-draining potting soil and water your herbs when the top inch of soil feels dry. Don’t drown the party; herbs like to keep their feet (or roots) dry! I usually layer the bottom of the pot with some natural mulch and then add a good soil like this one.
  • Pruning and Harvesting: Don’t be shy about trimming your herbs; they’ll thank you with fresh growth. Plus, you get to enjoy the spoils of your harvest in your dishes. If you have extra you can always dry or dehydrate it for later use.
  • Companionship: Some herbs are social butterflies and love sharing a pot with others. Others prefer their own space. Respect their preferences, and your garden will thrive.

Herb-tastic Recipes for Cold Days

Now that you’ve got your indoor herb garden flourishing, it’s time to put those fresh flavors to work. Here are some herb-tastic recipes to warm your soul during the cold months:

  1. Basil Pesto Pasta: Blend fresh basil, pine nuts, garlic, Parmesan cheese, and olive oil for a fragrant pesto sauce. Toss it with your favorite pasta for a taste of summer in the middle of winter.
  2. Minty Hot Chocolate: Add a sprig of fresh mint to your hot chocolate for a refreshing twist. Top it with whipped cream and a sprinkle of cocoa for pure indulgence.
  3. Rosemary Roasted Vegetables: Toss your winter vegetables in olive oil, minced rosemary, and a pinch of salt before roasting. The aroma alone will transport you to a cozy cabin in the woods.
  4. Thyme-Infused Lemonade: Brew a pot of thyme-infused tea and mix it with freshly squeezed lemon juice and a touch of honey. A soothing winter beverage with a hint of summer.
  5. Chive and Cheese Scones: Add chopped chives and grated cheese to your scone dough for savory delights that pair perfectly with a warm bowl of soup.

Indoor herb gardening during the cold months isn’t just about surviving; it’s about thriving. With a little greenery and a lot of love, you can bring the garden party indoors, tantalizing your senses and warming your heart. So, roll up your sleeves, grab your gardening gloves, and let the indoor herb festivities begin!

DIY

Clean Green: DIY All-Natural Household Cleaners That’ll Leave Your Home Spick and Span!

Welcome, fellow clean freaks and eco-warriors, to a cleaning adventure like no other! We’re about to embark on a mission to transform your home into a sparkling, fresh oasis using nothing but the power of nature. Grab your apron, your sense of humor, and let’s dive into these DIY all-natural household cleaner recipes that will make you the cleanest, greenest superhero on the block!

Citrus Splash All-Purpose Cleaner

Ingredients:

  • 2 cups of water
  • 1/2 cup of white vinegar
  • The juice of 1 lemon (or orange, or grapefruit, or all three for a fruity fiesta!)

Instructions:

  1. Pour the water and white vinegar into a spray bottle, which is basically your superhero utility belt.
  2. Squeeze in the fresh citrus juice of your choice. It’s like inviting a burst of sunshine into your cleaning routine!
  3. Cap it, shake it, and unleash the power of citrus on all your household surfaces. Your home will smell like a tropical getaway, and your countertops will gleam like a Hollywood smile.

Another option that I like to do is use the peels of citrus fruits and add them to a glass container and fill with vinegar. I allow this to sit for several weeks to months. This vinegar can then be used in your cleaners and smells citrusy-fresh.

Mighty Minty Glass and Mirror Cleaner

Ingredients:

  • 1 cup of distilled water
  • 1/4 cup of white vinegar
  • 1/4 cup of rubbing alcohol
  • 10-15 drops of peppermint essential oil (or whatever essential oil you choose)

Instructions:

  1. Pour distilled water, white vinegar, and rubbing alcohol into a spray bottle. It’s like creating a superhero team for cleaning!
  2. Add 10-15 drops of peppermint essential oil. The invigorating aroma will make you feel like a cleaning superhero.
  3. Give it a gentle shake, and spray it on glass and mirrors for streak-free shine. Admire your reflection as you become the champion of cleanliness!

The Lavender Love Bathroom Scrub

Ingredients:

Instructions:

  1. Mix baking soda and liquid castile soap together. It’s like a dynamic duo ready to tackle bathroom grime!
  2. Add 10-15 drops of lavender essential oil for a soothing touch. Cleaning will become a spa-like experience.
  3. Scoop some of this lavender love scrub onto a sponge or brush, and go to town on your bathroom surfaces. Watch as the dirt and stress of the day wash away!

Creating a natural room freshener with witch hazel is a breeze, and it’s an excellent alternative to commercial air fresheners that often contain artificial fragrances and chemicals. Witch hazel acts as a base to dilute essential oils, which provide the lovely scent. Here’s a simple recipe:

Room Freshening Spray

Ingredients:

  1. Witch Hazel: Witch hazel serves as the base and also helps to disperse the essential oils evenly. You can use plain, alcohol-free witch hazel.
  2. Essential Oils: Choose your favorite essential oils for the best scent. You can use a single oil or create a unique blend. Some popular choices include lavender, lemon, eucalyptus, peppermint, or tea tree.
  3. Distilled Water: Distilled water helps to dilute the mixture and ensure it’s not too concentrated.
  4. Glass Spray Bottle: Opt for a dark-colored glass spray bottle to protect the essential oils from light.

Instructions:

  1. Gather Your Materials: Ensure you have all the necessary ingredients and a clean, empty spray bottle.
  2. Measure the Witch Hazel: Pour 1/2 cup of witch hazel into the glass spray bottle. This will be the base of your room freshener.
  3. Add Essential Oils: Add your chosen essential oils for fragrance. The number of drops will depend on your preference and the strength of the oils. Start with about 20-25 drops in total. You can use a single essential oil or combine multiple oils to create a custom scent. For example, you could use 10 drops of lavender and 10 drops of lemon for a delightful blend.
  4. Add Distilled Water: After adding the essential oils, pour in about 1/2 cup of distilled water to dilute the mixture. This will also help disperse the oils more evenly.
  5. Shake Well: Close the bottle securely and shake it vigorously to blend all the ingredients thoroughly.
  6. Test and Adjust: Spray a small amount of the freshener into the air to test the scent strength. If it’s too mild, you can add a few more drops of essential oil and shake again. If it’s too strong, add a bit more distilled water.
  7. Label Your Bottle: Don’t forget to label your homemade room freshener bottle so you can easily identify it.
  8. Store Properly: Store your natural room freshener in a cool, dark place to preserve the essential oils. Shake well before each use to ensure the oils are properly mixed.

To use your DIY room freshener, simply spritz it into the air in any room where you want to freshen the scent. Enjoy the natural and pleasant fragrance without the chemicals found in commercial air fresheners.

There you have it, folks! Your ticket to a cleaner, greener, and more fragrant home. These DIY all-natural household cleaner recipes are not only effective but also eco-friendly, leaving you feeling like a superhero of cleanliness. So, put on your cleaning cape and save the day, one scrub at a time!

Gardening, Sustainability

Mulch Ado About Nothing: How to Embrace Your Inner Mulch-ologist for Homesteading Success

Welcome, fellow homesteaders and mulch enthusiasts! Today, we’re diving headfirst into the delightful world of natural mulch – because who needs synthetic garden bling when you can have a forest floor party right in your backyard? Get ready for a barrel of laughs and some seriously leafy wisdom on how to use natural mulch for homesteading.

Chapter 1: Mulch, Mulch Everywhere

If you’re new to the mulch scene, don’t worry; we’ve got your back. Natural mulch is like the fairy godmother of the gardening world – it covers your soil with a cozy blanket and whispers, “Sweet dreams, little plants.”

But here’s the kicker: it’s not just about wood chips and leaves. Get creative! Think straw, grass clippings, pine needles, or even that unsolicited junk mail. Your garden is the runway, and mulch is the haute couture of the soil.

We live on almost 6 acres in Black Forest, Colorado. We have an abundance of pine needles which work amazing as a mulch and additive to our compost. We also like to use a local mulch that is made from trees, branches and slash from our little community. Not only is it cost effective, there are no added chemicals and we are nurturing our little slive of heaven by adding good nutrients back into the soil as the mulch breaks down.

We get our mulch from Black Forest Slash but a quick google search should help you to find local mulch in your area. Another great resource is Chip Drop. This helps find local, free mulch delivered to your home. I have never needed to personally use this service, but I know many who have and loved it.

Chapter 2: The Mulch Mafia – Weed Whisperers

Picture this: you’ve just laid down a fresh mulch bed, and your weeds are thinking, “Oh, snap! We’ve landed in a hostile jungle!” Mulch is like their worst nightmare, a fortress of doom where they can’t see the light of day.

So, instead of hand-to-hand combat with those pesky dandelions, let the mulch mafia handle it. Lay down a thick layer of mulch, and those weeds will be sending you thank-you cards – for their one-way trip to the underground weed club.

Chapter 3: Mulch-a-Palooza – The Moisture Masterclass

Mulch doesn’t just keep weeds at bay; it’s also the king of hydration. It’s like your garden’s personal butler, making sure everyone’s glass is full. You see, mulch holds moisture better than a kitchen sponge at a pool party.

No more running around with a hose, giving your plants the 24/7 spa treatment. With natural mulch, your garden will be sipping cocktails in style, and your water bill can take a vacation!

Chapter 4: Compost and Chill

Here’s a secret: mulch and compost are like the dynamic duo of soil health. Think Batman and Robin, but with more earthworms. When you mix mulch and compost, you create a superhero team that’s ready to save the world – or at least your garden.

Spread some compost, then crown it with mulch, and watch your plants burst into the most vibrant, superheroic growth spurt of their lives. Cue the capes and epic music!

Chapter 5: Mulch Magic and the Lazy Gardener

Are you a homesteader who values your beauty sleep? Well, welcome to the club, because mulch is your new BFF. It’s the laziest gardener’s dream come true.

With mulch in charge, you can snooze while your garden thrives. Less weeding, less watering, and more time for hammock naps – because you’ve got mulch to handle the heavy lifting.

Chapter 6: Pine Straw/Mulch For Animals

Pine straw, also known as pine needles or pine straw mulch, can be used as bedding for some types of livestock, particularly poultry like chickens.

  1. Comfort and Insulation: Pine straw can provide a comfortable and insulated surface for animals to rest on. It’s soft, which is suitable for animals with more delicate feet like chickens.
  2. Absorbency: Pine straw is not as absorbent as some other bedding materials like wood shavings or straw. This means that it may not be the best choice for animals that produce a lot of moisture, such as horses or cows. For poultry, it can work, but you may need to replace it more frequently if it becomes wet.
  3. Aromatic Qualities: Pine straw has a distinctive pine scent. This scent can help mask odors and also help keep bugs down.
  4. Availability: The availability of pine straw can vary depending on your location. In some regions, pine straw may be a readily available and cost-effective bedding option. Where we live, we have a never ending supply – which is amazingly helpful once we figured out what to do with it.
  5. Cleaning and Maintenance: Pine straw can be relatively easy to clean and replace when necessary. Regular cleaning and changing of soiled bedding are essential to maintain a healthy environment for your animals. Take the old pine straw with the manure and add it to your compost pile. It will help create an amazing compost for your garden or yard.

Chapter 7: The Grand Finale – Mulch, Naturally Yours

So, there you have it, fellow mulch-ologists: the art of using natural mulch for homesteading success. It’s a laughably simple way to keep your garden lush, your weeds at bay, and your garden dance floor hydrated.

Embrace your inner mulch maestro, and let your garden bask in the leafy, organic glory that only natural mulch can provide. Remember, a well-mulched garden is a happy garden, and a happy garden is a mulch-tastic adventure waiting to happen. Happy mulching!

Animals, DIY, Sustainability

The Art and Science of Natural Whitewash: Beauty and Benefits for Your Home

In a world of high-tech paint and chemical finishes, there’s something charmingly rustic and timeless about the art of whitewashing. This ancient technique not only adds a touch of country chic to your home but also boasts numerous benefits for both your living space and the environment. In this blog post, we’ll delve into how to make natural whitewash and explore the many advantages it brings to your abode.

Chapter 1: What is Whitewash?

Whitewash is a simple, time-tested paint-like mixture that consists of water, lime, and pigment. Historically, it was used to brighten walls, fences, and buildings while protecting them from pests and weathering. Today, it’s making a comeback as a sustainable and eco-friendly alternative to modern paints and finishes. I use whitewash primarily in my animal shelters. It’s way more eco-friendly than painting, safe for the animals and has many benefits.

Chapter 2: Making Your Own Natural Whitewash

Ingredients:

Instructions:

  1. Safety First: Lime is caustic, so protect yourself with gloves and goggles when handling it. Work in a well-ventilated area.
  2. Mixing Lime: Adding water slowly until it turns into a smooth paste.
  3. Diluting Lime: Mix the lime paste (or hydrated lime) with water to create a thick, creamy consistency. You can add more lime or water as needed to create the consistency you are wanting. I usually aim to get it to the thickness of paint or slightly thicker.
  4. Application: Apply the whitewash to your chosen surface using a brush, roller, or sprayer. Apply multiple coats for greater coverage.
  5. Drying: Whitewash dries relatively quickly, but it may take a few days to fully cure. Avoid exposing it to rain or excessive moisture during this time.

Chapter 3: Benefits of Natural Whitewash

Now that you know how to make whitewash, let’s explore why you should consider it for your home:

  1. Eco-Friendly: Natural whitewash is environmentally friendly, containing no harmful chemicals commonly found in commercial paints. It’s a sustainable choice for eco-conscious homeowners.
  2. Breathability: Whitewash allows surfaces to breathe, preventing moisture buildup and the growth of mold and mildew. It’s an ideal choice for damp or humid areas.
  3. Protection: Whitewash acts as a protective barrier against pests and weathering, extending the life of wood, brick, and other surfaces.
  4. Cooling Effect: The reflective nature of whitewash can help keep interiors cooler in hot climates, reducing the need for air conditioning.
  5. Aesthetic Appeal: Whitewash adds a charming, rustic look to interiors and exteriors. It can be used to achieve various styles, from farmhouse chic to Mediterranean elegance.
  6. Cost-Effective: Making your own whitewash is cost-effective, and lime is readily available and affordable.
  7. Low Maintenance: Whitewash is easy to maintain. You can touch up areas as needed without the hassle of matching paint colors.

Natural whitewash is not just a coating for your walls; it’s a time-honored technique that connects us to our heritage and the environment. By learning to make your own whitewash and understanding its benefits, you can enhance your living space while embracing sustainable practices and timeless aesthetics. So, pick up your lime and paintbrush, and let the whitewashing adventure begin!

Gardening, Sustainability

Permaculture: Gardening Like Mother Nature

Hello, fellow green thumbs and dirt enthusiasts! Today, we’re diving headfirst into the wonderfully weird world of permaculture. But hold onto your garden hats, because this ain’t your grandma’s gardening club. Permaculture is like gardening, but with a side of cosmic wisdom and a sprinkle of eco-friendly magic.

What the Heck is Permaculture?

Permaculture isn’t just a gardening method; it’s a lifestyle, a philosophy, and a quirky dance with Mother Nature herself. It’s like telling the planet, “Hey, let’s get cozy and grow some stuff together, but also, let’s keep it weird.”

Permaculture is all about observing how nature does its thing and then copying it. Picture this: You’re in your garden, and you spot a squirrel. Instead of chasing it away with a broom (admit it, we’ve all done it), you start taking notes. “Squirrel,” you write. “Good at planting acorns. Hmm.”

The Three Permaculture Ethics

Permaculture has three ethics that are as noble as they are amusing:

  1. Earth Care: This one’s a no-brainer. Take care of the planet like it’s your favorite pet hamster. Stroke its furry soil and make sure it gets enough sun (but not too much, we’re talking sunscreen for the Earth here).
  2. People Care: People are like plants. They need love, attention, and a decent amount of hydration. In permaculture, we build communities that thrive like a garden full of happy tomatoes.
  3. Fair Share: Don’t hog all the ripe apples! Share your bounty with your neighbors, or else your karma might end up as worm food.

Designing with Nature

Permaculture design is where the fun really kicks in. Instead of straight rows of vegetables, permaculturists design their gardens like a forest. It’s like creating a salad bowl where the lettuce, tomatoes, and cucumbers have a jam session together, swapping nutrients and stories about their latest compost pile gossip.

And here’s the kicker: permaculture doesn’t just grow food; it grows friendships. In a permaculture garden, you’re more likely to hear plants gossiping about their best fertilizers than see them squabbling over sunlight.

Chickens and Ducks as Garden Gurus

In the permaculture world, chickens and ducks aren’t just poultry; they’re the garden’s secret agents. They scratch, they peck, they patrol for pests, and they provide you with breakfast. It’s like having your own feathered garden ninjas. Here’s a little advice – don’t let your chickens free range your garden competely. They will eat almost everything – including the stuff you don’t want them to. Chicken manure is a fantastic fertilizer because it’s high in nitrogen. Here’s the catch – it’s STRONG so it needs to be composted first as to not burn your plants. We’ll go into composting details in later posts. Chickens also love to eat your weeds which is a great way to keep them happy and lower that food bill.

Plus, they have a hilarious sense of humor. Ever tried explaining to a chicken that it’s time to take a break from laying eggs? Good luck with that! They’re dedicated, even if it means producing enough eggs to fill a swimming pool. Unless of course you are in need of a bunch of eggs, in which case they will decide to take a break or molt.

Meditate with Mulch

In permaculture, mulch isn’t just a gardening tool; it’s a way of life. When you’re not spreading mulch, you’re probably meditating on it. Picture it: You, cross-legged in your garden, surrounded by a zen garden of mulch. Namaste, my friends. We use a locally made mulch from Black Forest Slash. This is a win-win. It’s local branches and slash that are then turned into a fantastic mulch that not only helps conserve water but adds nutrients back into the soil. Mulch will also act as a natural weed barrier.

Permaculture is like gardening’s whimsical, eco-conscious cousin who always brings homemade kombucha to family reunions. It’s about working with nature, not against it, and doing so with a touch of humor and a dash of cosmic insight. A great place to start with permaculture is researching Back to Eden Gardening.

What’s Back to Eden Gardening, Anyway?

Imagine your garden as a laid-back forest shindig where your plants are the groovy party animals. Back to Eden gardening is all about mimicking the natural world, where the soil is rich, moist, and teeming with life. It’s like Mother Nature herself threw a disco for your plants and invited them to dance in style.

Step 1: Mulch Like There’s No Tomorrow

You know that saying, “Mulch is the answer; what was the question?” Well, that’s basically the mantra of Back to Eden gardening. Mulch is like the velvet dance floor for your plant party.

Grab some wood chips, straw, or leaves, and pile ’em up like you’re making a mulch mountain. Spread it around your plants like you’re throwing confetti at a garden parade. The mulch keeps the soil moist, prevents weeds from crashing the party, and lets your plants shimmy their roots down to the rhythm of the Earth.

Step 2: Forget About Tilling (It’s So Last Season)

Tilling is like the garden equivalent of the Macarena – fun in the ’90s, but it’s time to move on. In Back to Eden gardening, you don’t disturb the soil like it owes you money. Just lay that mulch down and let the soil microbes, earthworms, and other underground party animals do their thing.

Remember, your garden is an underground nightclub, and the soil organisms are the DJs spinning the tunes (compost beats, anyone?). Tilling disrupts their groove, and we don’t want any upset earthworms on our dance floor.

Step 3: No Need to Fertilize (Nature’s Buffet Is Open)

Back to Eden gardening believes in letting your plants graze at the buffet of nature. The mulch breaks down over time, releasing nutrients and goodies for your plants to gobble up. It’s like the ultimate all-you-can-eat garden brunch!

Say goodbye to chemical fertilizers – they’re the uninvited guests at this organic garden soirée. Your plants will thank you with vibrant health and the best salsa moves this side of the garden fence.

Ben turning our compost pile

Step 4: Water Like You’re Serenading Your Plants

Watering your Back to Eden garden is like serenading your plants with a love song. You give them a slow, deep drink, and they respond with lush growth and radiant vibes.

The mulch helps retain moisture, so you don’t have to play garden DJ with your hose all day. Water when your plants are looking a bit parched, and watch them sway to the rhythm of hydration.

Step 5: Sit Back and Watch the Garden Disco Unfold

Now that you’ve set the stage for your garden’s dance-off, it’s time to be the VIP guest and enjoy the show. Kick back with a glass of iced tea and let your plants do their thing.

Watch as your garden transforms into a lush, vibrant discotheque of greenery. You’ll have tomatoes twerking, carrots cha-cha-ing, and peppers doing the salsa – it’s a garden party like no other!

So there you have it, folks – Back to Eden gardening, where mulch is king, tilling is taboo, and your plants are the life of the underground dance party. Get out there and let your garden boogie like it’s 1979!

Animals, chickens

Cluck-tastic Chronicles: The Egg-sasperating Adventures of Raising Chickens

Greetings, fellow poultry enthusiasts, or should I say, “egg-ceptional” humans? Don’t unfollow me please. Today, we’re going to dive headfirst into the hilarious world of raising chickens. If you’ve ever considered turning your backyard into a feathered fiesta, or if you’re already knee-deep in feathers and coop cleaning, you’ll relate to the egg-sasperating adventures I’m about to share.

1. Chicken Math: The New ‘Common Core’

You thought math was tough in school? Try calculating the number of chickens you need. First, it’s just a “baker’s dozen,” and before you know it, you’re considering a second coop to accommodate your newfound feathered friends. But don’t worry, chicken math is a lot more forgiving and way more fun than algebra! I can tell you this firsthand since I homeschool some of my children. My husband agreed to three chickens. Within 6 weeks I had 12 chickens. I now have 45 chickens. Because chicken math.

My first “three” chickens.

2. The Great Escape Artists

Chickens are notorious escape artists, and they approach it with the cunning of a secret agent. I’ve seen hens execute daring daylight breakouts like they’re auditioning for a spy movie. Be prepared for regular renditions of “The Great Chicken Escape,” complete with feathered fugitives, a high-speed chase, and your neighbors giving you strange looks. One night one of our kids came knocking on our door to tell us she heard a chicken outside her window. I think, “impossible that chicken coop is Fort Knox”. Low and behold there’s a chicken in our driveway bocking away. To this day we have no idea how she escaped or why at 1am she decided to sing the egg song outside the window. By the way – there were no eggs laid that night nor any other chickens out.

3. Chicken Fashion: A Thing We Never Knew We Needed

When it comes to fashion, chickens are way ahead of the curve. They’ve got natural tuxedos (black and white feathers), punk-rock mohawks (Silkies), and feathered pantaloons (Polish chickens). Forget Paris Fashion Week; your coop is where it’s at!

4. Coop Cleaning: A Never-Ending Task

Raising chickens means facing the never-ending struggle of coop cleaning. It’s like trying to tidy up after a toddler’s birthday party every single day. Just when you think you’ve got it spotless, your feathered friends decide to redecorate with fresh bedding. Expect to become an expert in chicken poop disposal – a skill no one ever adds to their resume.

5. Chicken TV: The Ultimate Reality Show

Who needs Netflix when you have Chicken TV? Spend hours watching your feathered friends peck at bugs, have intense conversations with the neighbor’s cat, and perform spontaneous dust baths that make you question your own personal hygiene choices.

6. Chicken Therapy

Forget expensive therapists; chickens are the ultimate emotional support animals. They listen to your woes without judgment, provide a daily dose of adorable antics, and even lay eggs to cheer you up. Just try to stay grumpy when you’re holding a warm, freshly laid egg. It’s impossible.

7. The Egg Hunt: Easter Every Day

Every morning is like an Easter egg hunt when you’re raising chickens. But instead of colorful plastic eggs filled with candy, you’re hunting for freshly laid eggs hidden in the most unexpected places. It’s a daily adventure that keeps you on your toes.

8. Chicken Shenanigans

Chickens have a knack for getting into the most ridiculous situations. Whether they’re perched on top of the swing set, pretending to be raptors from Jurassic Park, or attempting to master yoga poses that would put a contortionist to shame, their antics will leave you laughing or crying or both.

Raising chickens is a cluck-tastic adventure filled with laughter, love, and a whole lot of feathers. It’s like living in your very own poultry-themed sitcom, complete with quirky characters and unforgettable moments. So, if you’re considering adding some feathered friends to your life, go ahead and take the plunge into the hilarious world of chicken-raising. Just be prepared for a few egg-sasperating adventures along the way!